How to Add Your Own Custom Fonts to Ghost Theme
You're in the right place! Whether you're using Google Fonts or have your own font files, this guide will walk you through everything you need to know.
Quick Overview
- Time needed: 10-15 minutes
- Technical level: Beginner-friendly
- Tools needed: Access to your Ghost admin panel
Method 1: Using Google Fonts (Recommended for Beginners)
This is the easiest way to add custom fonts to your site. Google Fonts are free, load quickly, and work on all devices.
- Visit Google Fonts
- Browse and select your fonts
- Click the "+ Select" button for each font you want
- You can choose multiple styles (like regular and bold)
- Click on Get embed code and copy the embed code
- Open your Ghost admin panel
- Go to Settings > Code Injection
- In the "Site Header" section, paste this code:
<link rel="preconnect" href="https://fonts.googleapis.com">
<link rel="preconnect" href="https://fonts.gstatic.com" crossorigin>
<link href="https://fonts.googleapis.com/css2?family=Inter:wght@400;700&display=swap" rel="stylesheet">

<style>
  :root {
    --font-base: 'Inter', sans-serif;  /* This changes your body text */
    --font-serif: 'Inter', sans-serif; /* This changes your headings */
  }
</style>
Just replace 'Inter' with your chosen font name. That's it!
Method 2: Using Your Own Font Files
Have your own fonts? Here's how to use them. First, you'll need to convert them to web-friendly formats.
Step 1: Convert Your Fonts
We need to convert normal font to webfont to be able to use it on web.
- Go to Transfonter (it's free!)
- Upload your font files (.ttf or .otf)
- Select these settings:
- Check "WOFF2" and "WOFF" (these are modern web formats)
- Turn OFF "Base64 encode"
- Click "Convert" and download the files
Step 2: Add Fonts to Your Theme
- Unzip your theme folder
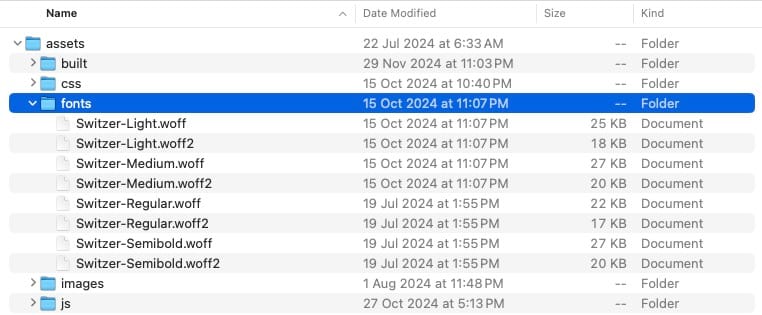
- Create a new folder called "fonts" inside the "assets" folder
- Put your converted font files there
- Zip the theme folder back up
- Upload the theme to Ghost

Step 3: Add the Code
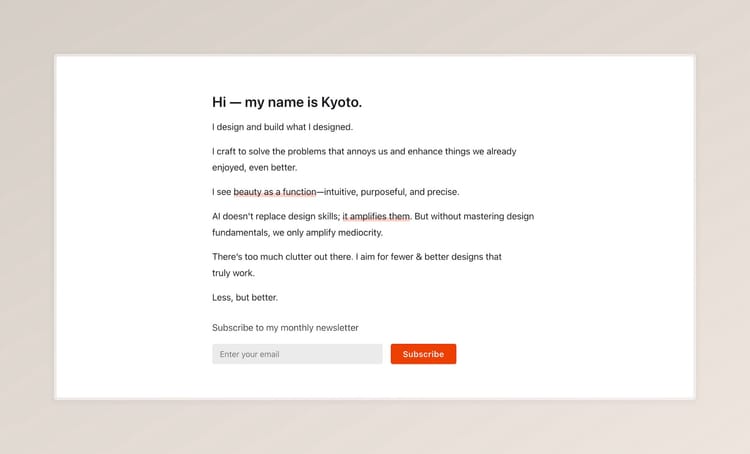
In this example, we’re using Switzer font with different styles.
Go to Ghost admin > Settings > Code Injection and add this code to the "Site Header":
<style>
  @font-face {
    font-family: 'Switzer';
     src: url('../fonts/Switzer-Light.woff2') format('woff2'),
          url('../fonts/Switzer-Light.woff') format('woff');
     font-weight: 300;
     font-display: swap;
     font-style: normal;
}

@font-face {
    font-family: 'Switzer';
    src: url('../fonts/Switzer-Regular.woff2') format('woff2'),
         url('../fonts/Switzer-Regular.woff') format('woff');
    font-weight: 400;
    font-display: swap;
    font-style: normal;
}

@font-face {
     font-family: 'Switzer';
     src: url('../fonts/Switzer-Medium.woff2') format('woff2'),
          url('../fonts/Switzer-Medium.woff') format('woff');
     font-weight: 500;
     font-display: swap;
     font-style: normal;
}

@font-face {
     font-family: 'Switzer';
     src: url('../fonts/Switzer-Semibold.woff2') format('woff2'),
          url('../fonts/Switzer-Semibold.woff') format('woff');
     font-weight: 600;
     font-display: swap;
     font-style: normal;
}

  :root {
    --font-base: 'Switzer', sans-serif;
    --font-serif: 'Switzer', sans-serif;
  }
</style>
Here's what each part does:
- font-family — This is the name you're giving your font
- src — This tells the website where to find your font file. Just replace it with the name of the font files you downloaded.
- font-weight — This is how thick the letters are (400 is normal, 700 is bold)
- font-style — This tells if the text is straight up (normal) or slanted (italic)
When you have multiple versions of the same font (like bold or italic), you need a separate name tag for each one. But you can use the same font-family name.
In the example above, we only use one font for title and body. But you can include different fonts for title and body. You just need to change the name font --font-base and --font-serif.
:root {
    --font-base: 'Font Name Default', sans-serif;
    --font-serif: 'Font Name Serif', sans-serif;
  }
Replace 'Font Name Default' and 'Font Name Serif' and the file paths with your actual font names and files.
Now, save it and and enjoy your sit with your own fonts.
Pro Tips
- Keep your font files small (under 300KB total) for better site speed
- Use .woff2 files first - they're smaller and load faster
- Only include the font weights you actually need
- Test your site on different devices after adding fonts
- If fonts don't show up, try clearing your browser cache
Troubleshooting
- Fonts not showing? Make sure your file paths are correct
- Site loading slowly? Your font files might be too large
- Text looking weird? Double-check your font-weight values
Happy customizing! 🎨
Become a subscriber receive the latest updates in your inbox.


