Braun Docs

Changelog
 Trong Themex
Introduction
Since this is a Ghost theme documentation, you are assumed to have a basic knowledge of the Ghost app.
If you're starting with Ghost, it is best to see the guides in the official Ghost Help Center – check this out, and you'll have all the available information.
Getting Started
Welcome
Braun theme concept is built for flexibility and easy customization. It leverages existing Ghost features of tags & pages to help you customize your own Ghost site from the Ghost admin interface.
Looks like you're just getting started. Don't worry, we're here to help you build an amazing website.
First, let watch this short video on how to setup and customize the theme:
Building the homepage with Braun
To kick things off, here are some helpful guides:
- Import internal tags or demo content (internal tags, hero, blog)
- Crafting a compelling hero section - Make a lasting first impression with a stunning hero section.
- Launching your Blog page - Share your thoughts, experiences, and expertise with a dedicated blog.
- Showcasing your success stories - Highlight your achievements and inspire others with captivating case studies.
- Curating valuable resources - Provide your visitors with a collection of useful resources.
Install Theme
Upload Zip File
To begin, unzip the downloaded package by double-clicking it on a Mac or by right-clicking and selecting "Extract All" on Windows.
Inside the new Braun folder, you will find the Braun.zip theme file and an online documentation file.
Step-by-Step to Upload the Theme to Your Website
- Log in to your Ghost website admin (example.com/ghost).
- Click the settings icon ( ⚙️ ) at the bottom of the left-hand side.
- Go to Design & branding > Customize > Change Theme.
- Click Upload theme and select the Braun.zip theme file.
- Once uploaded, click Activate now to activate the theme.
Upload Routes.yaml
The routes.yaml is required if you want to show the following pages:
- Works
- Blog
- Course
- Serie or Timeline
- Books
- Gallery
If you don’t want any page above, you can skip this step.
Step-by-Step to Upload the File:
- Unzip the Braun.zip theme file.
- In your Ghost admin, click the settings icon ( ⚙️ ) at the bottom of the left-hand side.
- Go to Labs and click Open.
- Click the Upload routes YAML button.
- Select and upload the
routes.yamlfile inside the theme folder. - Done
Import internal tags (optional)
This step is to import all the available tags we will use to create content on the homepage.
After importing tags, you can select them from Ghost admin without worrying about typo mistakes that can cause the theme to not work as expected.
- In your Ghost admin, go to Settings > Advanced > Import/Export.
- Under Export, click Export content. This ensures you have a full backup of your current data. Once done, proceed to the next step.
- Under Import, click Universal import.
- Select and upload the
internal-tags.jsonfile from the unzipped theme folder. - Now, navigate to the Tags page within your admin panel to view all available tags under Internal tags.
- That's all for the theme installation!
Import demo content (optional)
Using demo content to quickly get started with Braun
Demo content accelerates your theme setup by providing a fully configured example of the theme's capabilities. Instead of building from scratch, you'll have working examples of content structures, internal tags that showcase best practices for your theme's features.
Before importing demo content, export your existing content as a backup.
To import the demo content:
- Navigate to Settings > Advanced > Import/Export
- Under Import, upload the
demo-content.jsonfile from your theme directory - The demo content includes:
- Homepage sections (hero, blog, case studies, resources)
- Internal tags for content organization
- Sample pages and layouts
To manage demo content:
- Go to Pages
- Filter by the
Demotag - Edit or replace the content with your own
The demo content provides a foundation to understand the theme's structure and capabilities. You can modify, remove, or expand upon these sections using the theme's built-in components and layouts.
Now let’s move on to creating your homepage.
Build Your Homepage
Homepage Sections
After uploading the theme and uploading the routes.yaml file, the homepage is still empty.
To get started, let’s add the two essential parts of your website: Hero section and blog section.
Let’s watch this short video to learn how to build your homepage.
Building the homepage with Braun
The homepage is built around tags and pages, so you can update them from the Ghost admin UI with no coding required.
- Homepage content includes different sections, such as hero, blog, static text, testimonials…
- Each section is a page with represented internal tags you can create from Ghost admin. This gives you full flexibility to edit and customize your content.
- The sections' order is displayed in chronological order (oldest first). You can adjust the order by simply changing the "Publish date" in the Page settings.
Here are the available sections of the homepage with their represented tags.
- Hero section
#section-hero - Blog
#section-blog - Posts Row Section
#section-custom-posts - Logos
#section-logos - Side projects
#section-side-projects - Case studies
#section-case-studies - Resource
#section-resource - Testimonials
#section-testimonials - Static text
#section-static-text - Static banner
#section-static-banner - Work experiences
#section-experiences - Books
#section-books
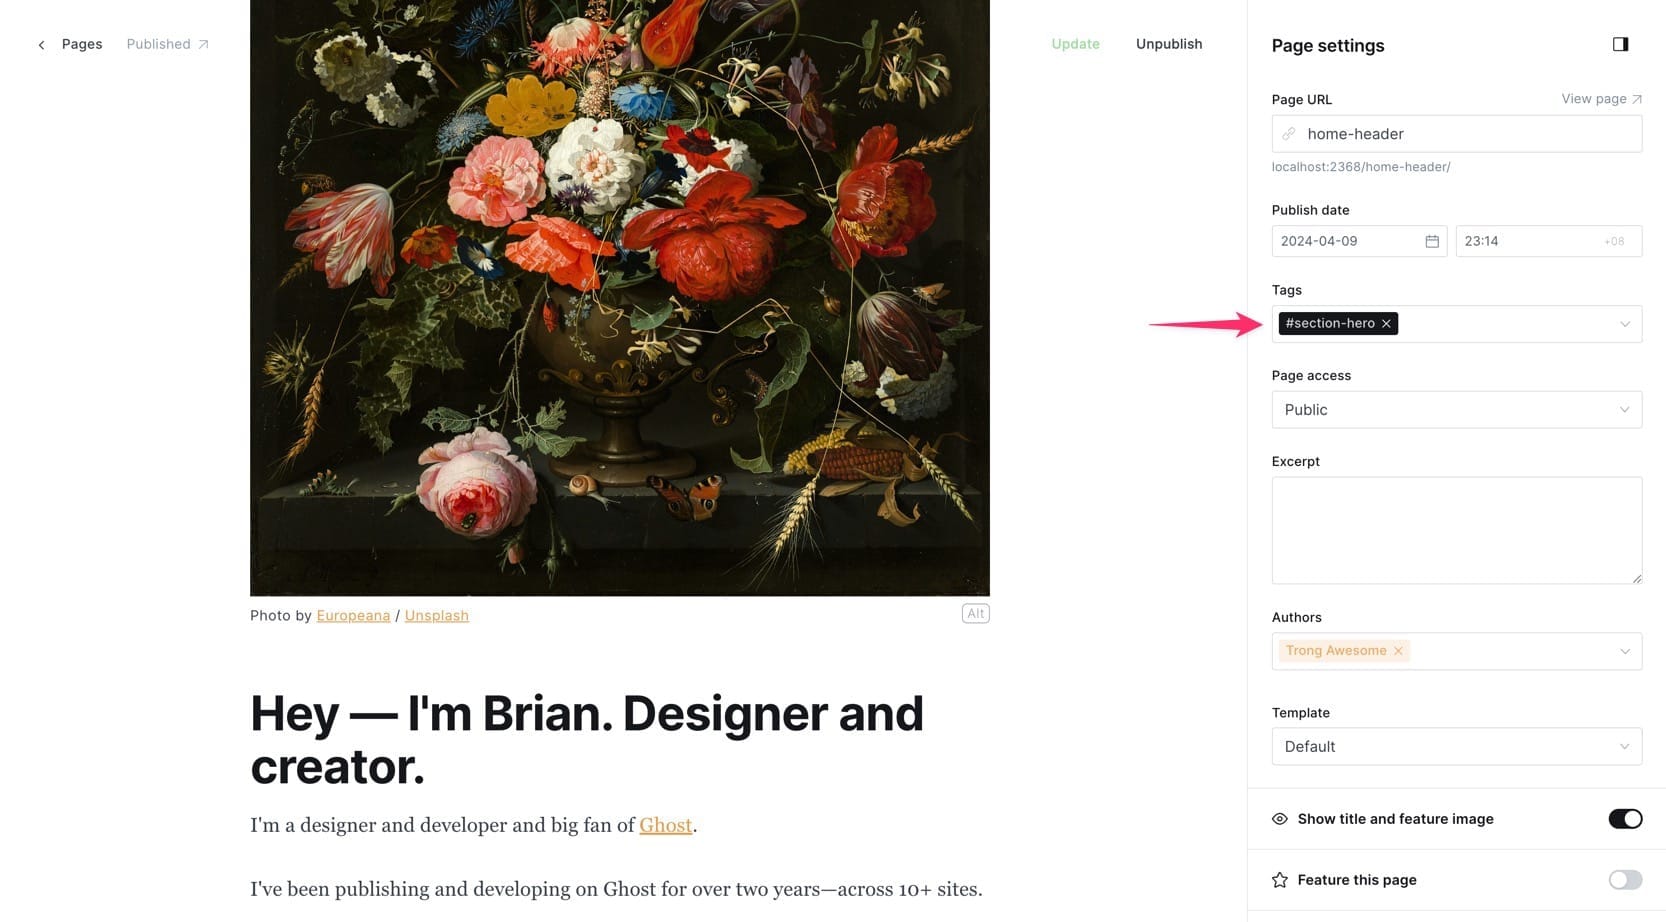
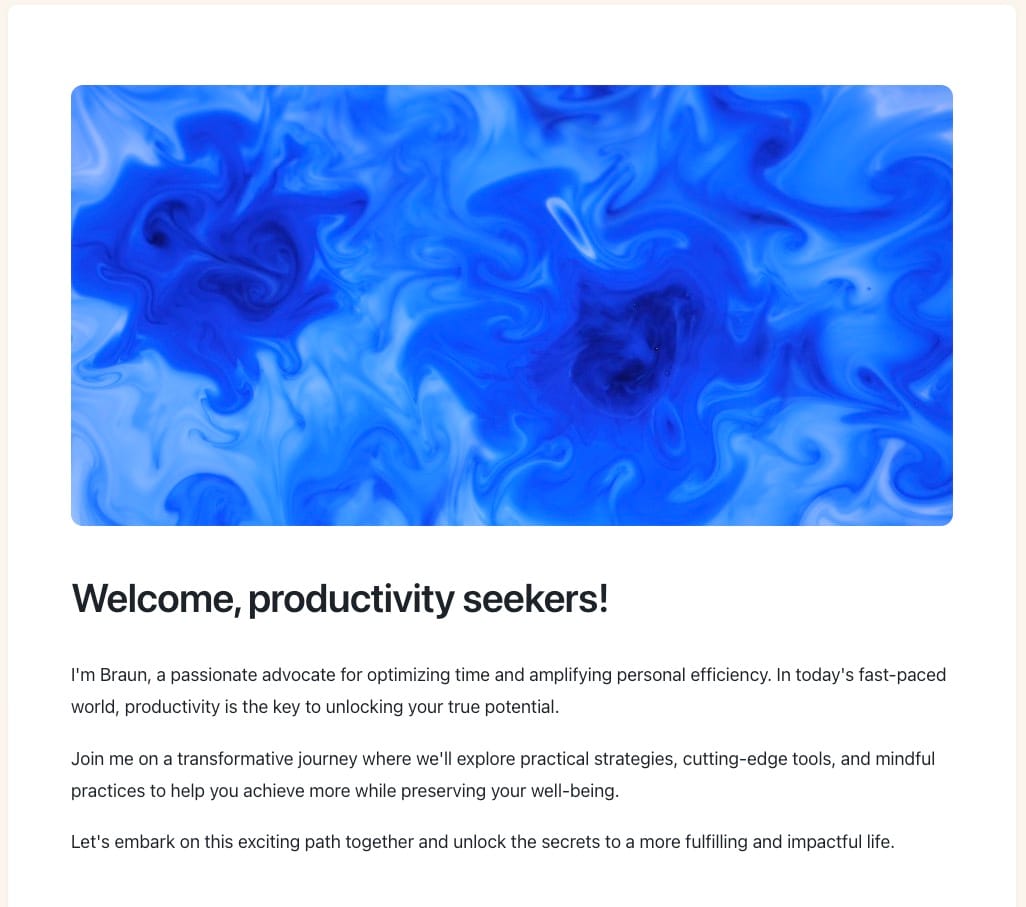
1/ Hero Section
The hero section is permanently set to the top section of the homepage.
Step-by-Step to Add Hero Section
- In Ghost admin, create a new page.
- Add your featured photo, title, and content.
- Open page settings, add
#section-heroto Tags input. Make sure it's the first tag in the input. - Publish and open the homepage to check.
The final page content should look like the following:
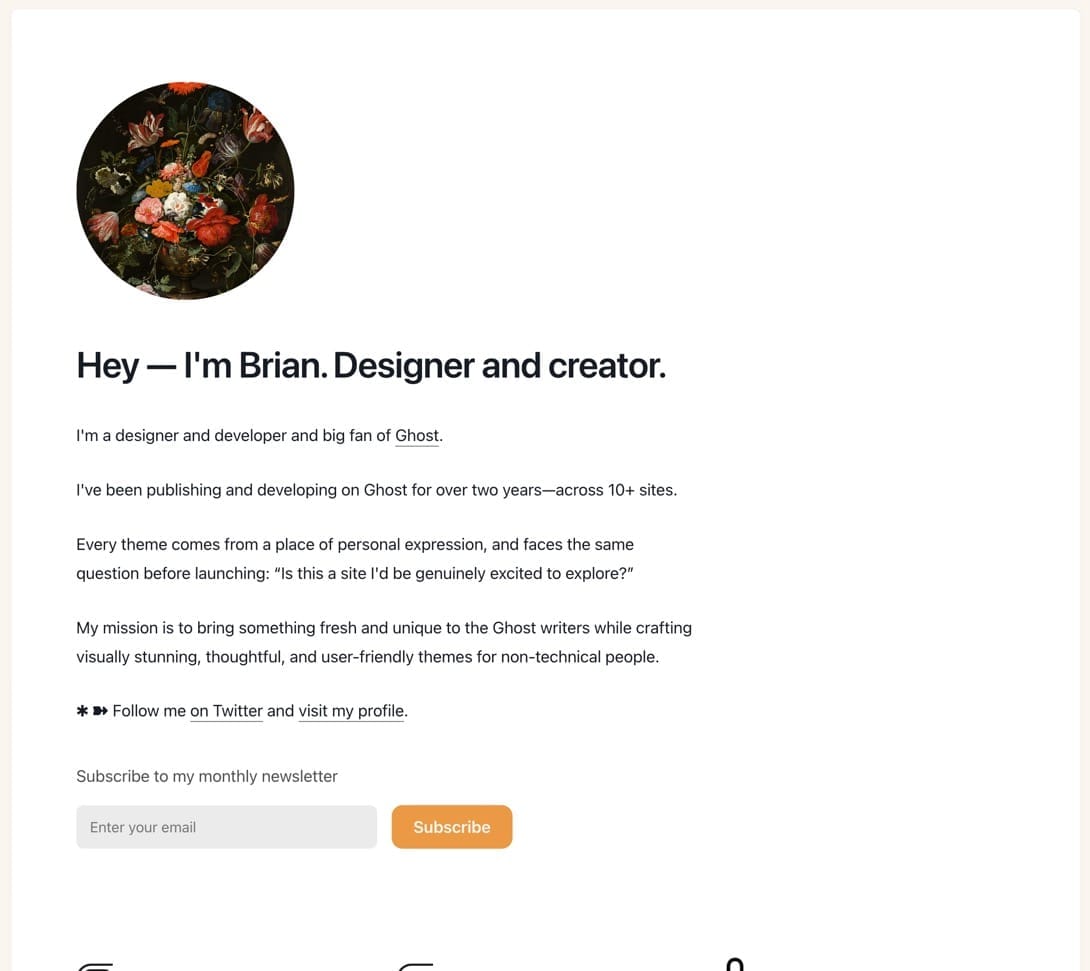
Hero Section Styles
Braun supports different styles for hero sections. You can choose your favorite one at Ghost admin > Settings > Design & branding > Homepage > Hero layout.

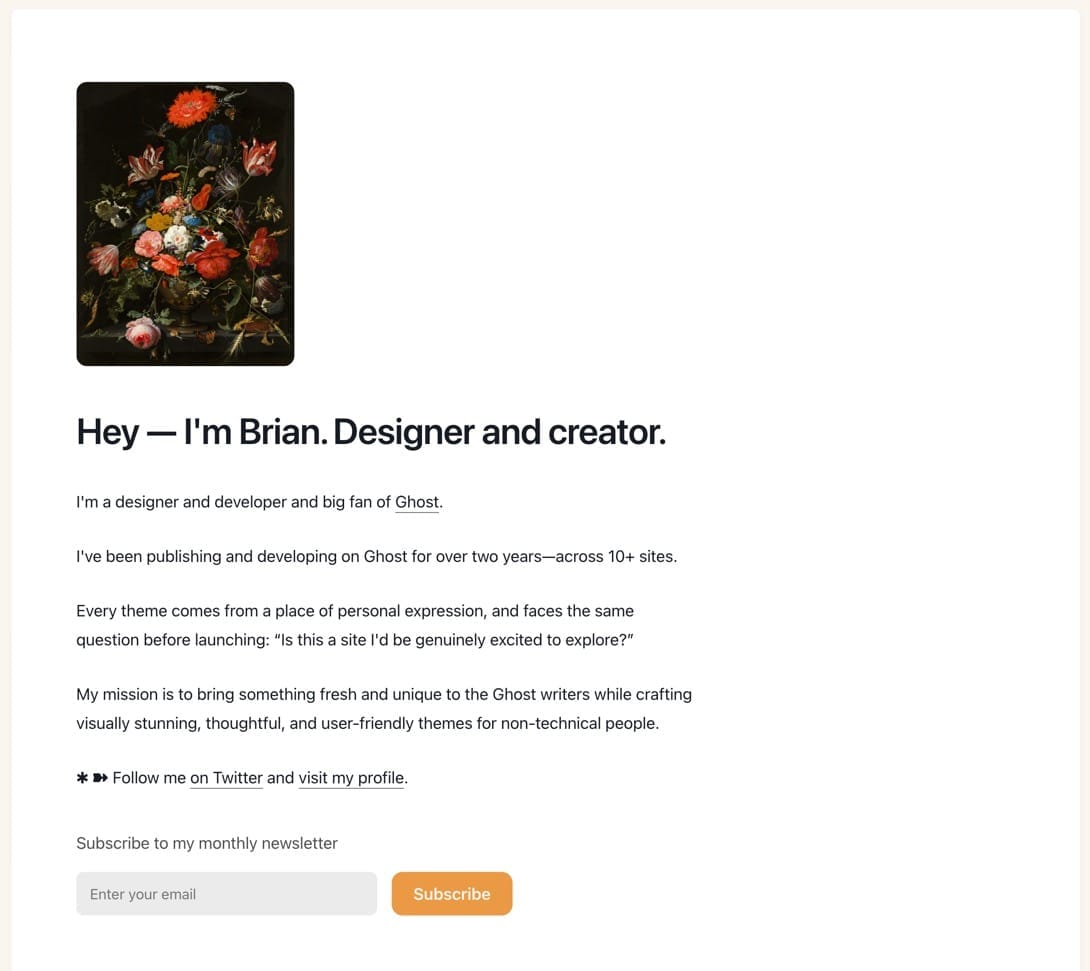
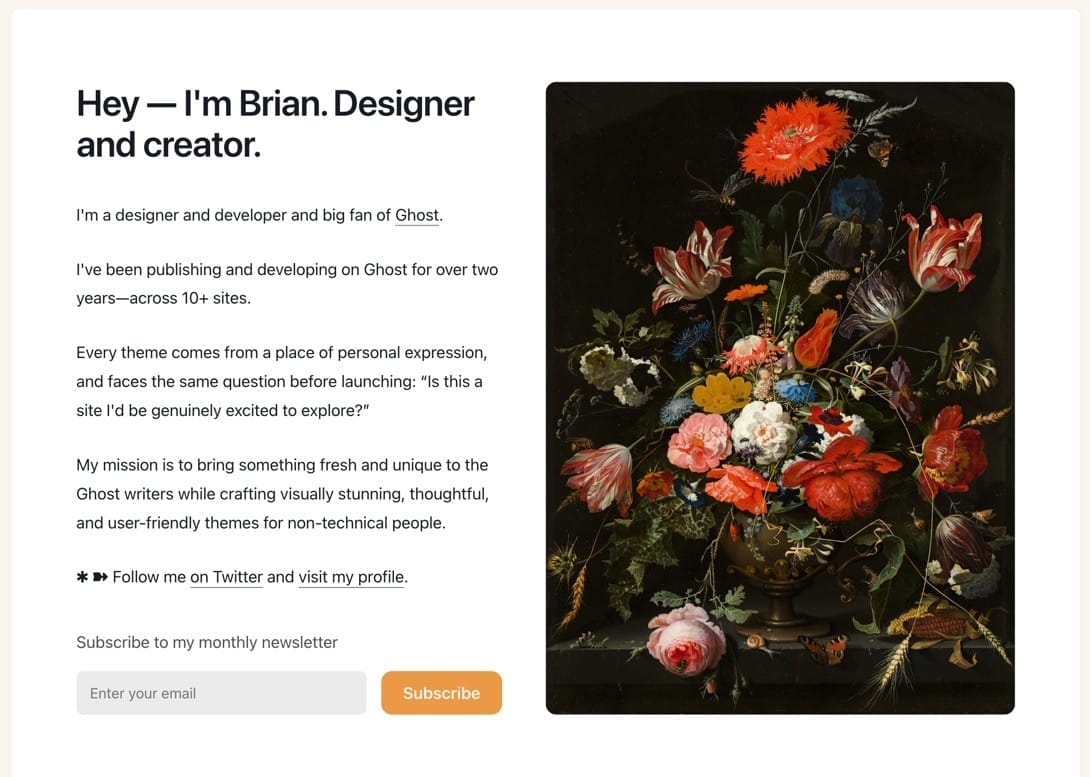
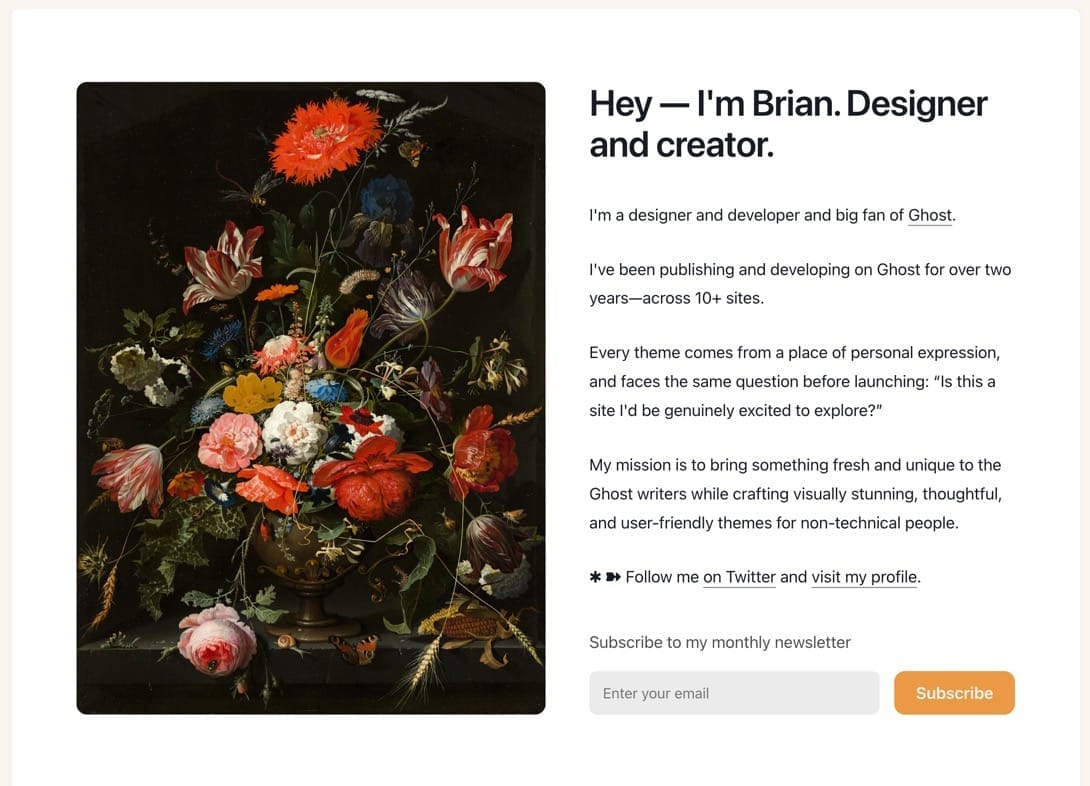
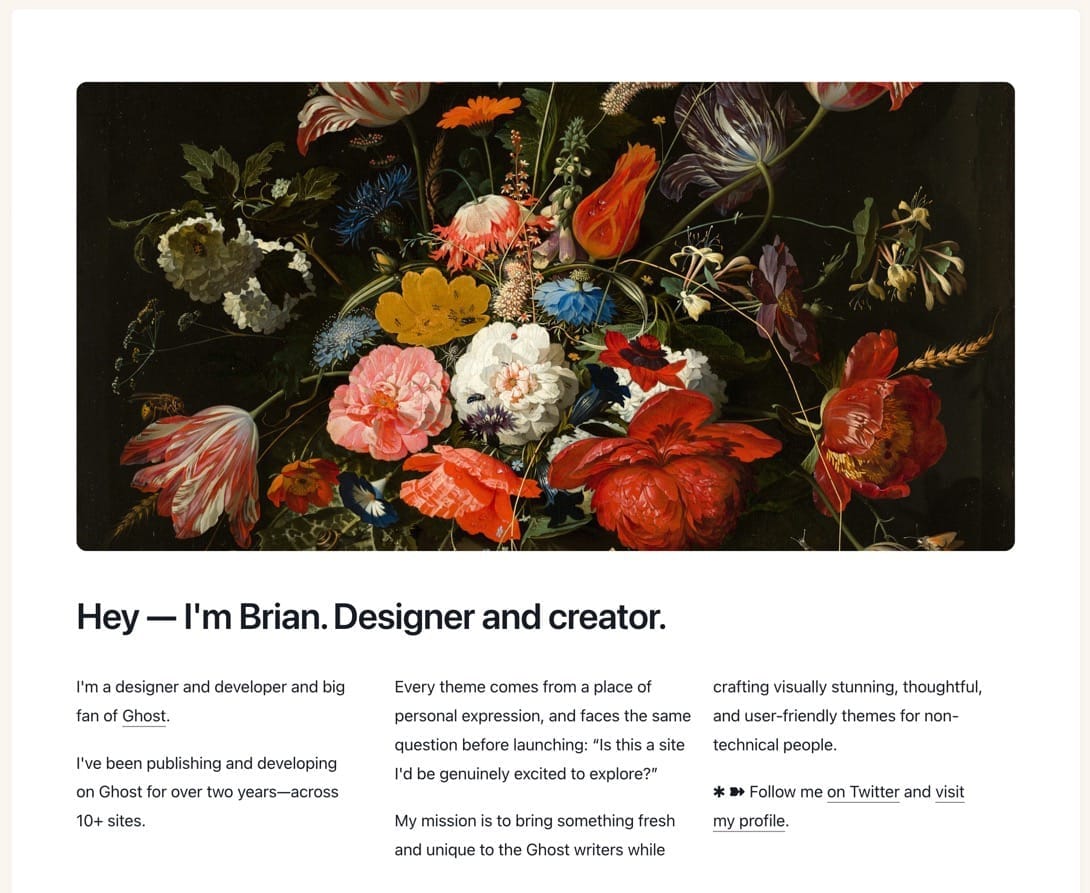
Single column text for Wide image top option
If you prefer text in one column for choosing Wide image top, add this CSS to Code injection:
<style>
.is-hero-image-wide-image-top .gh-content {
column-count: 1;
}
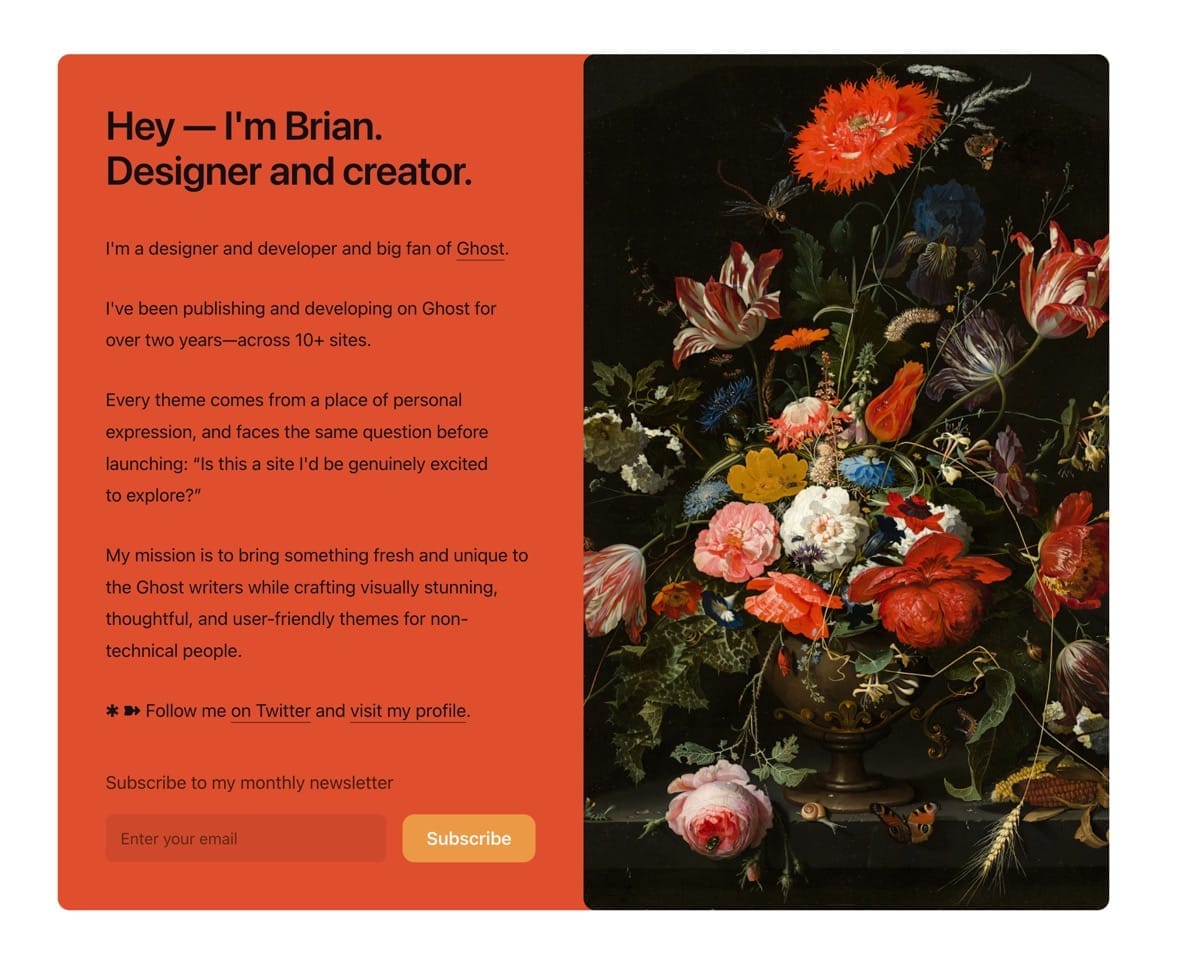
</style>Adding Background to Hero Section
Make your hero section stand out more with a background color.
You can add it from Ghost admin. The theme is using the accent color from the tag #section-hero for this.
Step-by-Step to Add Background Color to Hero Section
- In Ghost admin, go to Tags.
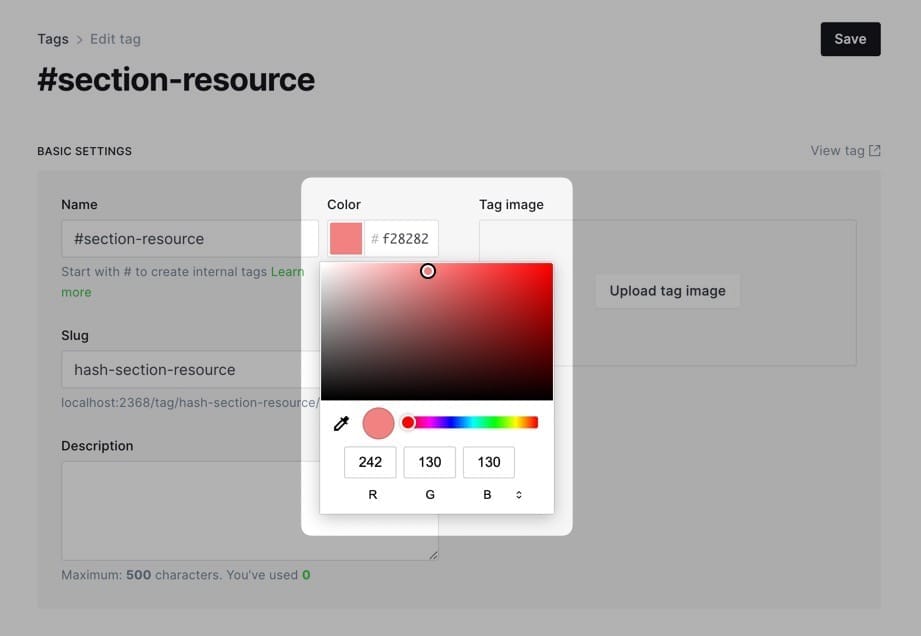
- Under Internal tag, click
#section-heroto go to that tag detail. - Select a color from Color input.
- Save and done.
Using Video in Your Hero Section
Add dynamic video backgrounds to your site's hero section with these simple steps.
Requirements
- Self-hosted video file (MP4 format recommended)
- Direct URL to your video file
- Note: YouTube/Vimeo links are not supported
Step-by-Step
Upload your video file:
- Use your Ghost site's media library, or
- Upload to any file hosting service that provides direct video URLs
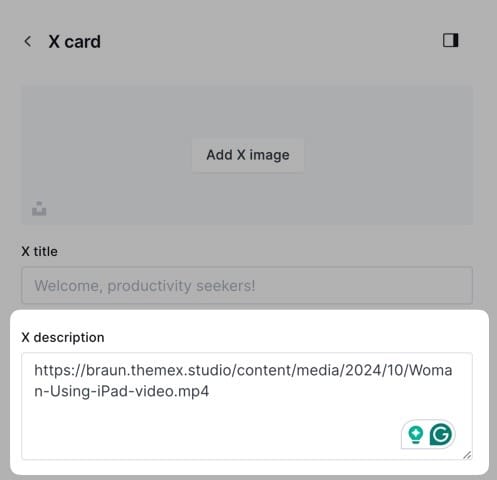
Configure the hero video:
- Navigate to the Page that you created as Hero Section
- Go to Page Settings → X Card
- Paste your video URL into the "X Description" field
- Click Update
Best Practices
- Keep video file size under 10MB for optimal loading
- Use short loops (15-30 seconds)
Troubleshooting
If your video doesn't appear:
- Verify the URL is direct to the video file (.mp4, .webm, etc.)
- Check that the URL is publicly accessible
Clear your browser cache and refresh
2/ Blog Section
The blog section will contain the latest posts that you published and a shortcut link to go to the /blog page.
Step-by-Step to Add the Blog Section
- In Ghost admin, create a new page.
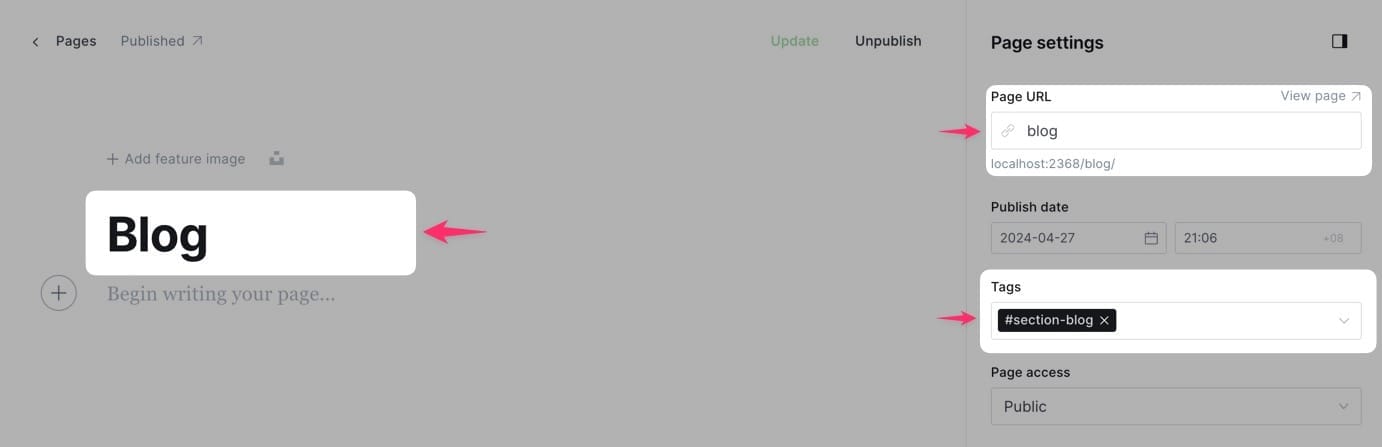
- Give it a title, any name. This title will be the title shown on the homepage and the blog page.
- From the Page settings, ensure that the Page URL setting is
blog. - Add
#section-blogto Tags input. Make sure it's the first tag in the input. - Publish and open the homepage to check.
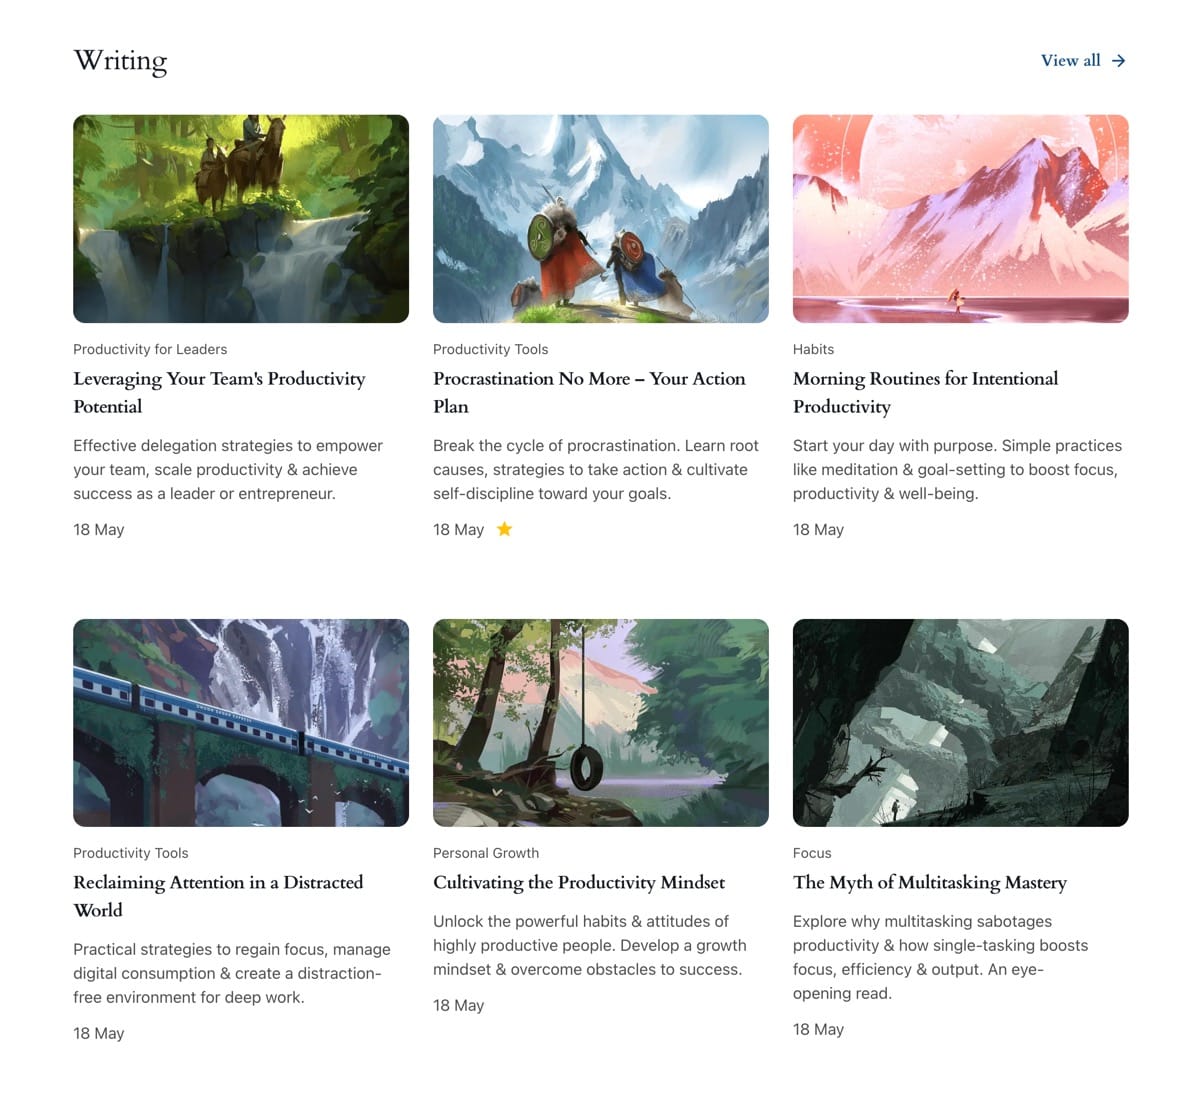
The final page content should look like the following:
Different Post Styles
Braun supports different post styles and different featured image aspect ratios.
- Card
- Expanded
- Right thumbnail
- Text-only
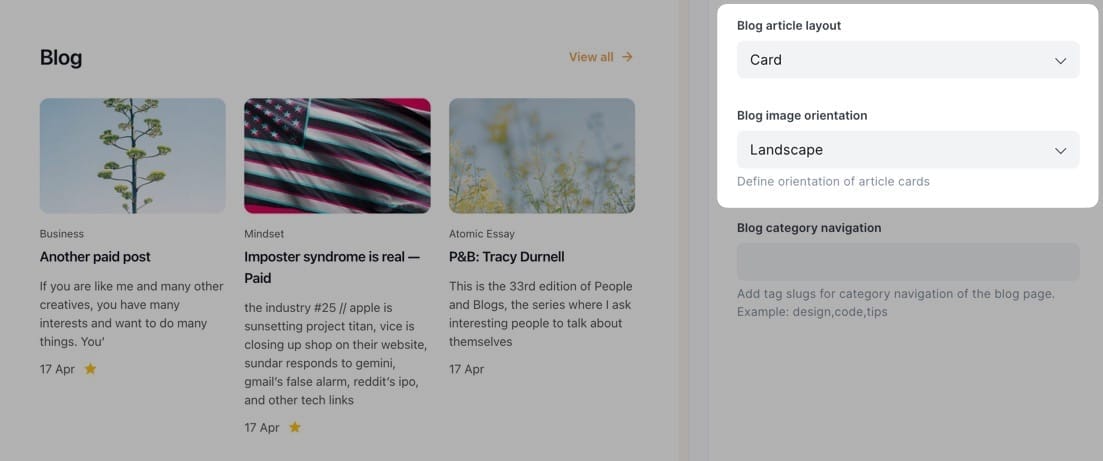
- Minimal
You can set your favorite style at Ghost admin > Settings > Design & branding > Homepage > Blog article layout and Blog image orientation for the post image ratio (Landscape, Square, Portrait).
The post style will be applied across the site, including the homepage, blog, and related post under the post detail page.
To create the Blog page, head to create a blog page.
Exclude Posts from Blog Feed on Homepage
Control which posts appear on your homepage feed by excluding specific tags.
Step-by-Step to Exclude Posts
- Go to Settings > Design & branding > Homepage
- Find Excluded tags
- Enter tag slugs separated by commas (e.g.,
internal,draft,private) - Click Save
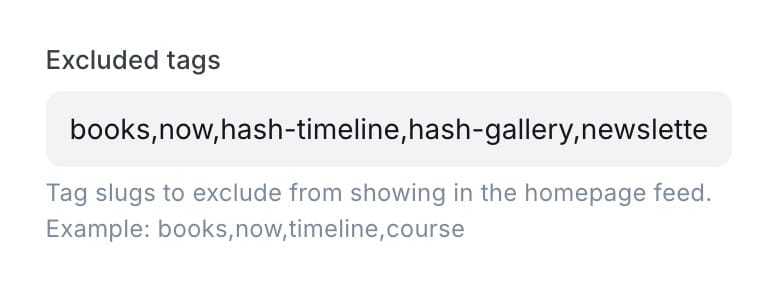
Posts with these tags won't appear in the homepage feed but remain accessible via direct links or tag pages.
3/ Posts Row Sections
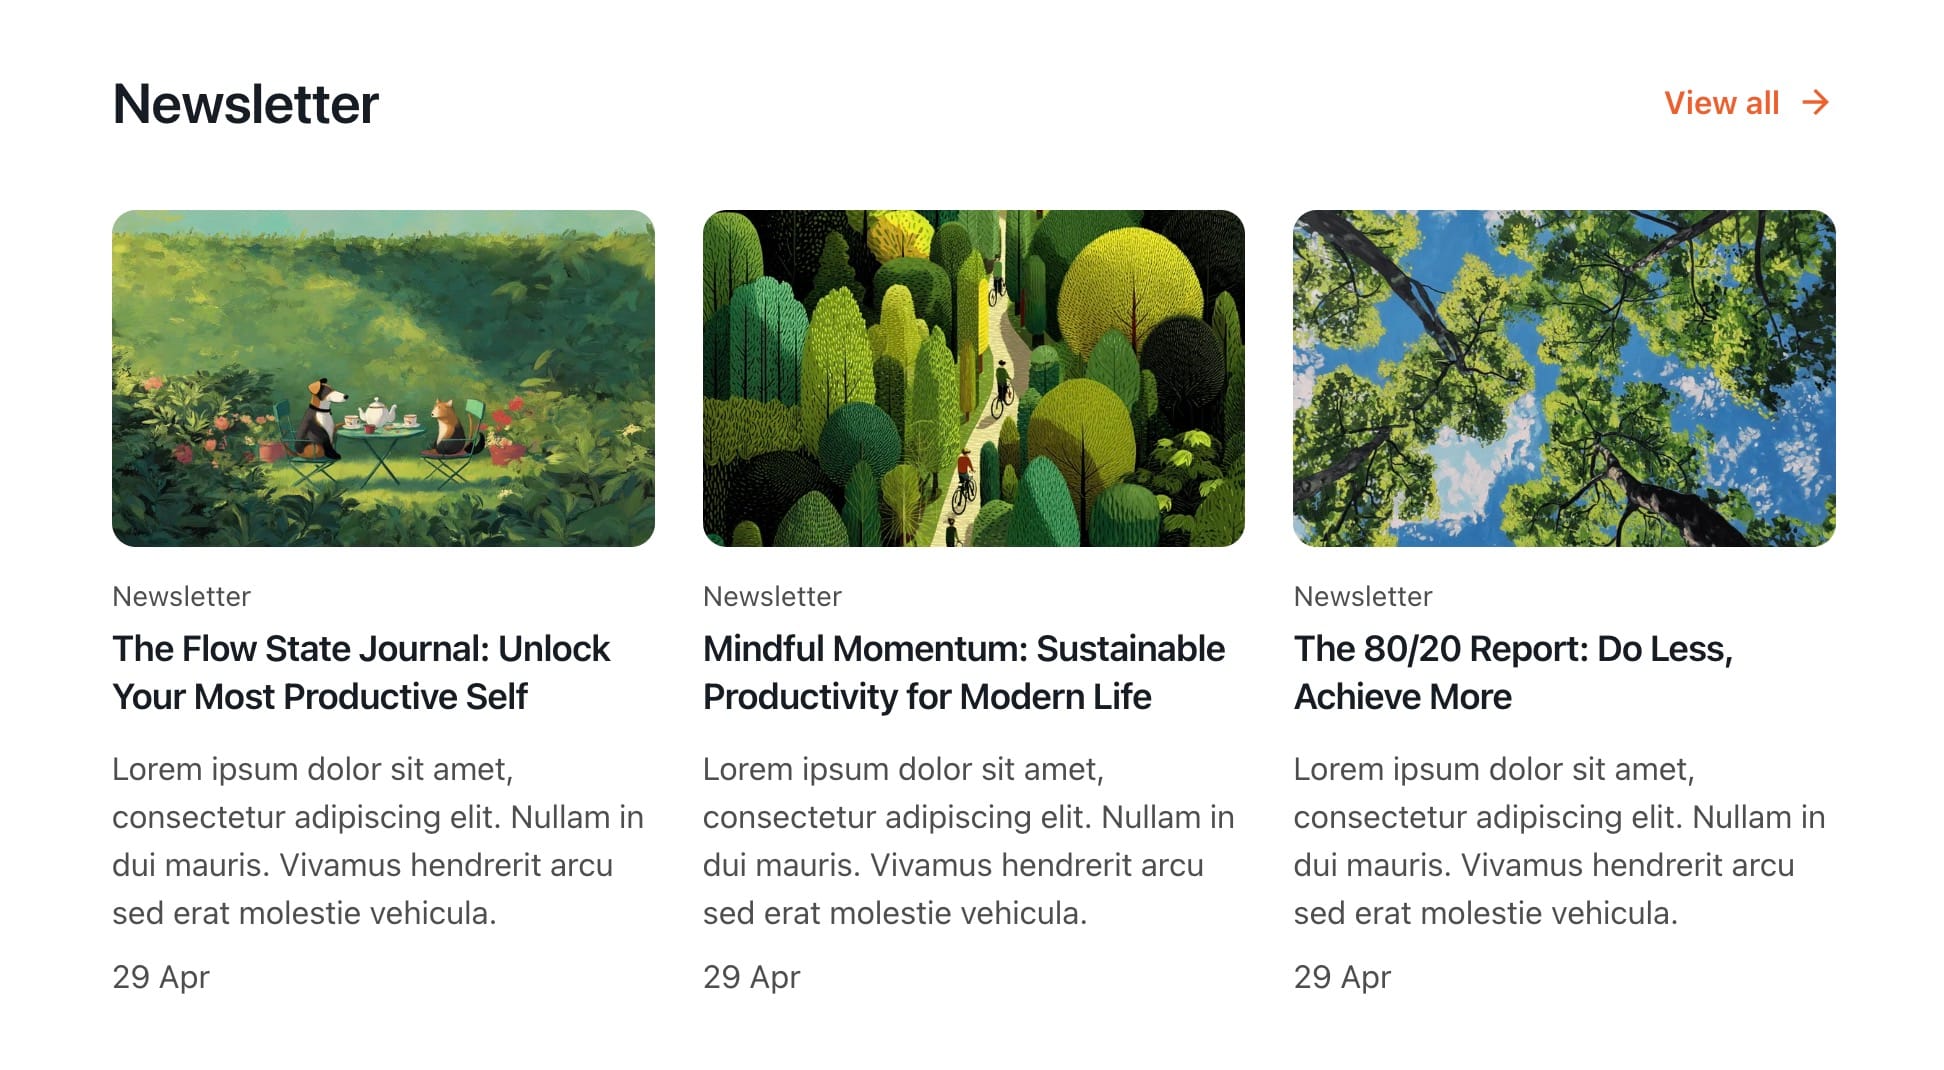
This section allows you to display a row of specific posts filtered by a tag on your homepage. Here's how to set it up:
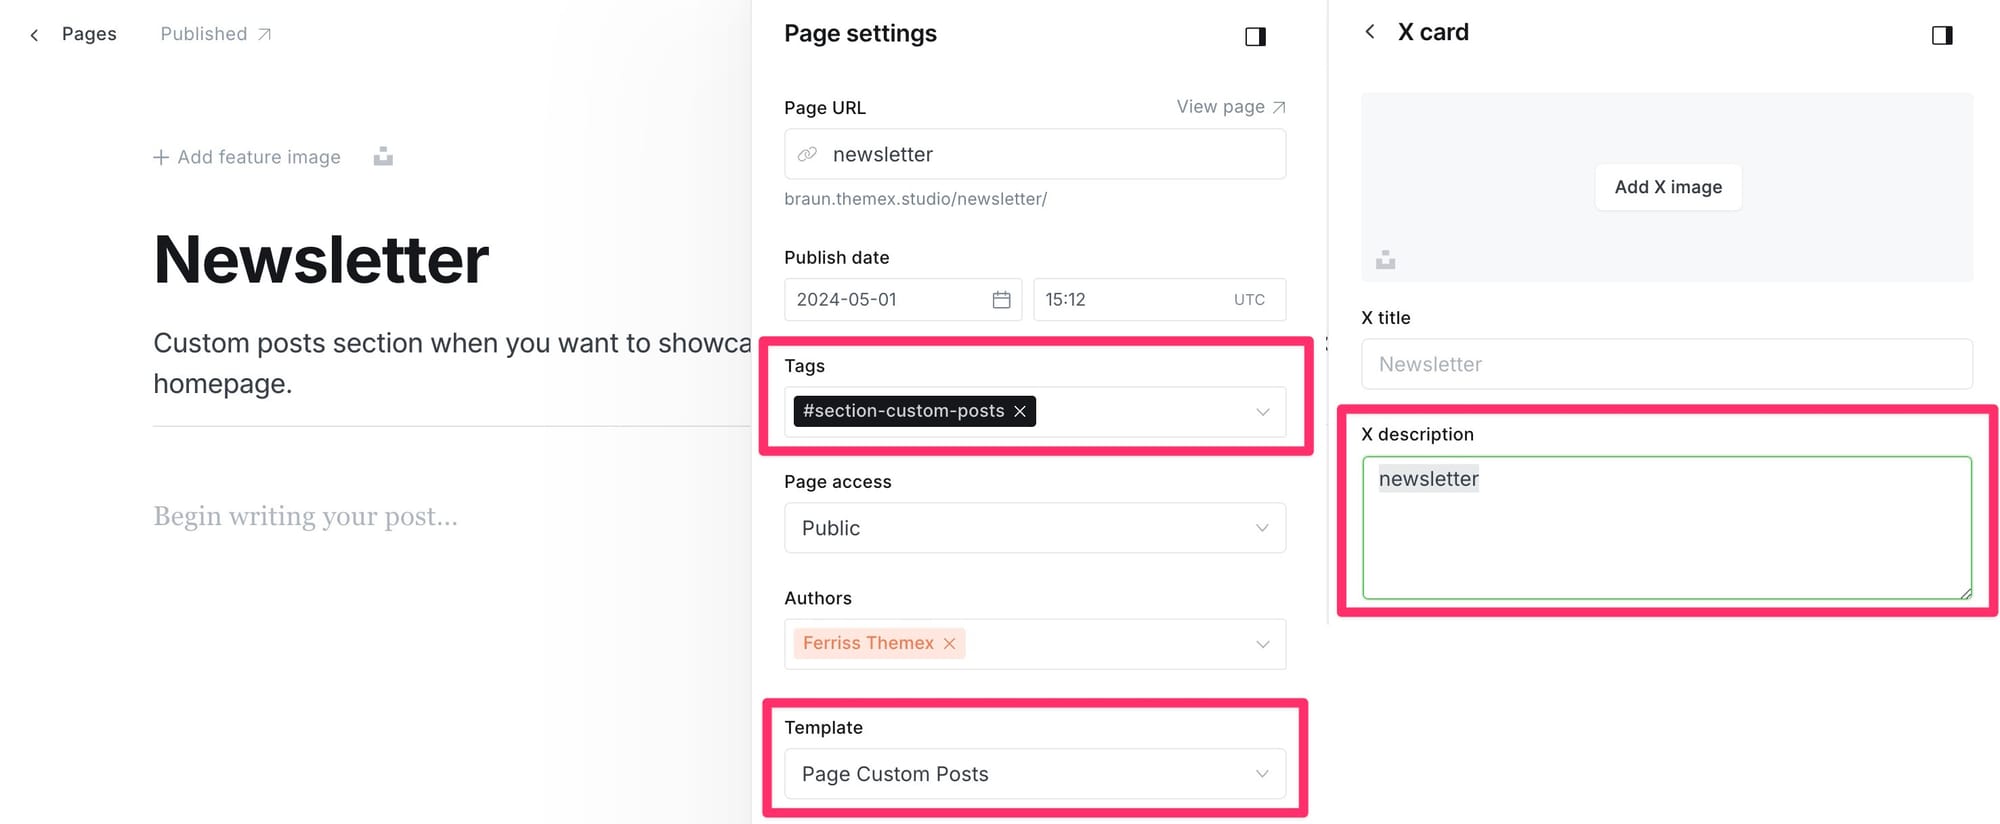
Step-by-Step to Add Posts Row Sections on Homepage
- In Ghost admin, create a new Page.
- Give it a title; this title will be shown on the homepage.
- In Page settings, add
#section-custom-poststo the Tags input. Make sure it's the first tag in the input. - In Template dropdown, choose Page Custom Posts (This will create a new page showing those posts)
- Click on X Card > X description input, add the tag slug of the POSTS (not pages) you want to show in this row on the Homepage. i.e. putting
newsletterif you want to show POSTS that are tagged asNewsletter - Publish and preview it on your homepage.
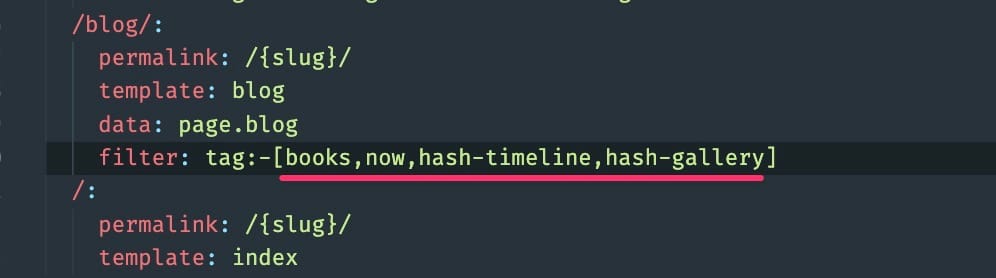
When showing this section on the homepage, you might want to exclude them from showing on the Blog section on the homepage and the /blog page.
- To exclude them from showing Blog section, add tags to exclude from the Setting
- To exclude on the /blog page, edit the routes.yaml file to add tags to exclude from it.

4/ Logos Section
Sometimes you want to show some kind of social proof, and a logo board can help achieve that.

Step-by-Step to Add Logo Board
- In the Ghost admin page, go to Pages > click on New page.
- Enter the title of the page. This title will be the section title on the homepage.
- Upload all logos you want to show on the homepage. Note: Don’t add any break lines above, between, or after the Images. It will create some odd alignment.
- In the Page Setting sidebar, add a tag named:
#section-logos. Make sure it's the first tag in the input. - Publish and check your homepage.
The final page content should look like the following:

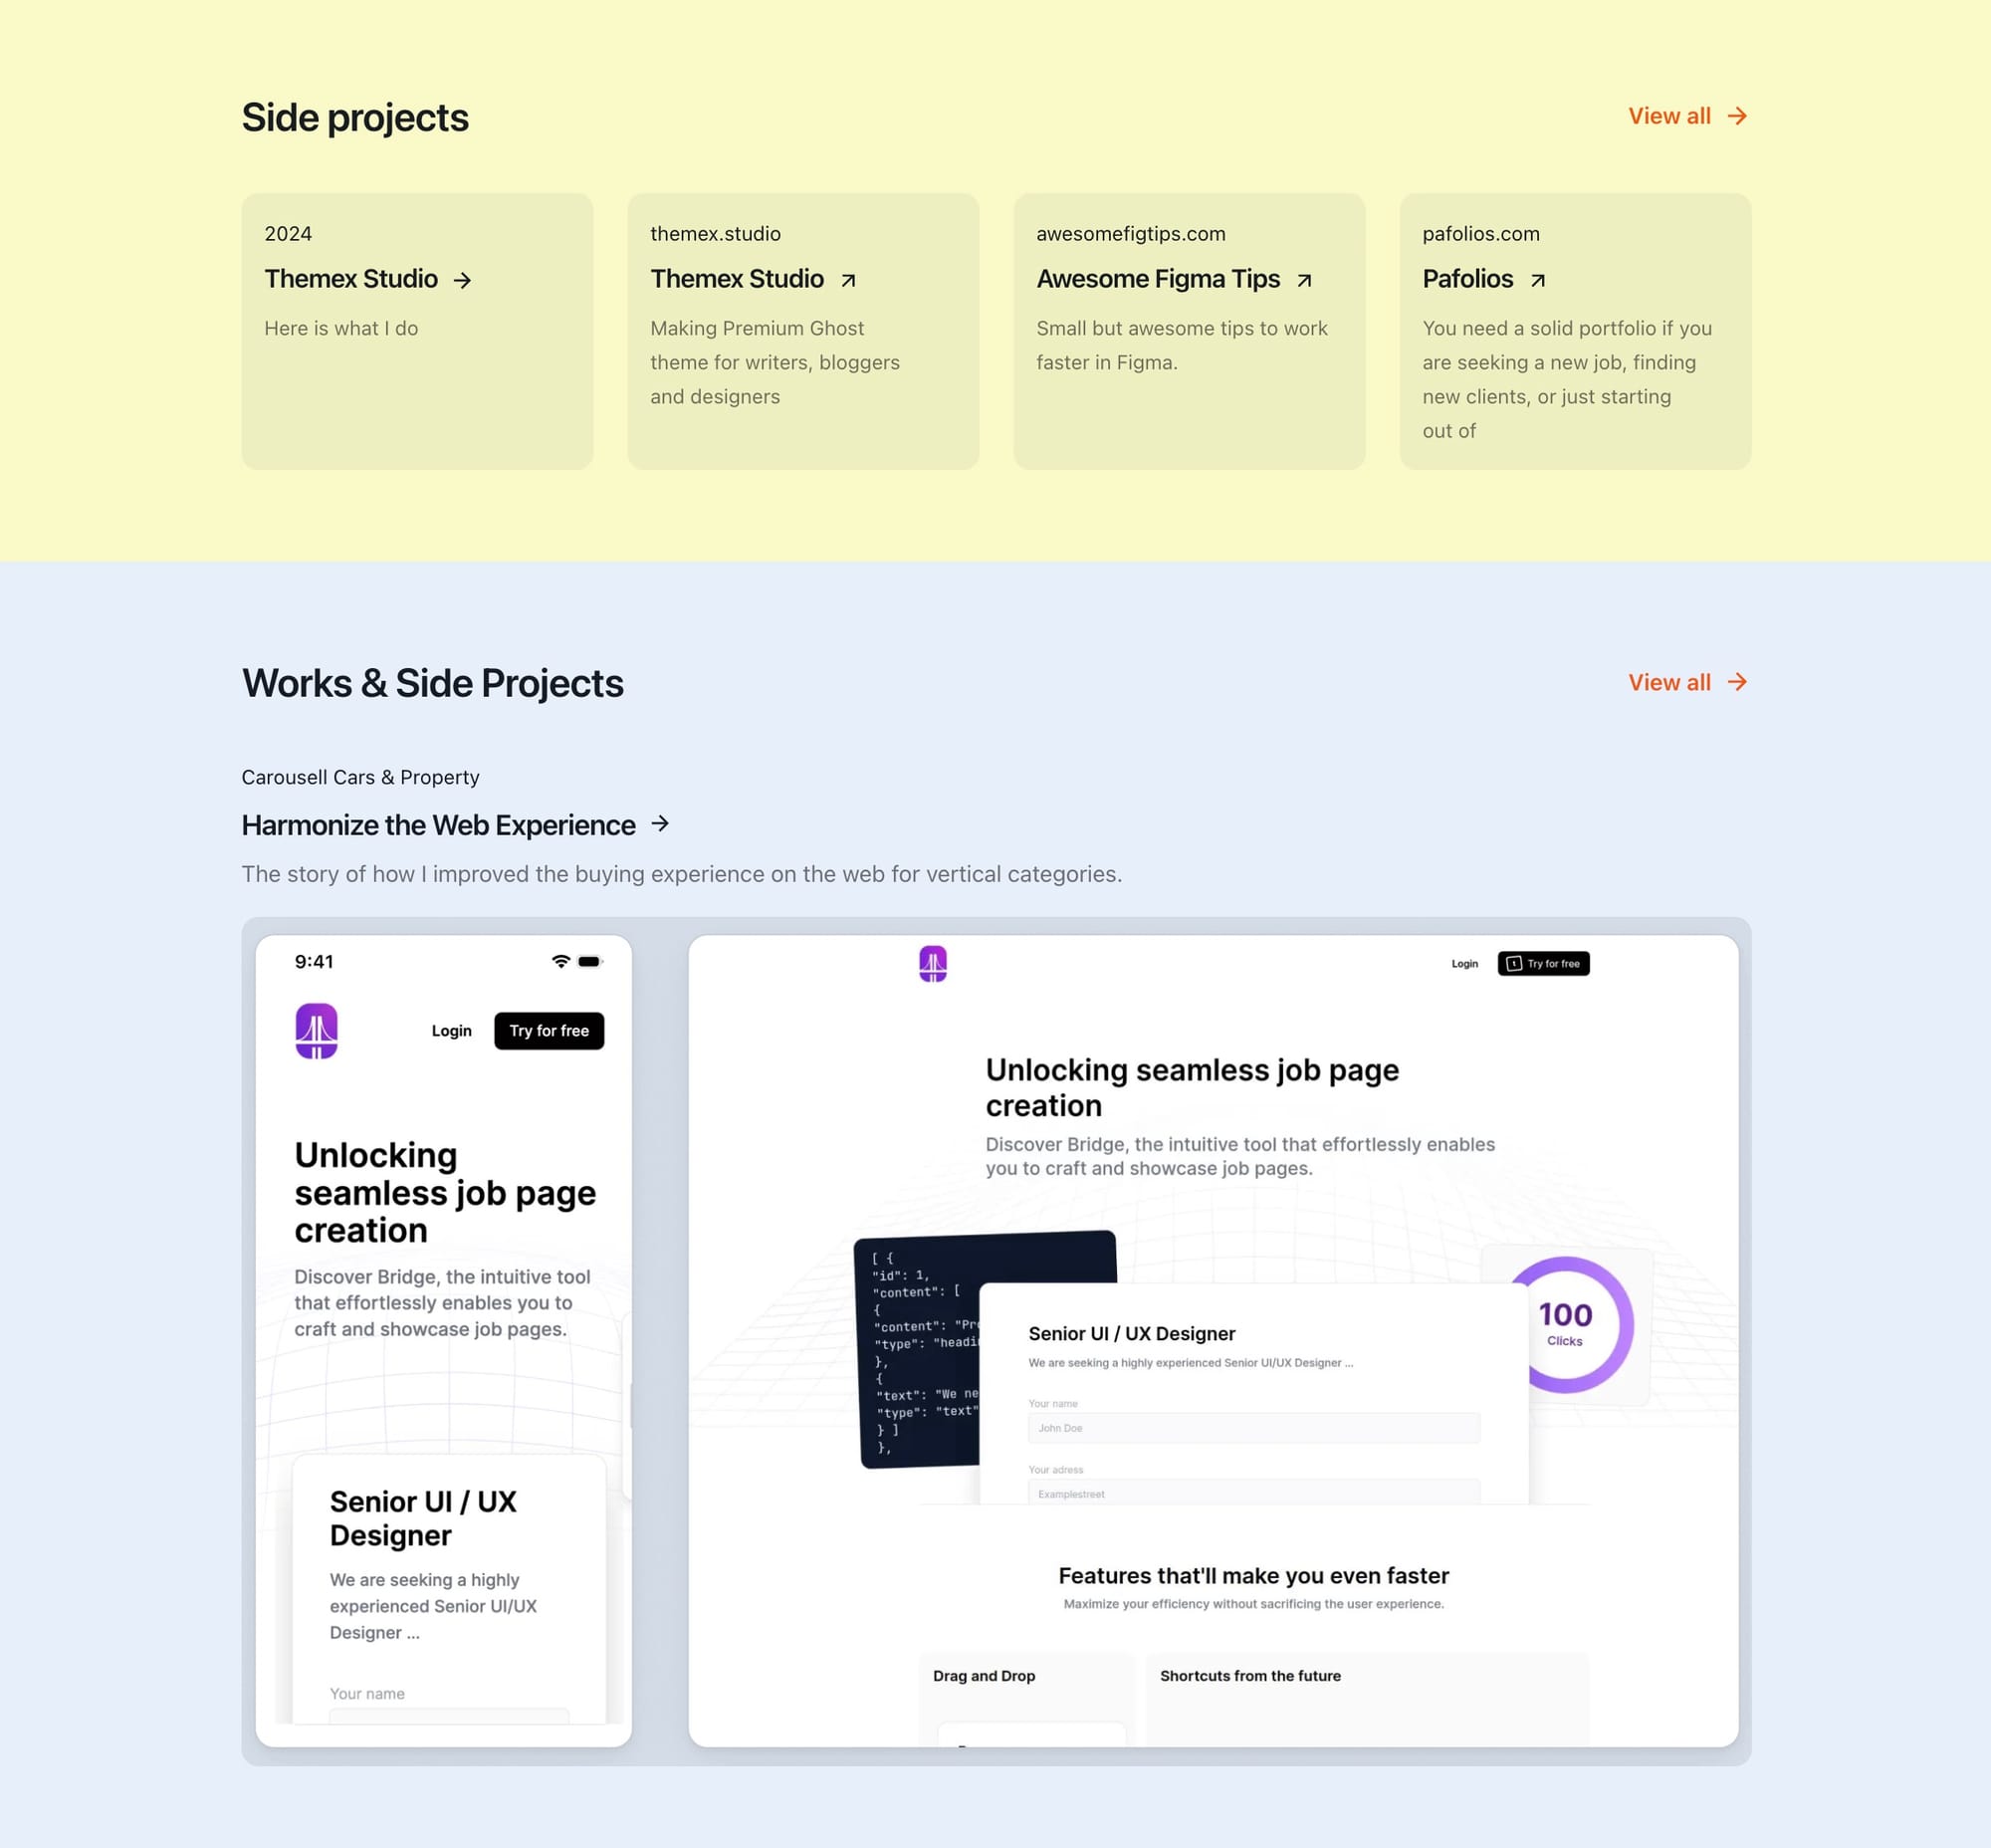
#no-title tag.Side Projects Section
You can add a side project section (or a section to show any link).
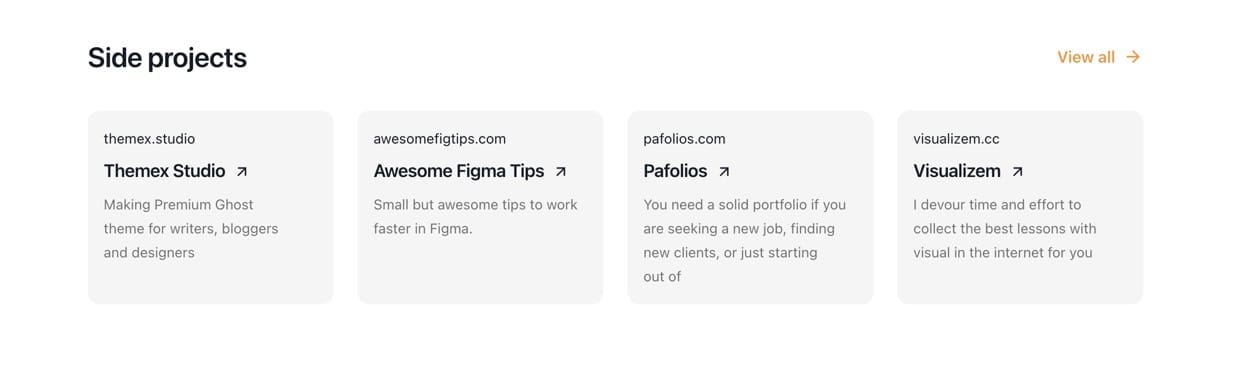
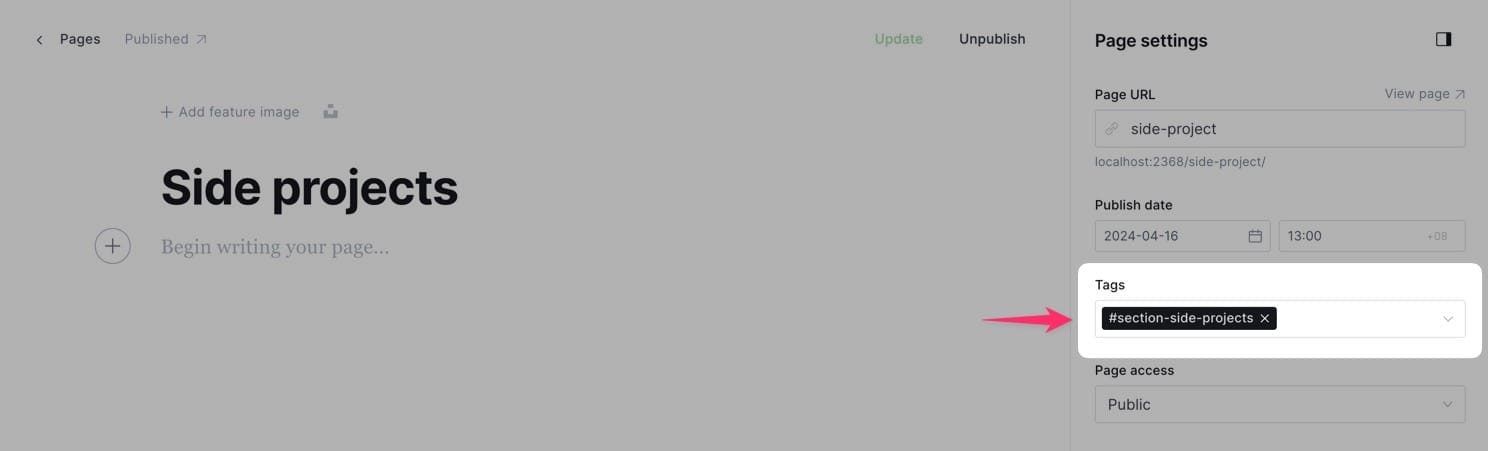
Step-by-Step to Add Side Project Section on Homepage
- In Ghost admin, create a new page.
- Give it a title, any name. This title will be the title shown on the homepage and the Work page.
- Add
#section-side-projectsto Tags input. - Publish.
The final page content should look like the following:
Now the side project section is visible on the homepage. Next, to add content for that section
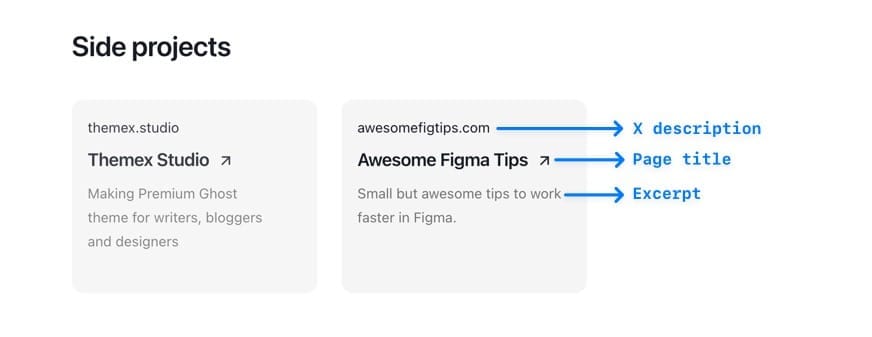
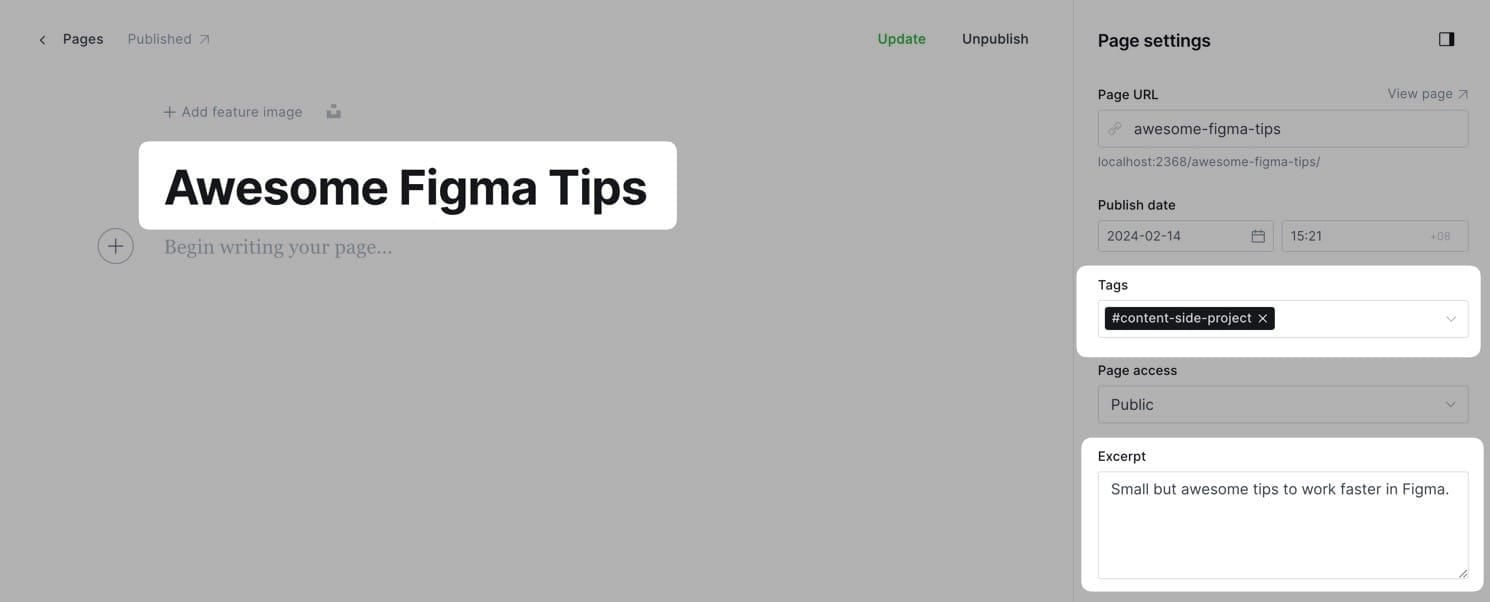
Step-by-Step to Add Side Project Content
- In the Ghost admin page, go to Pages > click on New page.
- Enter information for this project. Page title as the title, Excerpt as the project description, X description as project subtitle. Featured photo is optional.
- Tag the page as
#content-side-project. Make sure it's the first tag in the input. - (Optional) If you want to lead visitors to an external site, add the URL at Metadata > Canonical URL. By default, the link will lead to the Page detail.
- Publish.
- Repeat the same steps to create different content blocks for the side projects section.
The final page content should look like the following:
#no-link to the Tags input.5/ Case Studies Section
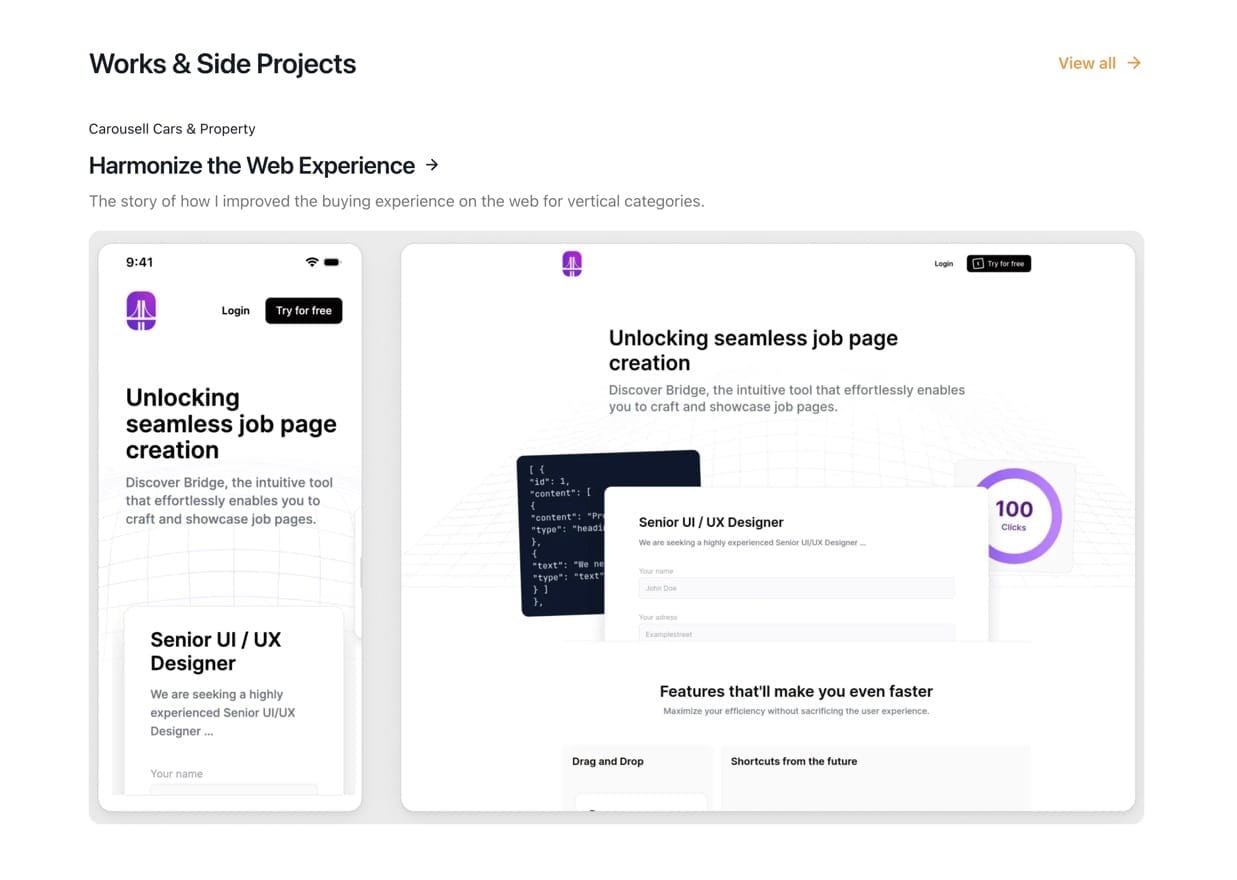
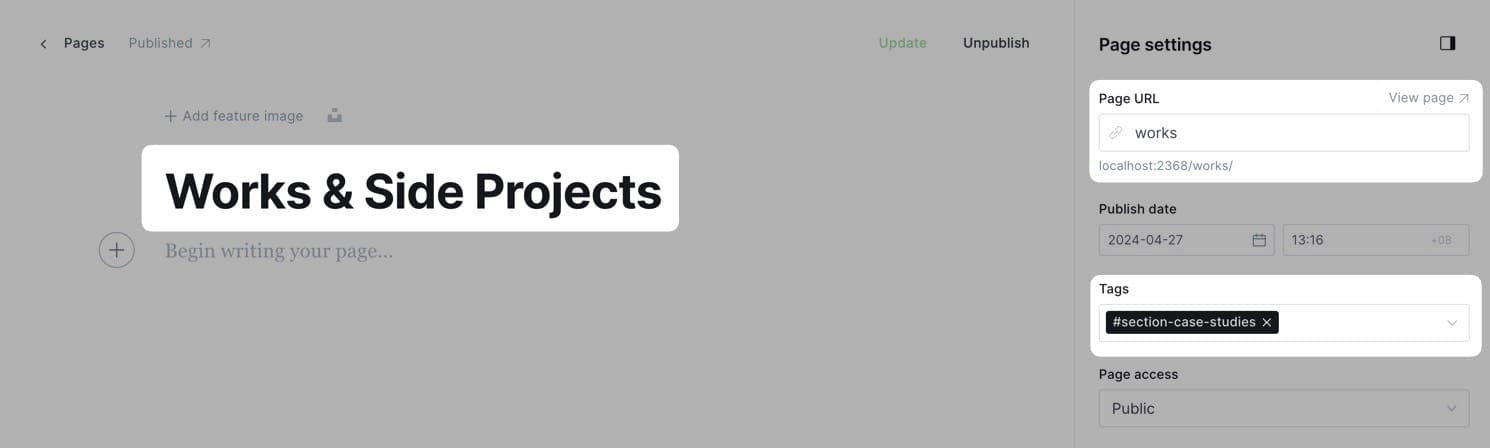
You can add a case study section to showcase your important projects or achievements. The case studies section is the most prominent section of the homepage.
Step-by-Step to Add Case Studies Section on Homepage
- In Ghost admin, create a new page.
- Give it a title, any name. This title will be the title shown on the homepage and the blog page.
- On the Page settings, ensure that the Page URL setting is
works(This is for the purpose of creating a separate page for works. If you don’t need a separate page, you can use any URL). - Add
#section-case-studiesto Tags input. Make sure it's the first tag in the input. - Publish.
The final page content should look like the following:
Now the case study section is visible on the homepage. Next, to add content for that section.
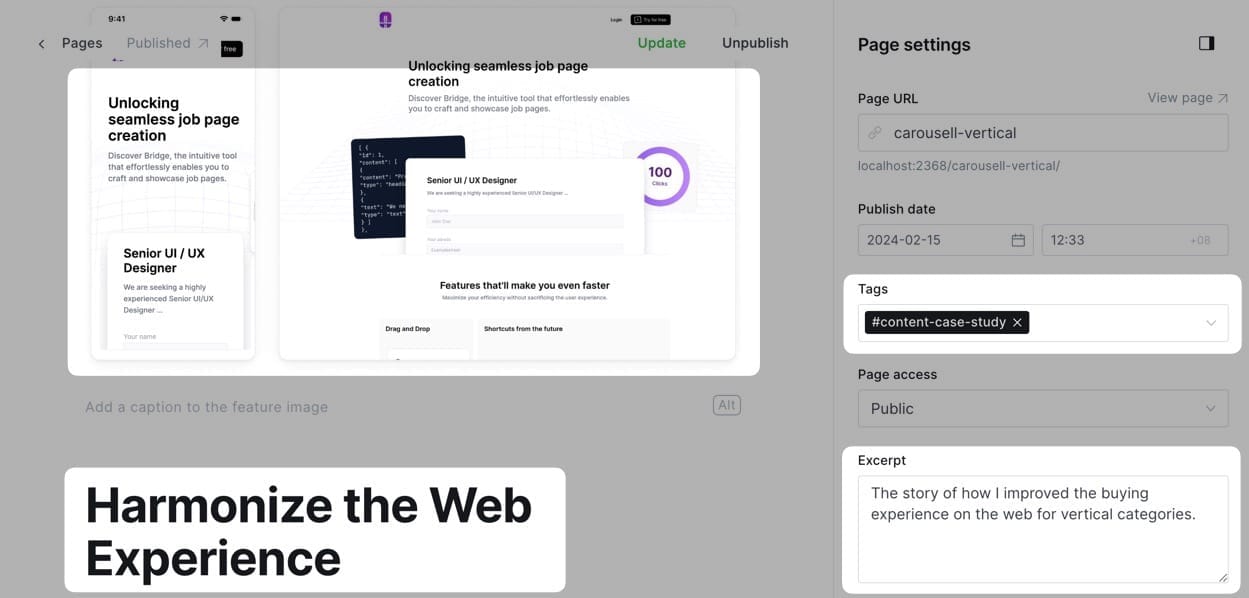
Add Case Studies
Step-by-Step to Add a Case Study
- In the Ghost admin page, go to Pages > click on New page.
- Enter information for this project. Page title as the title, Excerpt as the project description, X description as project subtitle, and featured image.
- Tag the page as
#content-case-study. Make sure it's the first tag in the input. - (Optional) If you want to lead visitors to an external site, add the URL at Metadata > Canonical URL. By default, the link will lead to the Page detail.
- Publish.
- Repeat the same steps to create different content blocks for the case studies section.
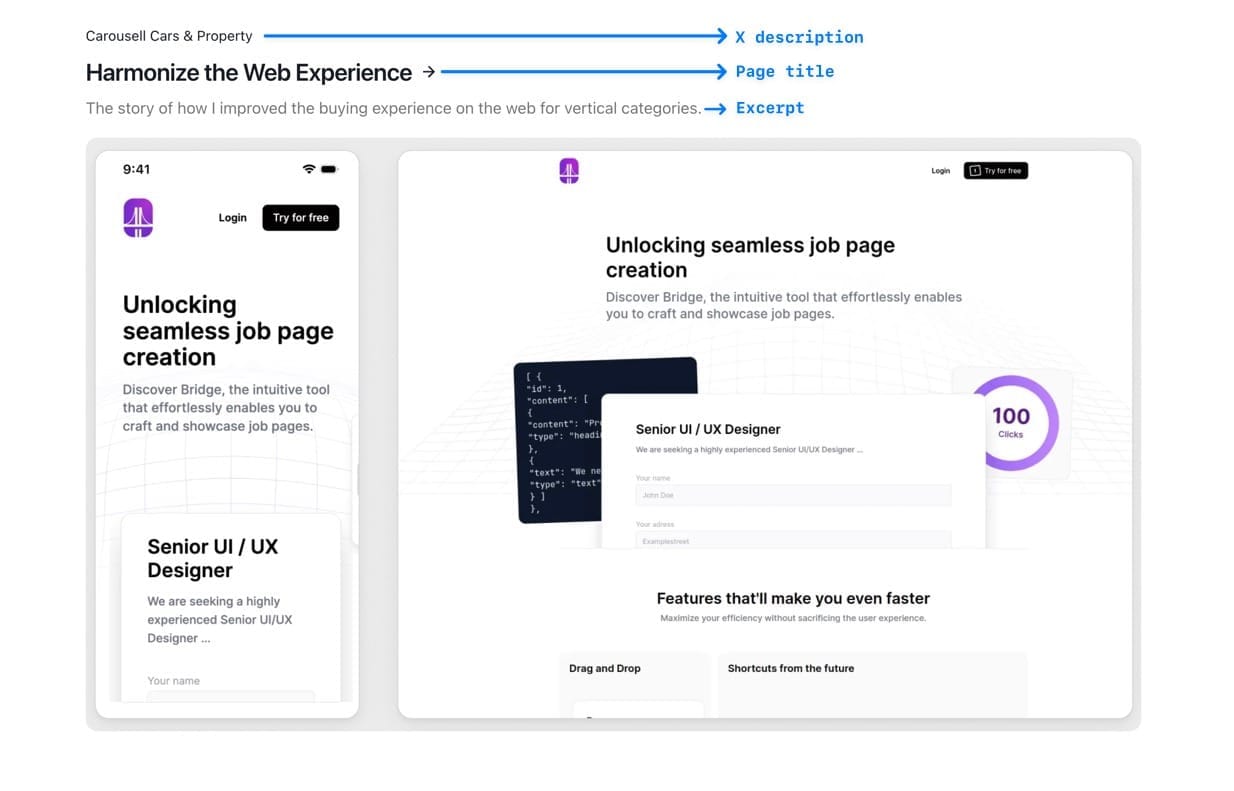
The final page content should look like the following:
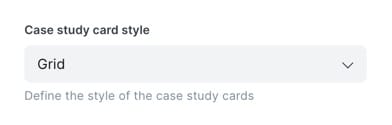
#no-link to the Tags input.Change Case Study Layout
For the case study card, the theme provides two options:
- Grid: two cards side by side.
- Full row: one card in a row.
- Go to Ghost admin > Settings > Design & branding > Homepage > Hero layout.
- At Case study card style, select your choice.
- Save.
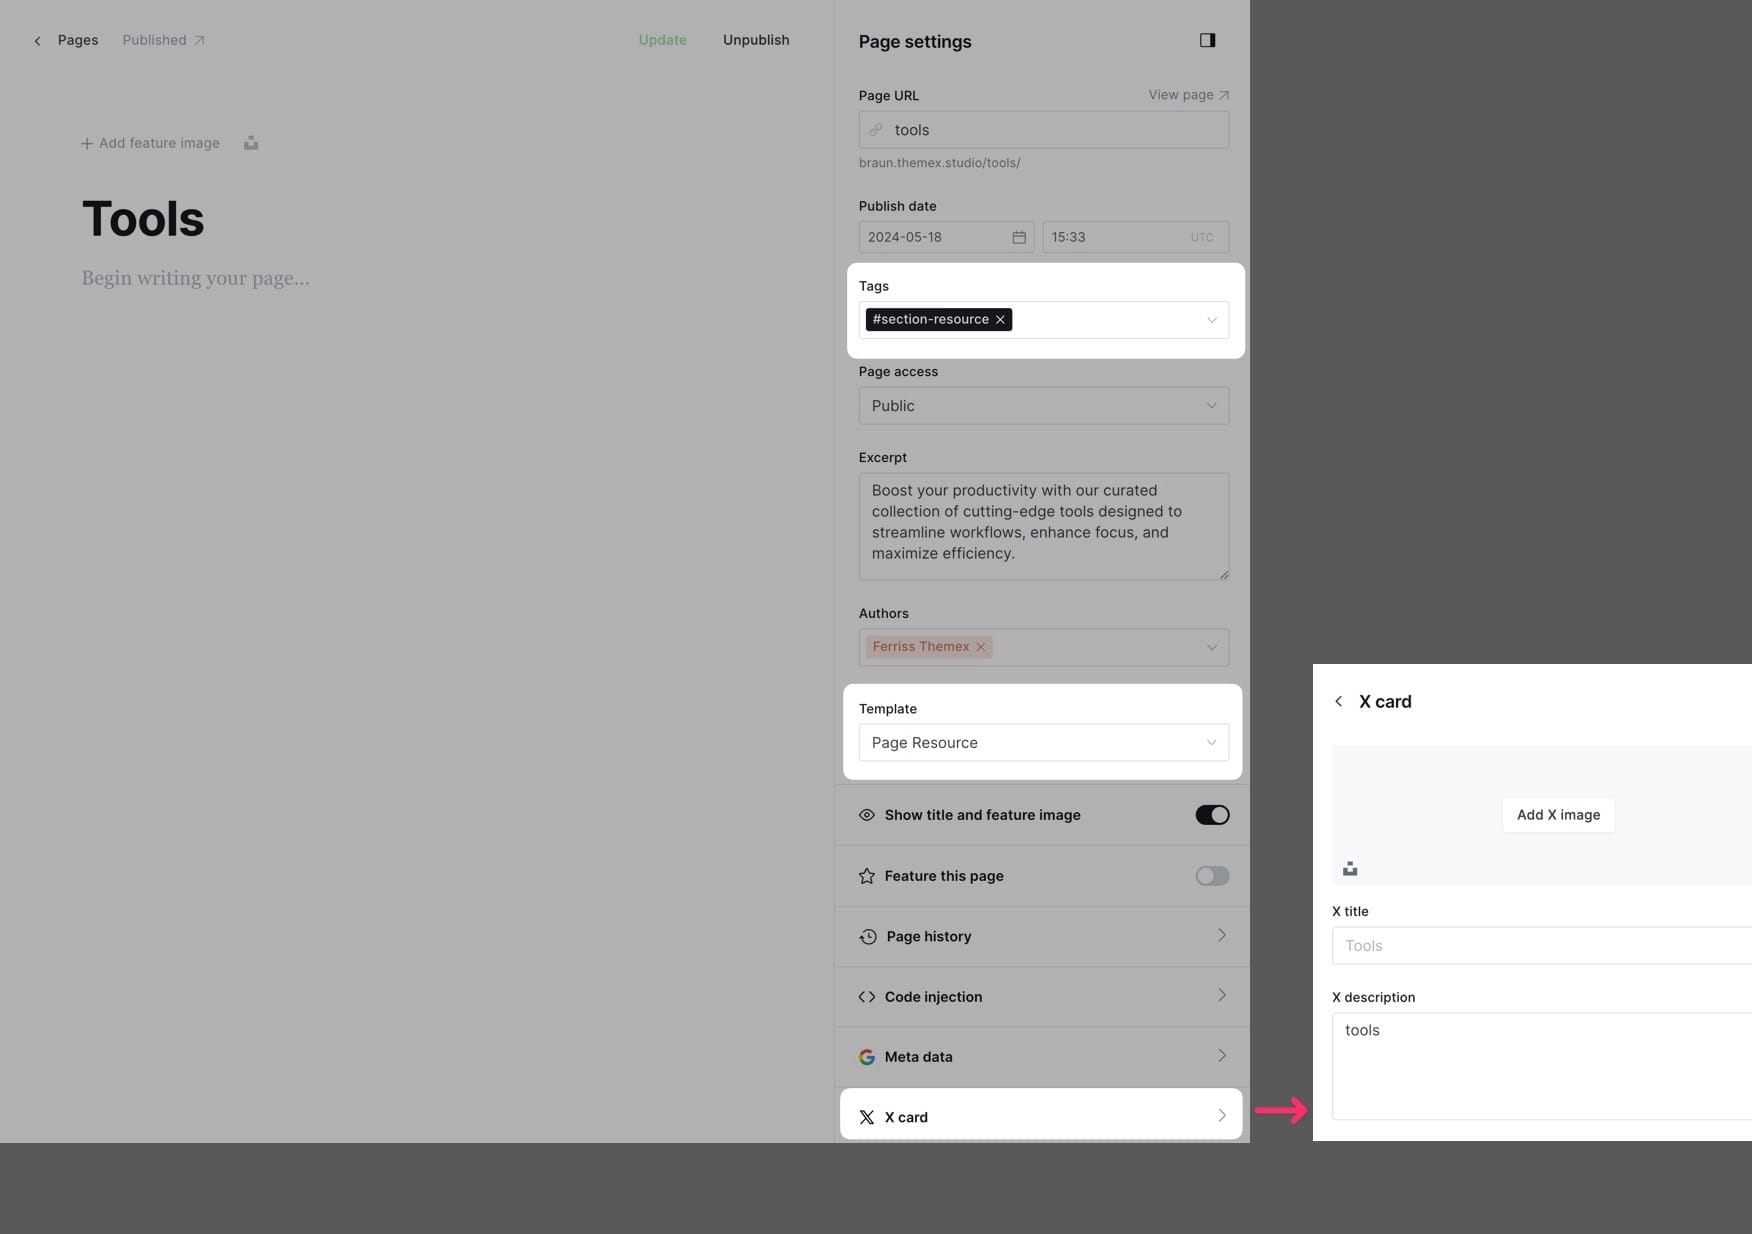
6/ Resources Sections
When you have some resources you want to show, such as helpful tools, newsletters, or bookmark links, resource sections are ideal for that. You can add as many resource sections as you want. Each section follows the same creation flow.

Add resource section on Homepage
- In Ghost admin, create a new Page.
- Give it a title; this title will be shown on the homepage and the blog page.
- In Page settings, add
#section-resourceto the Tags input. Make sure it's the first tag in the input. - In Template dropdown, choose Page Resource
- Click on X Card and add the tag slug of the PAGES you want to show in this row on the Homepage. i.e. putting
toolsif you want to show all PAGES that are tagged astools - Publish and preview it on your homepage.
The final page content should look like this:
Repeat these two steps to create different resource sections on the homepage. You can have as many resource sections as you want.
Some notes:
- If you want to hide the link section, add
#no-linkto the Tags input.
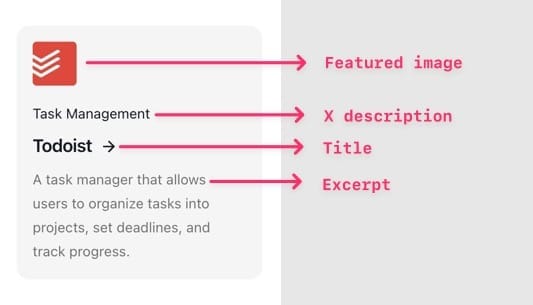
Add resource content
- In the Ghost admin page, go to Pages > click on New page.
- Enter the information for this resource:
- Page title as the title
- Excerpt as the project description
- X description as the project subtitle
- Featured photo (optional)
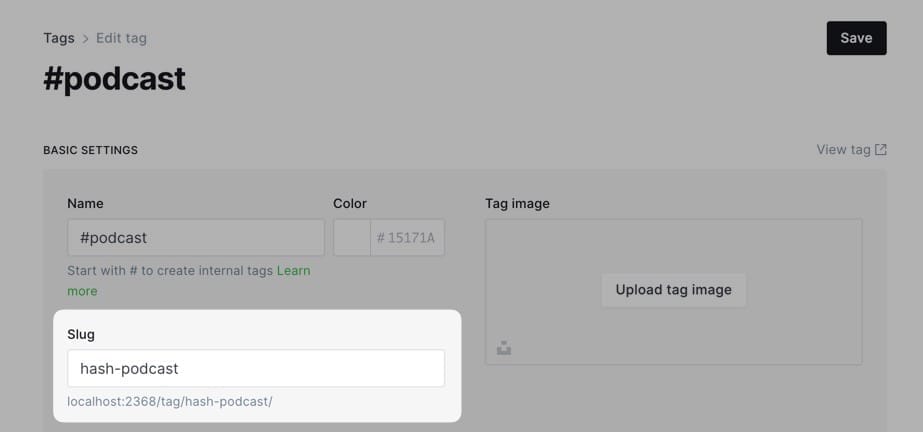
- Tag the page with any name you like, but it’s recommended to use internal tags that start with
#(e.g.,#podcast,#bookmark). We will use the tag name later. - (Optional) If you want to direct visitors to an external site, add the URL at Metadata > Canonical URL. By default, the link will lead to the Page detail.
- Publish.
- Repeat these steps to create different content blocks for the side projects section.
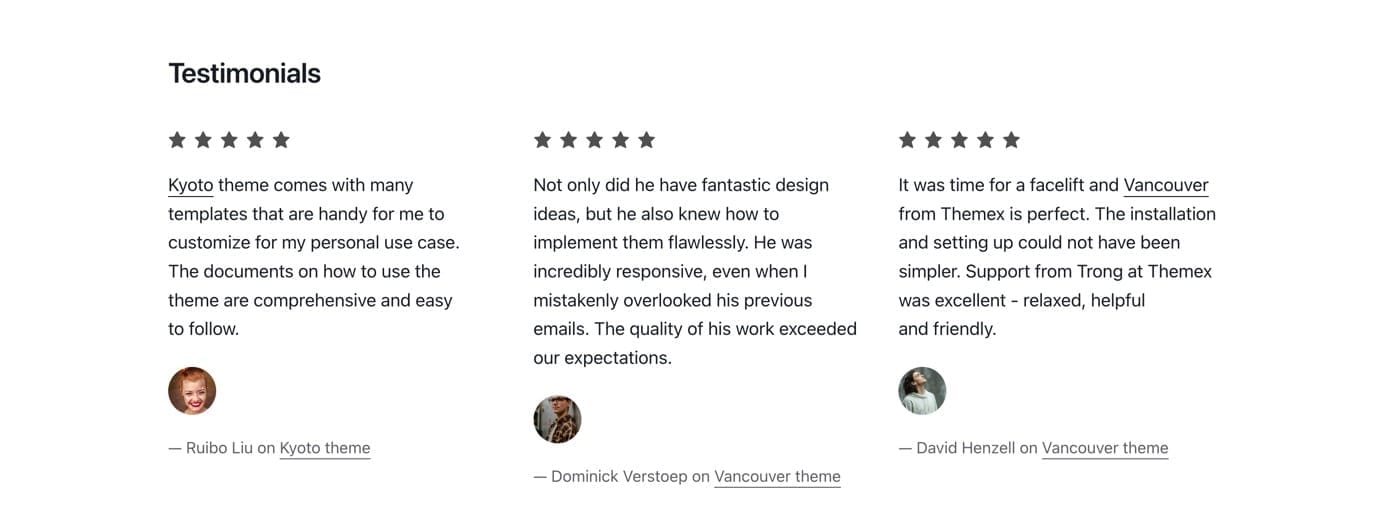
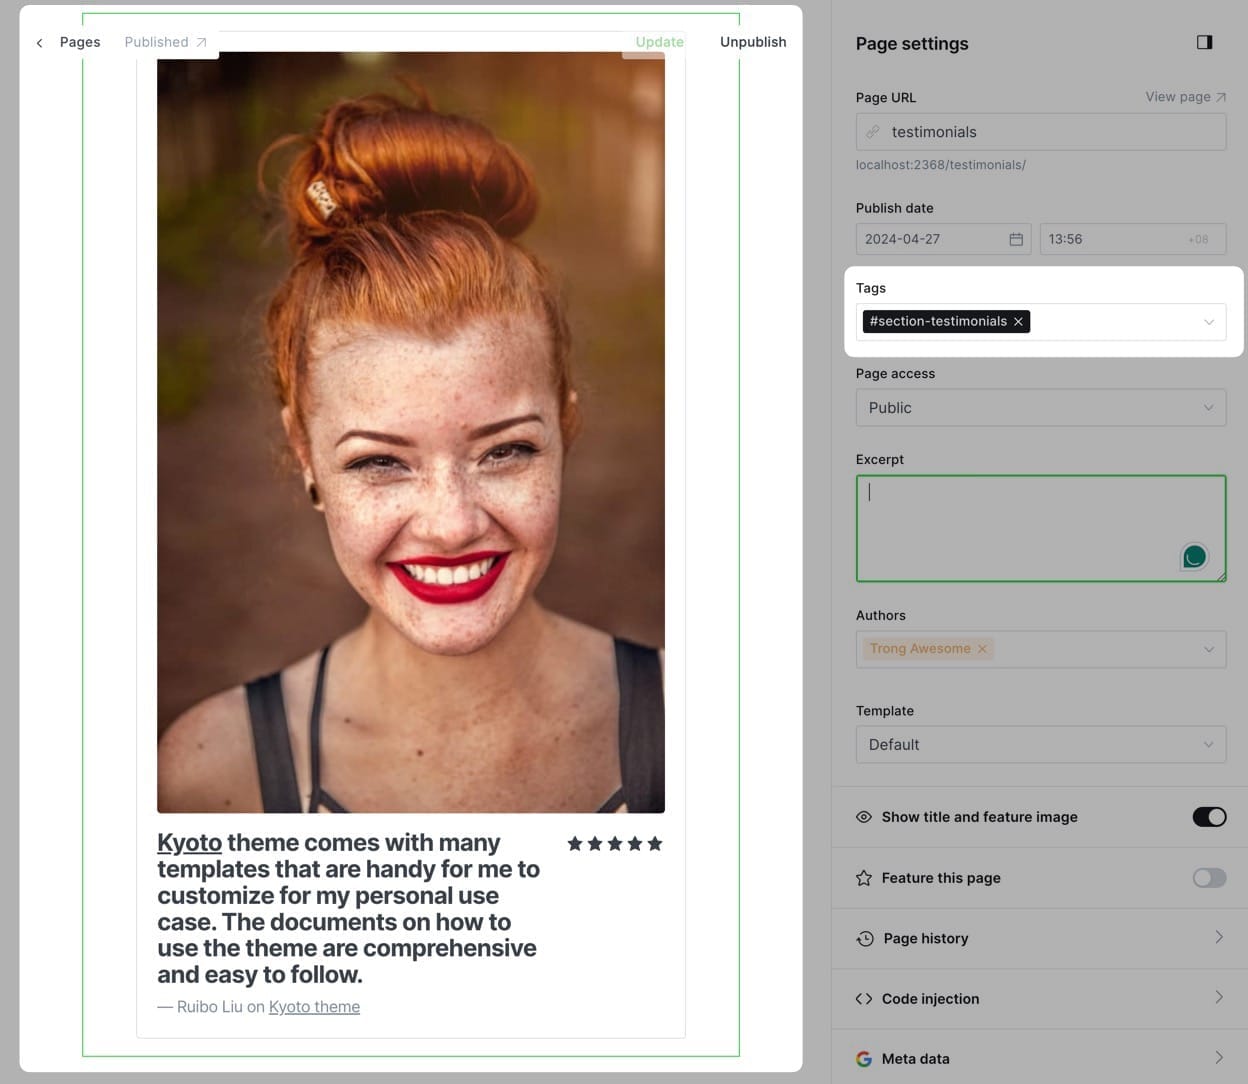
7/ Testimonials Section
To add a testimonials section, create a new page, give it a title, then add an internal tag #section-testimonials in the page settings.
Step-by-Step to add testimonial section
- In the Ghost admin page, go to Pages > click on New page.
- Enter the title of the page. This title will be the section title on the Homepage.
- In the page content, add a new Product card. You can find this card by clicking on the + icon on the left side of the editor or by typing
/productin the editor, then select the Product option. - On the product card, fill in the details:
- Title is the testimonial main text.
- Description shows a person's name and job title.
- Image as a profile picture.
- Stars as a rating.
- Add more Product cards to add more testimonials.
- In the Page Setting sidebar, add a tag named
#section-testimonials. Make sure it's the first tag in the input. - Publish and check your homepage.
The final page content should look like this:
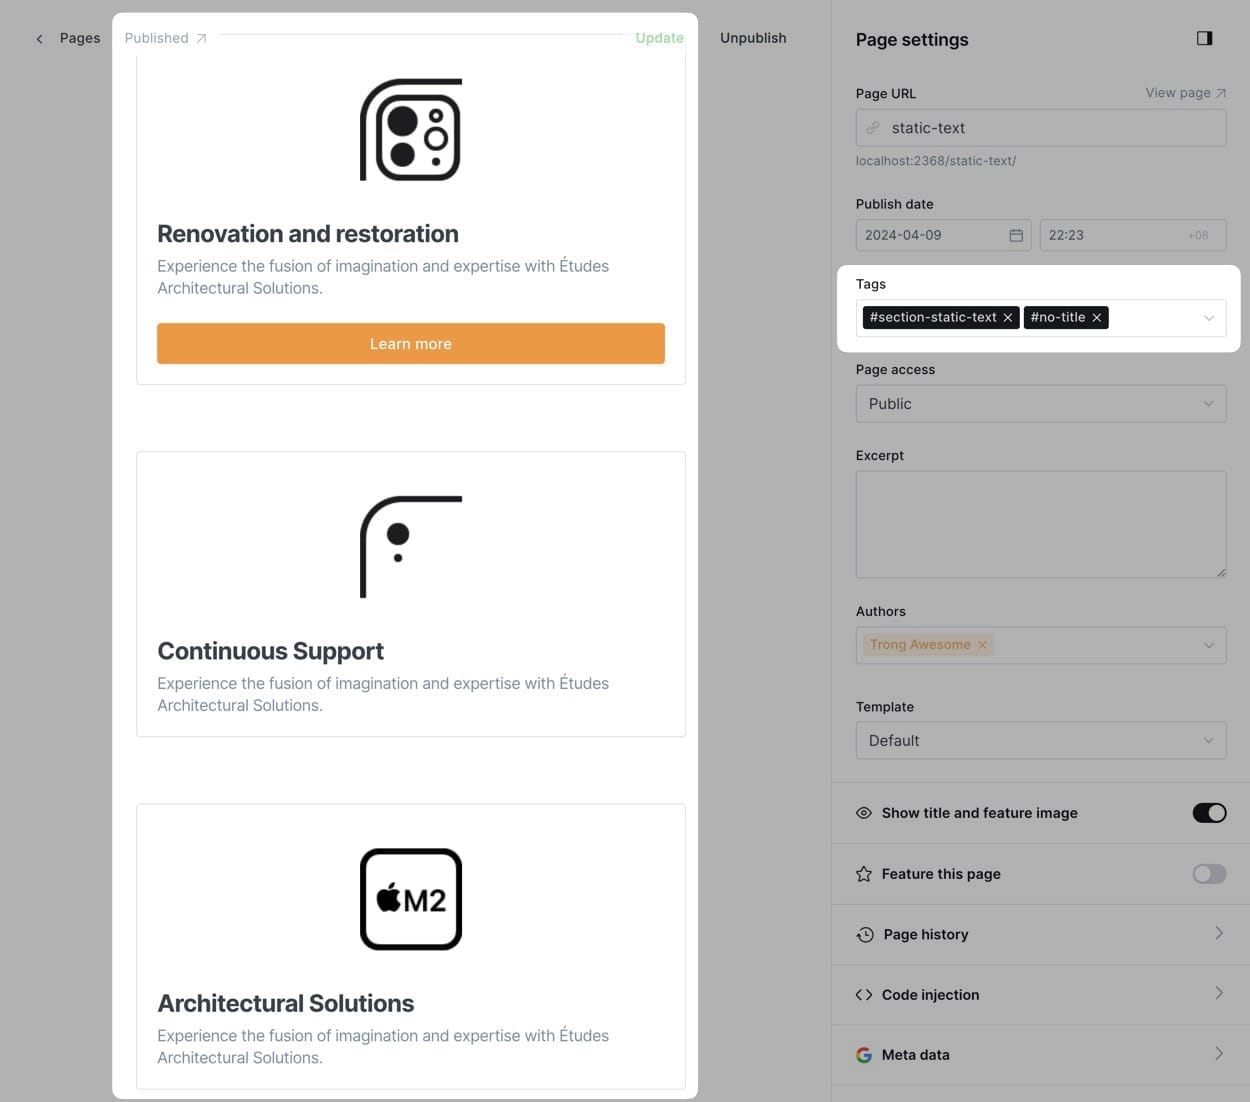
8/ Static Text Section
The static text section is useful for adding custom text on the homepage, such as your services, working principles, or values.
To add a static text section, create a new page, give it a title, then add an internal tag #section-static-text in the page settings.

Step-by-Step to add static text section
- In the Ghost admin page, go to Pages > click on New page.
- Enter the title of the page. This title will be the section title on the Homepage.
- In the page content, add a new Product card. You can find this card by clicking on the + icon on the left side of the editor or by typing
/productin the editor, then select the Product option. - On the product card, fill in the title, description, image, and link (optional).
- Add more Product cards to add more static text cards.
- In the Page Setting sidebar, add a tag named
#section-static-text. Make sure it's the first tag in the input. - Publish and check your homepage.
#no-title tag.The final page content should look like this:
If you want to create separate sections using Static text, create a new page and repeat the same steps above.
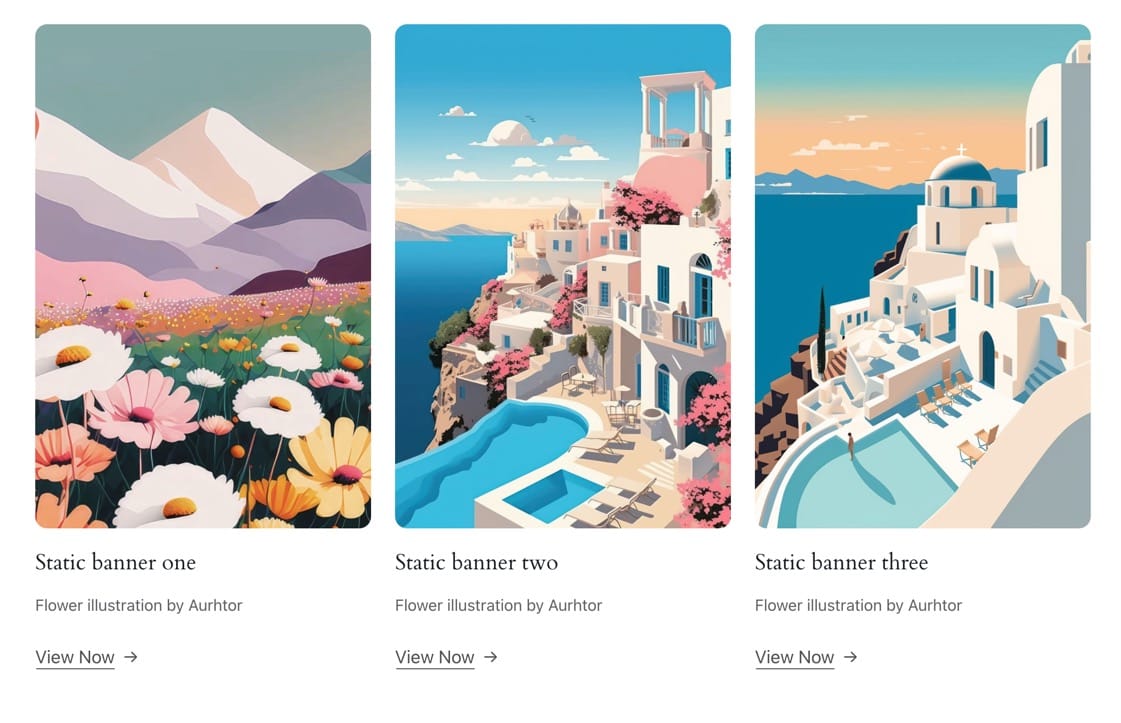
9/ Static Banner Section
If you prefer to show static images instead of text, you can use the static banner section.
You can repeat the same steps as creating the static text section but use the internal tag #section-static-banner.
Step-by-Step to add Static banner section
- In the Ghost admin page, go to Pages > click on New page.
- Enter the title of the page. This title will be the section title on the Homepage.
- In the page content, add a new Product card. You can find this card by clicking on the + icon on the left side of the editor or by typing
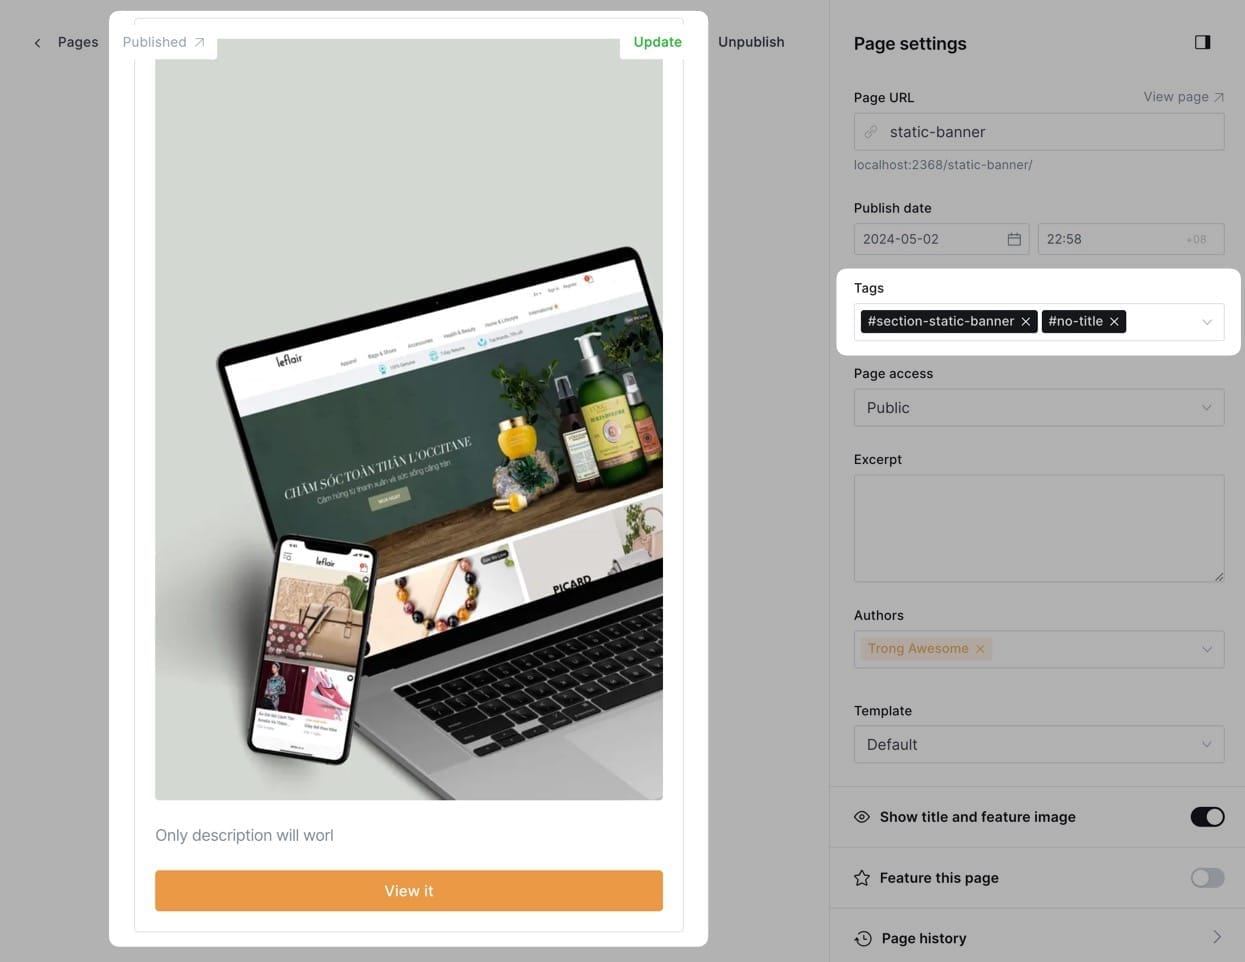
/productin the editor, then select the Product option. - On the product card, upload the image and link (if any). Title and description are optional.
- Add more Product cards to add more banners.
- In the Page Setting sidebar, add a tag named
#section-static-banner. Make sure it's the first tag in the input. - Publish and check your homepage.
#no-title tag.The final page content should look like this:
10/ Work Experiences Section
This section is to showcase your work history.
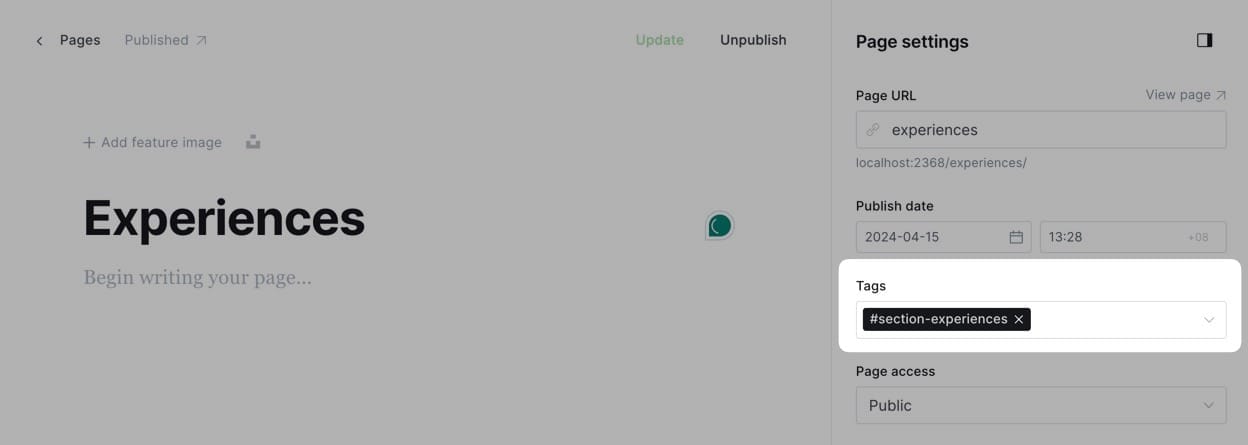
Step-by-Step to add work experiences section
- In Ghost admin, create a new Page.
- Give it a title; this title will be shown on the homepage and the blog page.
- Add
#section-experiencesto the Tags input. - Publish.
The final page content should look like this:
Now the Work experiences section is visible on the homepage. Next, add content for that section.
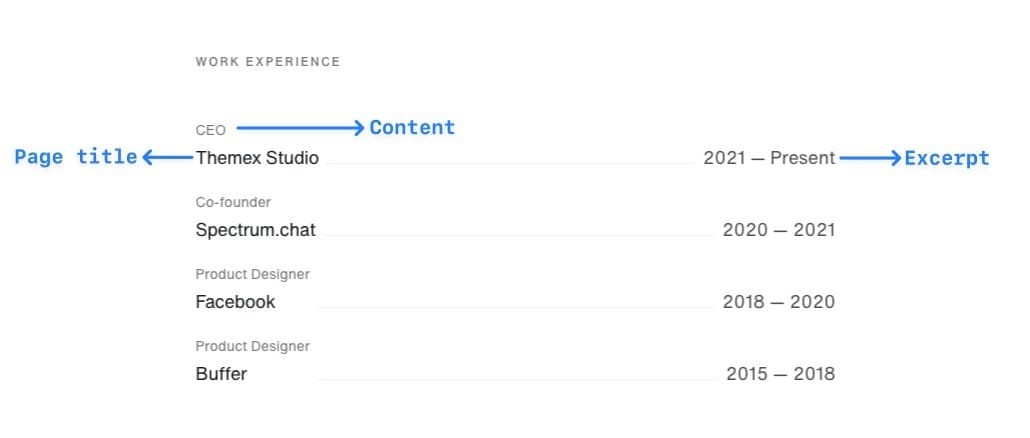
Step-by-Step to add work experience content
- In the Ghost admin page, go to Pages > click on New page.
- Enter the information for this project. Refer to the screenshot below.
- Tag the page as
#content-experience. Make sure it's the first tag in the input. - Click Publish.
11/ Books Sections
When you have some resources you want to show, such as helpful tools, newsletters, or bookmark links, resource sections are ideal for that. You can add as many resource sections as you want. Each section follows the same creation flow.
First, let’s start by adding some resource content to the Ghost CMS.
Add resource section on Homepage
- In Ghost admin, create a new Page.
- Give it a title; this title will be shown on the homepage and the blog page.
- In Page settings, add
#section-booksto the Tags input. - In Template dropdown, choose Page Resource
- Click on X Card and add the tag slug of the resource content you created in the previous step in the X description input. In this example, we’re using
tools. - Publish and preview it on your homepage.
The final page content should look like this:
Edit Shortcut Button
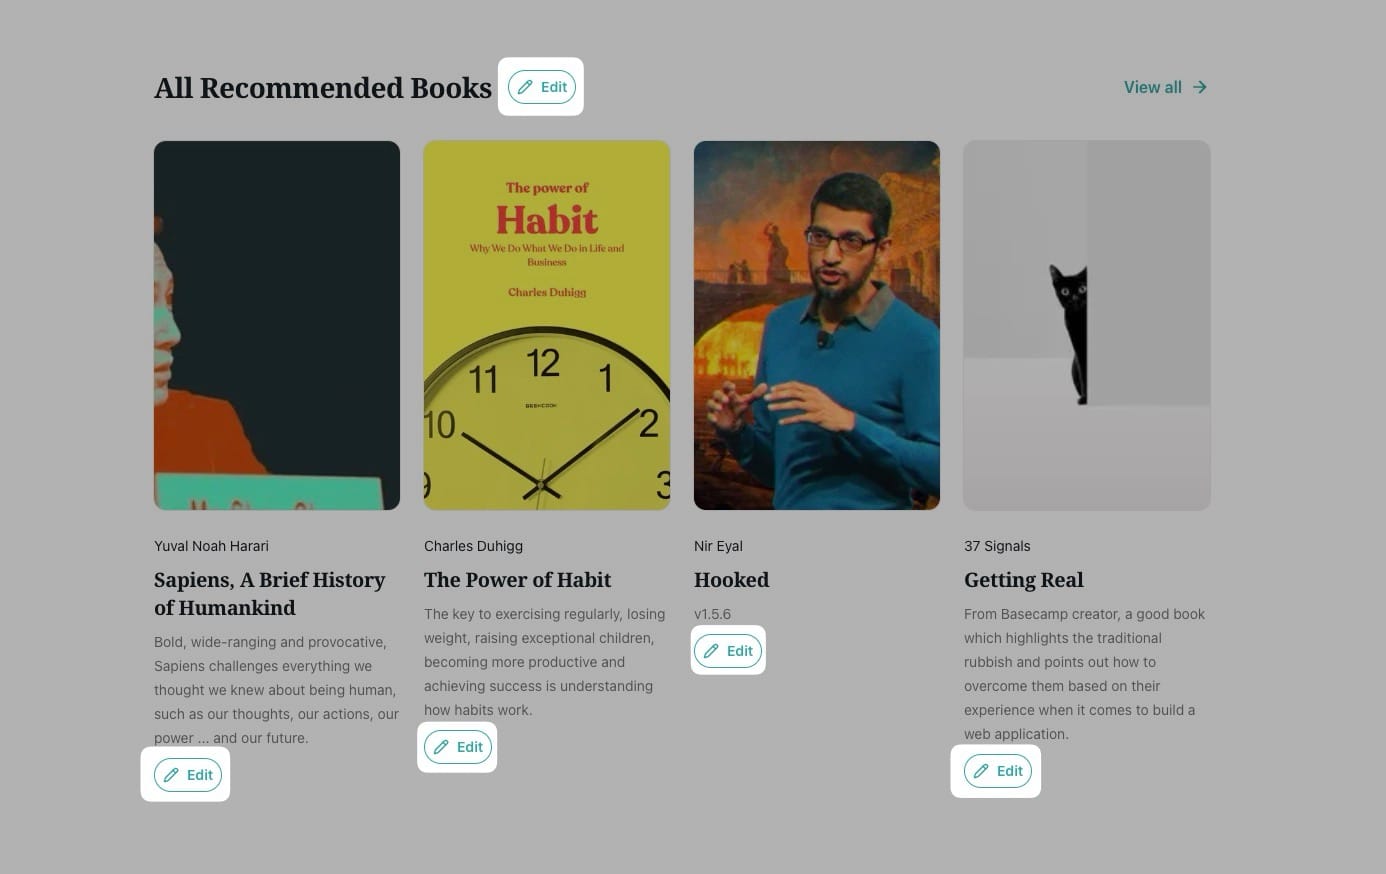
The Edit shortcut button provides quick access to edit pages/posts directly from your site's frontend. When enabled, it appears as a buttonn next to the section on the homepage that links to the Ghost admin editor to edit that page.
Enable/Disable Edit Mode
The edit shortcut button visibility is controlled by the Edit mode setting.
Step-by-Step to Enable Edit Mode:
- Go to Ghost Admin > Settings > Design & branding > Theme
- Find the Edit mode toggle switch
- Switch on to show the edit button, off to hide it
- Click Save
Always remember to turn off Edit mode after finishing editing. If left on, the Edit button will be visible to anyone viewing your public site (though they can't actually edit without admin access).
Other Customizations
Section Colors
You can add custom background colors for each section on the homepage by adding an Accent color for the respective internal tags.
Hide Section Title
If you want to hide the section title, add #no-title to the Tags input.
Hide Section Link
If you want to hide the link section, add #no-link to the Tags input.
Other pages
Blog page
A blog page displays all your posts in Ghost.
routes.yaml file.If you've already uploaded it, you can skip this step to create a blog page.
Step-by-Step to create the blog page:
- ⭐️ Important: Upload the routes.yaml file if you haven't done.
- In the Ghost admin page, go to Pages > click on New page.
- Add a title (e.g., 'Blog').
- Add a description or feature image for this page (optional).
- Click the icon in the top right corner to open the Page settings.
- Ensure the Page URL is
blog. - Click Publish.
Now you have a blog page with the URL yourblog.com/blog.
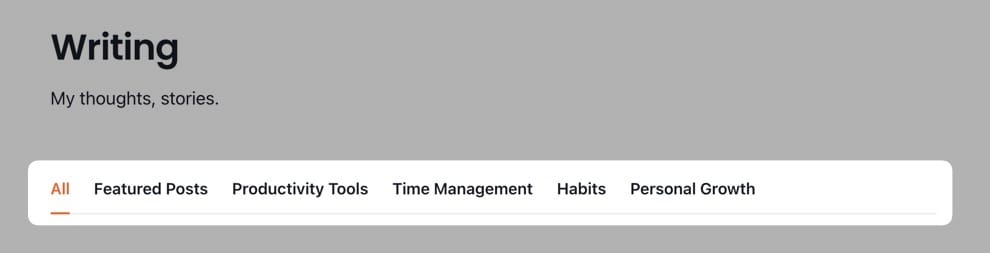
Blog category header
By default, the blog category header shows the top 5 tags sorted by the number of posts for each tag. You can also define which tags you want to display in the header.
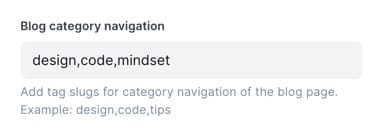
Step-by-Step to add custom items on the category header
- From Ghost admin, go to Settings > Design & Branding > Homepage.
- In Blog category navigation, enter the slugs for each tag, separated by commas without any whitespace (e.g.,
design,code,mindset). - Click Save.
The final page content should look like this:
Add featured items to the category header
You can create a separate page to showcase all featured posts and add it to the category header.
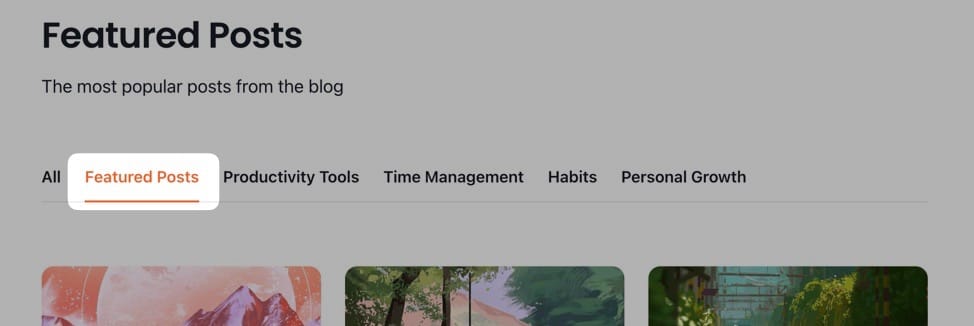
routes.yaml file.Step-by-Step to add a featured page to the category header:
- In the Ghost admin page, go to Pages > click on New page.
- Add a title (e.g., 'Featured Posts').
- Add a description or feature image for this page (optional).
- Click the icon in the top right corner to open the Page settings.
- Ensure the Page URL is
featured-posts. - Click Publish.
Post styles
The theme supports different styles for the post feed. Please check [TK Different post styles for blog section].
Work or Case Study page
This page serves as your portfolio, showcasing your work experiences, side projects, testimonials, and case studies.
routes.yaml file.If you've already created a [case studies section](TK Link), you can skip this step to create the work page.
Step-by-Step to create the work page:
- In the Ghost admin page, go to Pages > click on New page.
- Add a title (e.g., 'Works').
- Add a description for this page (optional).
- Click the icon in the top right corner to open the Page settings.
- Ensure the Page URL is
works. - Click Publish.
Now you have a work page with the URL yourblog.com/works.
All the block content of this page is the same as the options on the homepage. Refer to the homepage customization to adjust content for this page.
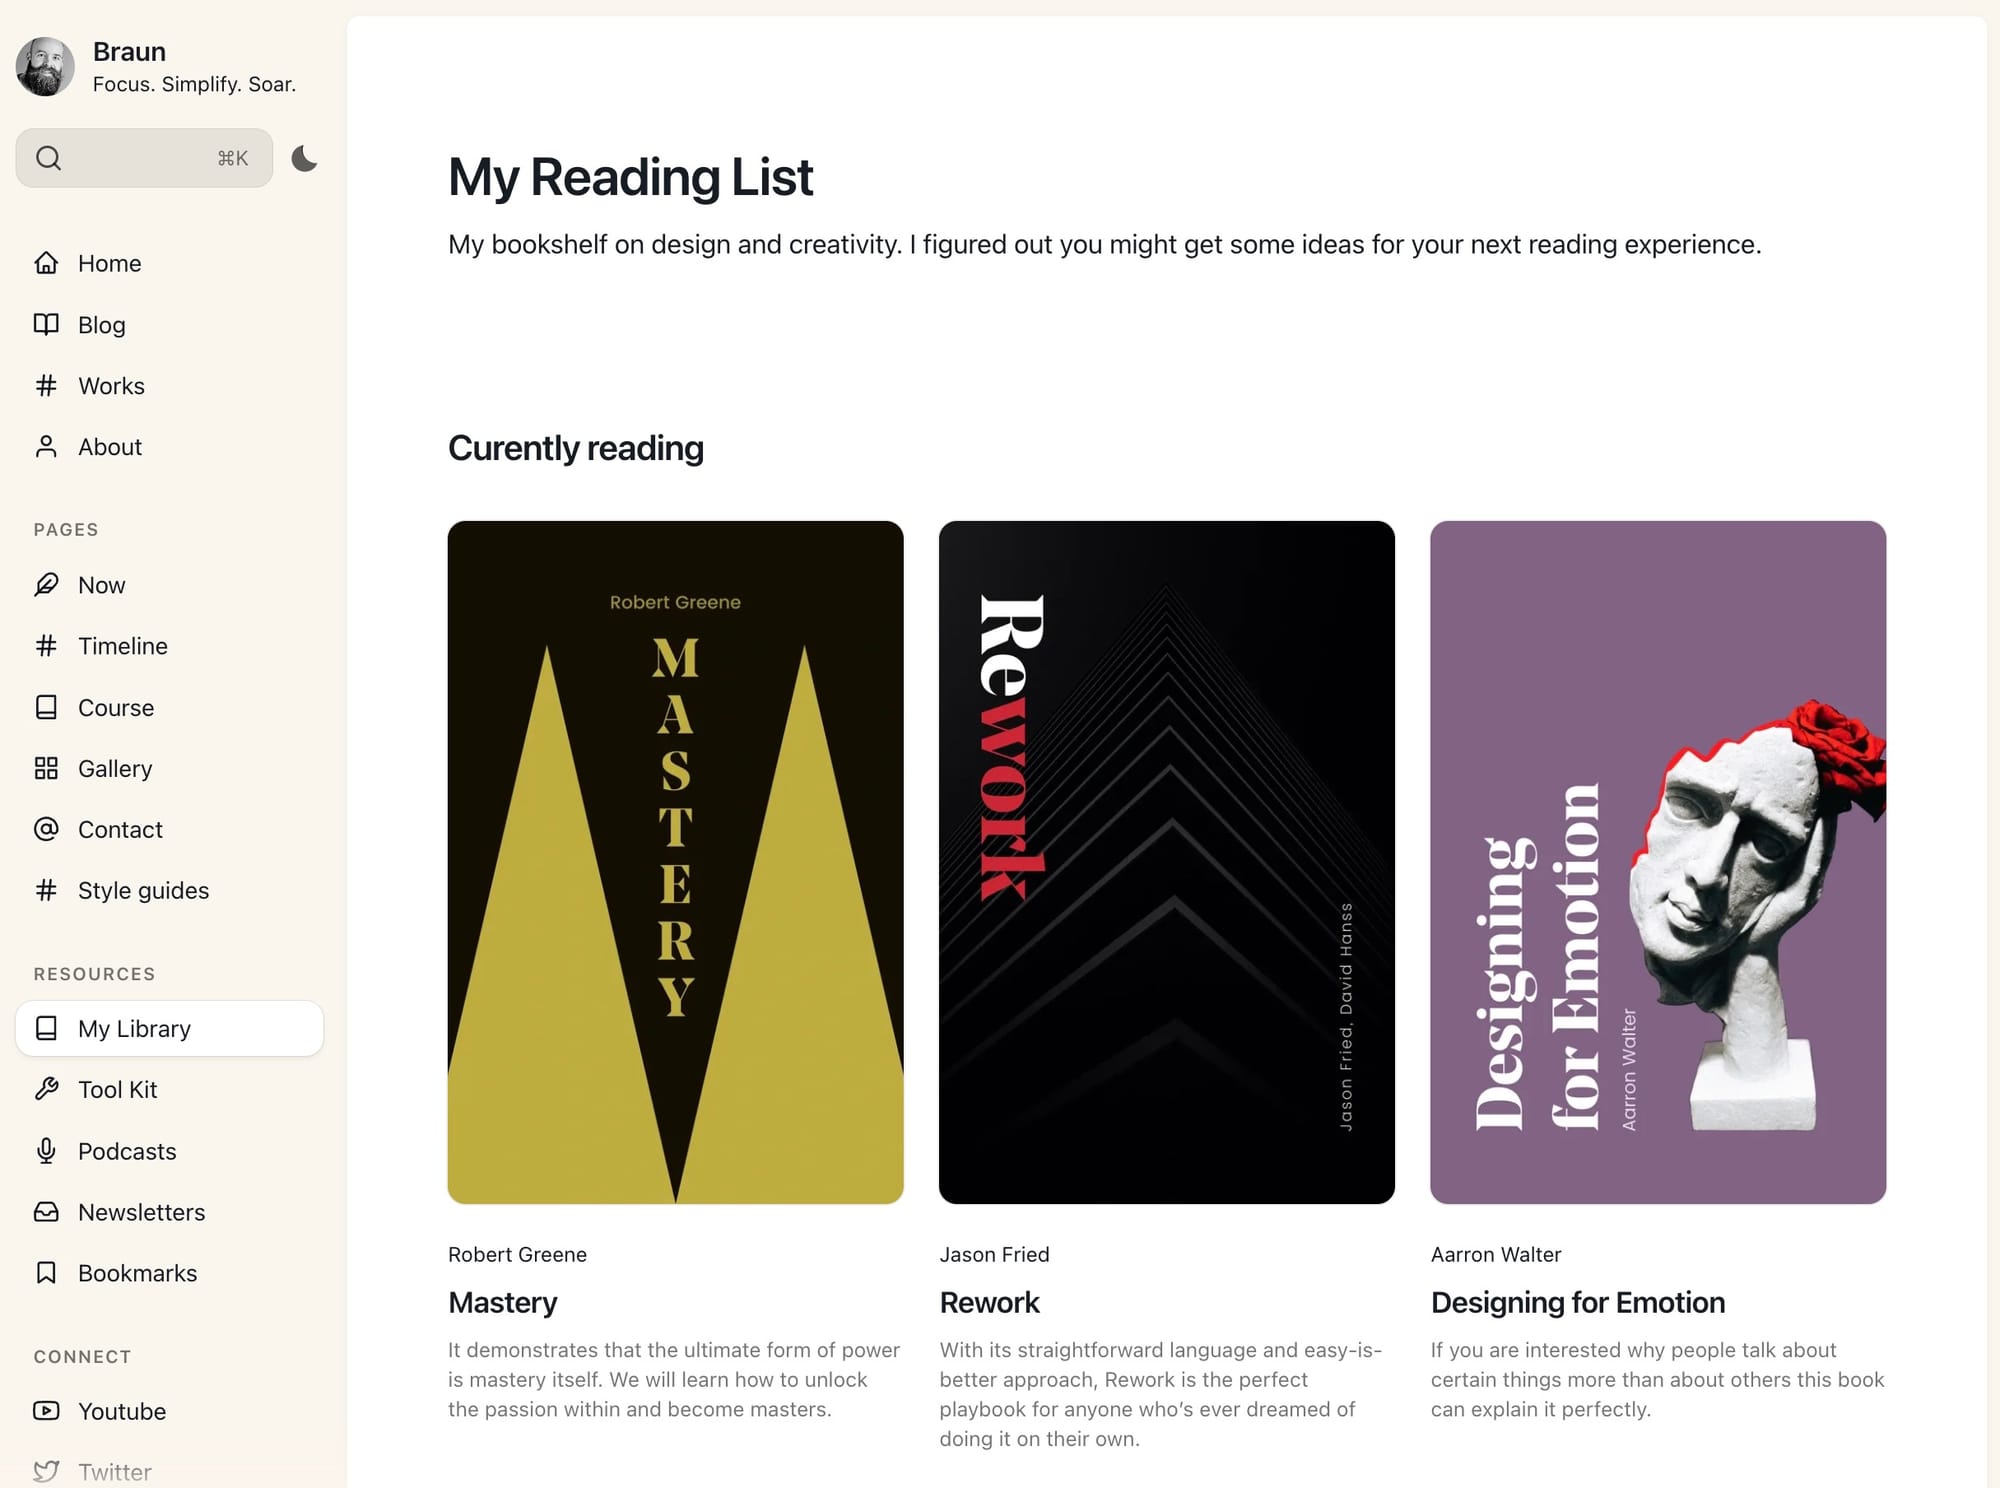
Books page
For Braun v1.7.0 and above
The Books template is now a flexible tool for creating organized collections of any type of content.
While it's still called the "Books" template, it now adapts to showcase books, courses, resources, projects, or any other categorized content you want to organize and display. And you can create as many pages as you like.
Step-by-Step to use Books template
- In Ghost admin, create a new Page.
- Give it a title, excerpt, and feature image.
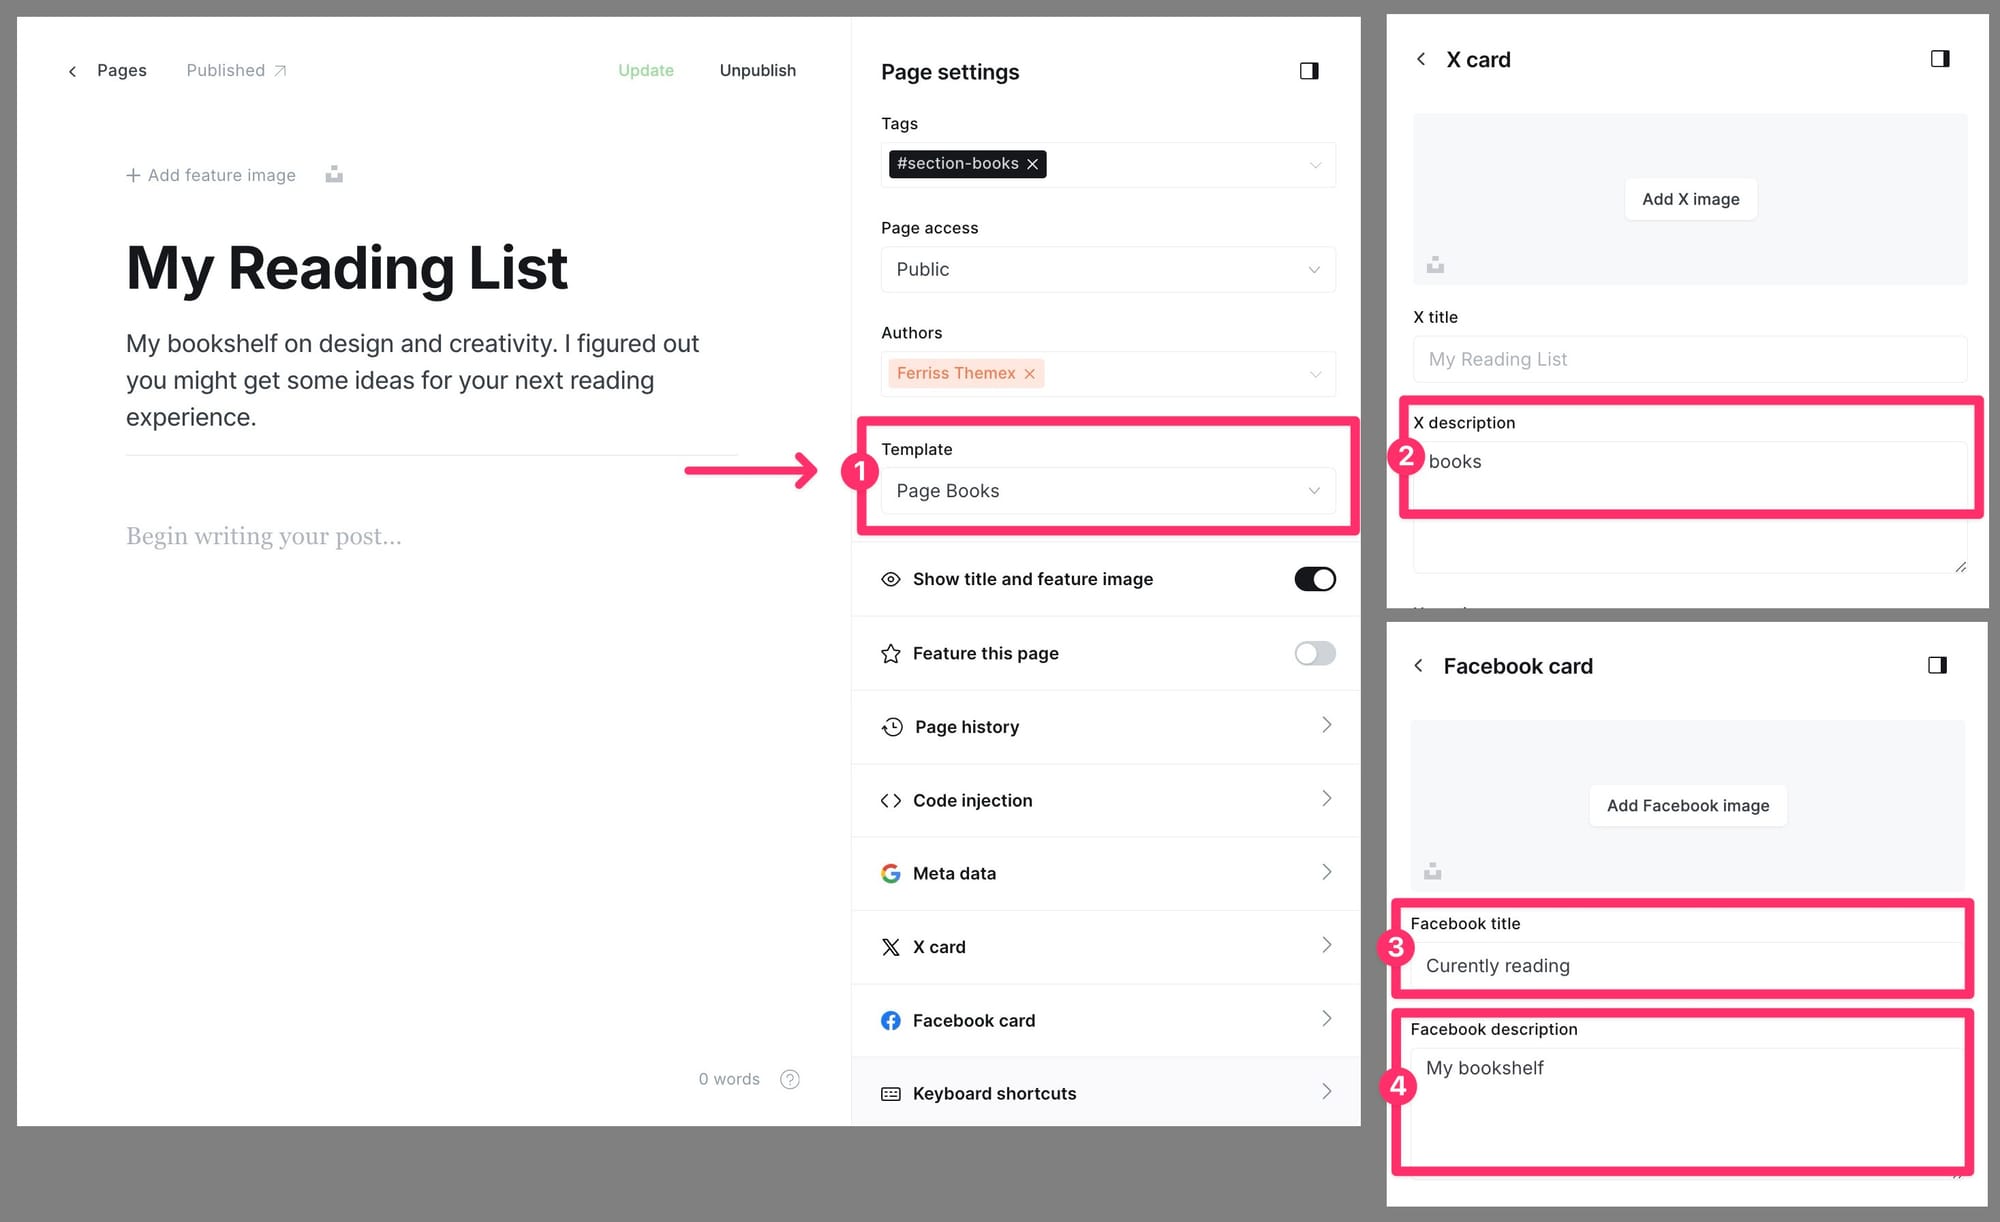
- In Template dropdown, choose Page Books
- Click on X Card and add the tag slug of the posts you want to show in this page. This is your tag filter - the tag that identifies your collection. i.e. putting
booksif you want to show posts that are tagged asBooks - Additional: Add section titles to the page
- Top section will show featured posts. Showing it by adding section title in Facebook card > Facebook title
- Bottom section will show all tagged posts. Adding the text in Facebook card > Facebook description.
- ☝️ Note: Since the featured posts are shown on the top section, they would be excluded from the bottom section.
- Publish and preview it on your homepage.
You can create multiple timeline pages with different content using this template by repeating the same steps above.
For Braun below v1.7.0
Step-by-Step to create the books page:
- Important: Ensure you upload the routes.yaml file.
- In the Ghost admin page, go to Pages > click on New page.
- Add a title (e.g., 'Books').
- Add a description and featured image for this page (optional).
- Click the icon in the top right corner to open the Page settings.
- Ensure the Page URL is
books. - Click Publish.
Now you have a books page with the URL yourblog.com/books.
Add content for the books page:
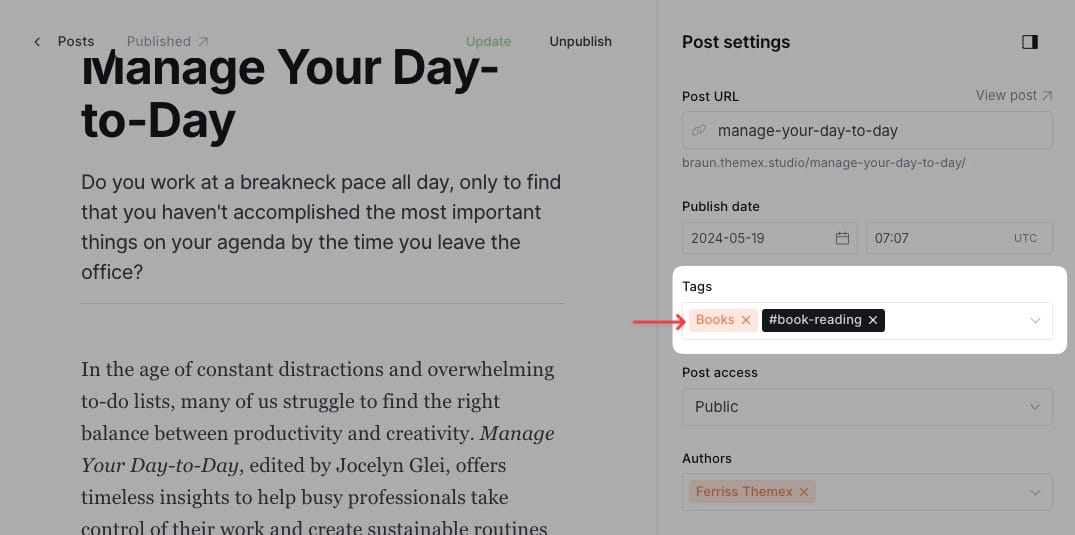
- Create a new post and write your content.
- Tag it as
Books. - Click Publish.
Book card anatomy:

For Braun below v1.7.0
Add current reading section:
- Open the post for the book you're reading.
- In the post settings, add the tag
#book-reading. - Click Update.
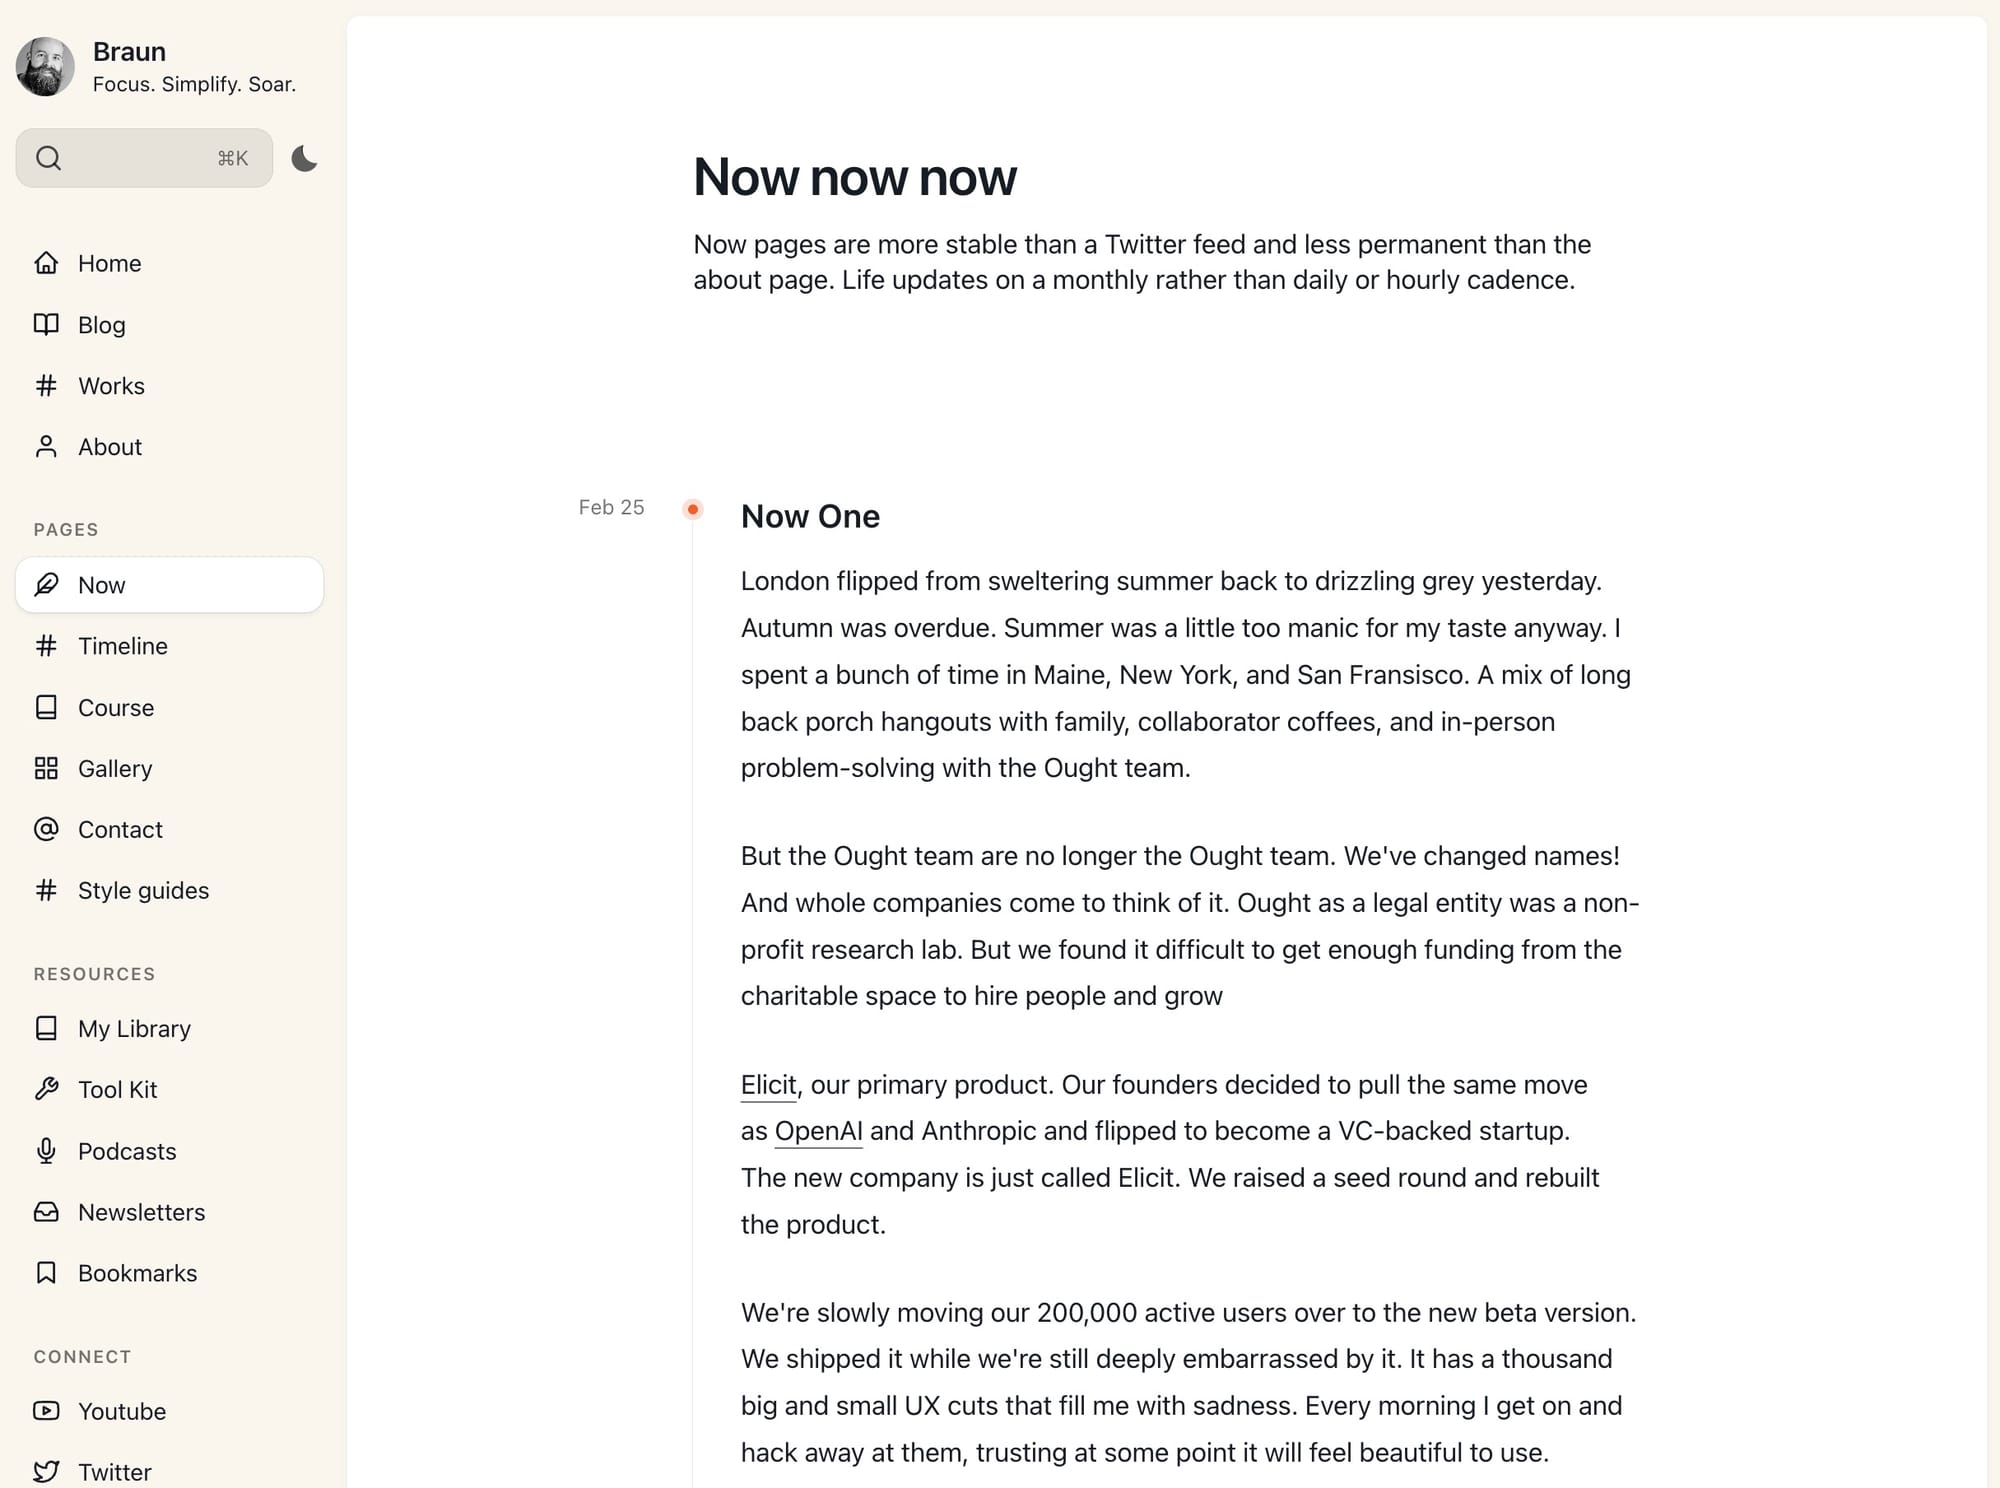
Now page
Now is a nice place for you to show what this person is focused on at this point in their life.
It’s inspired by nownownow.com projects. But we treat it differently by showing the whole history of the page, not just the latest update.
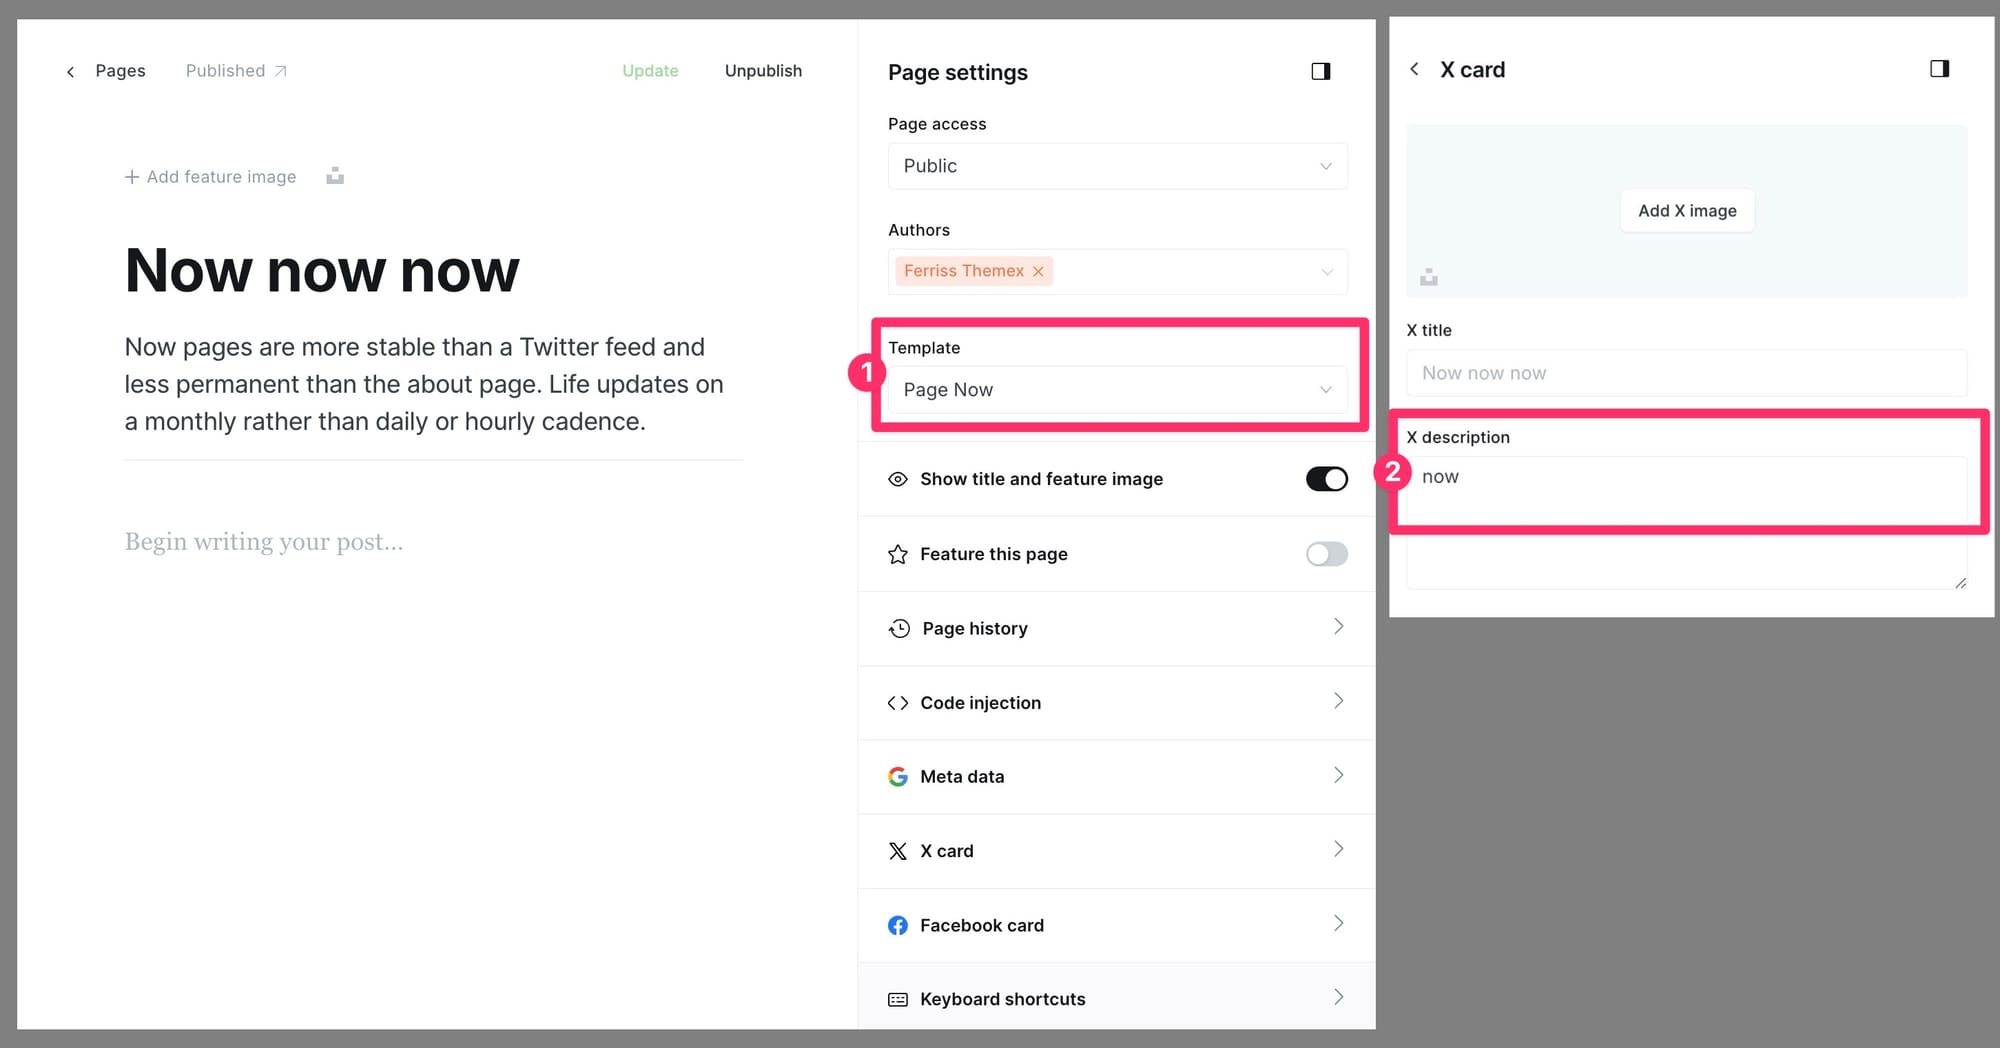
For version 1.7.0 and above
Step-by-Step to use Now template
- In Ghost admin, create a new Page.
- Give it a title, excerpt, and feature image.
- In Template dropdown, choose Page Now
- Click on X Card and add the tag slug of the posts you want to show on this page. This is your tag filter - the tag that identifies your collection. i.e. putting
nowif you want to show posts that are tagged asNow - Publish and preview it on your homepage.
For Braun below v1.7.0
Step-to-Step to create the Now page:
- Important: Ensure you upload the
routes.yamlfile. - In the Ghost admin page, go to Pages > click on New page.
- Add a title (e.g., 'Now').
- Add a description and featured image for this page (if you want to).
- Click the icon in the top right corner to open the Page settings.
- Ensure that the Page URL is
now. - Click Publish.
- Now you have a work page with the URL
yourblog.com/now.
Add content for Now page:
- Create a new Post and write your content.
- Tag it as
Now. - Click Publish.
Now will show all the posts tagged as Now and sort it by created time, from latest to oldest. Also those posts are only showing on the Now page, not on the Home or Blog page.
Timeline page
This custom page is designed for a linear reading experience, suitable for showcasing milestones or timeline.
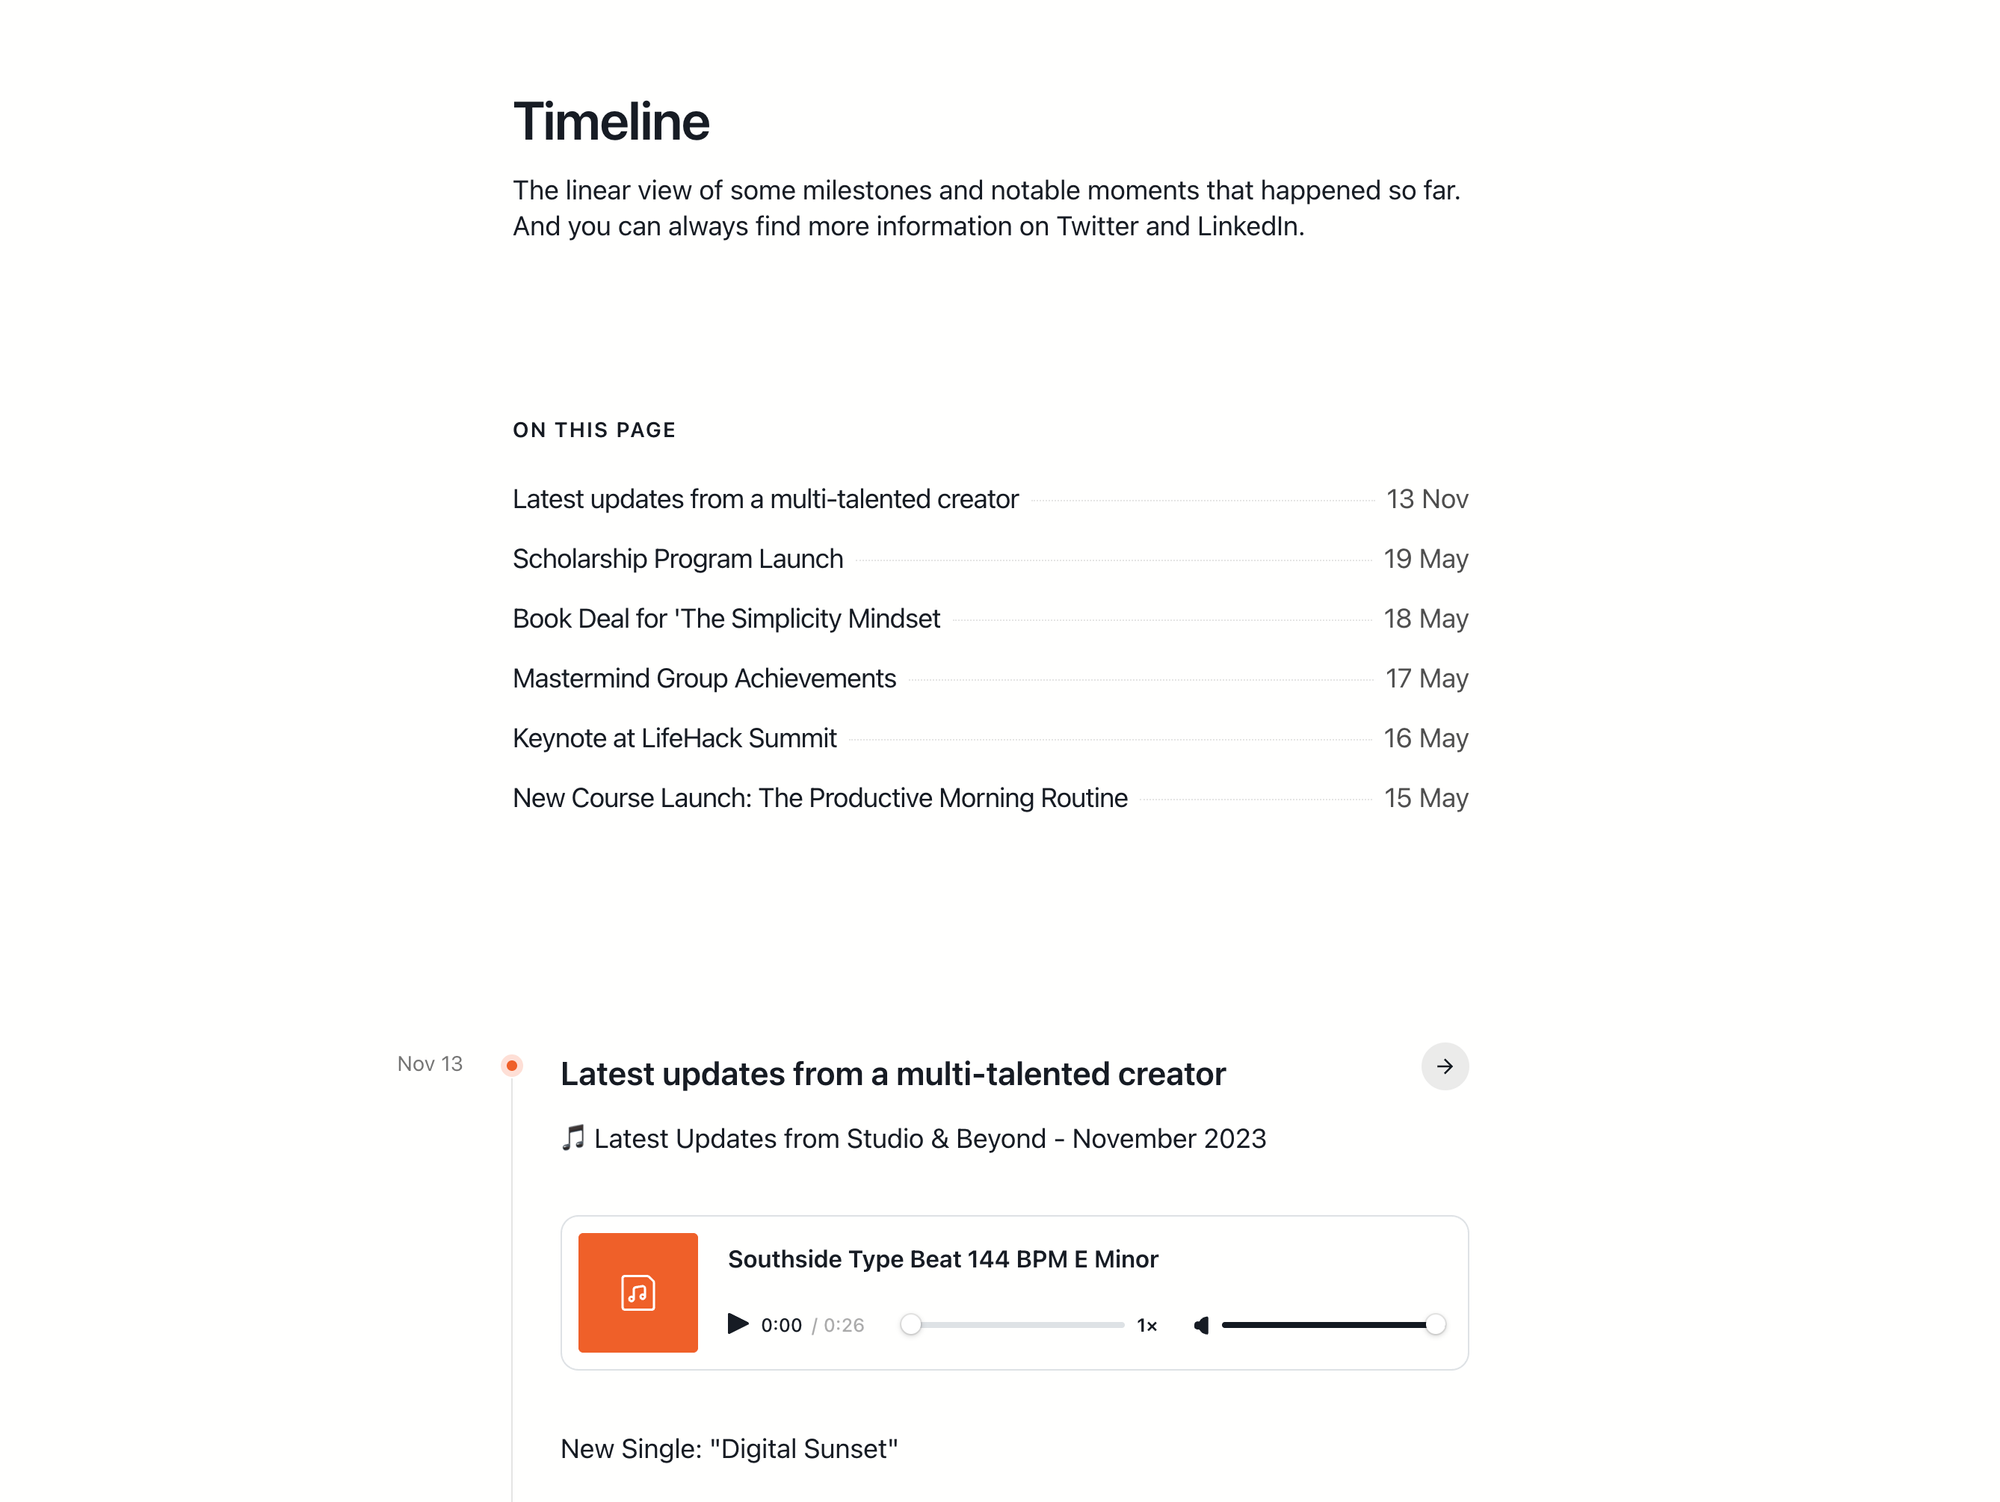
For version 1.7.0 and above
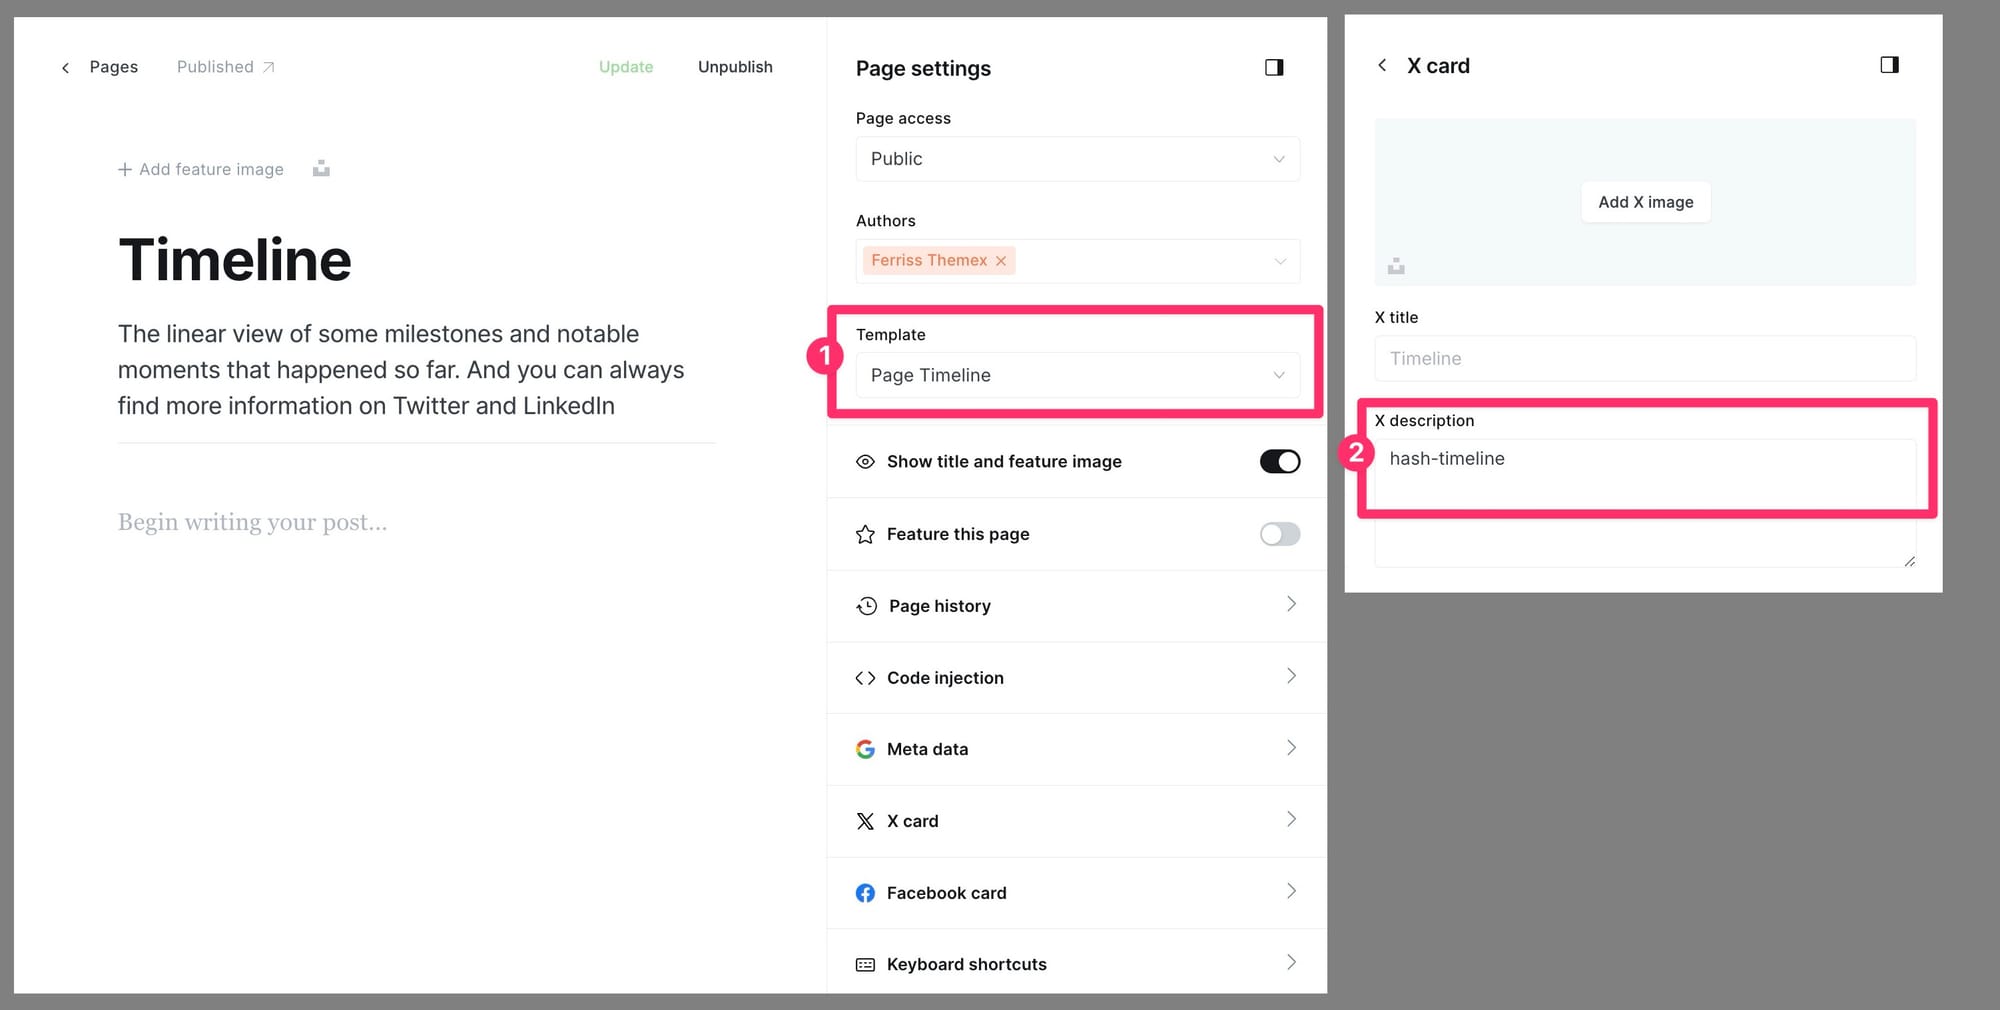
Step-by-Step to use Timline template
- In Ghost admin, create a new Page.
- Give it a title, excerpt, and feature image.
- In Template dropdown, choose Page Timeline
- Click on X Card and add the tag slug of the posts you want to show on this page. This is your tag filter - the tag that identifies your collection. i.e. putting
timelineif you want to show posts that are tagged asTimeline - Publish and preview it on your homepage.
You can create multiple timeline pages with different content using this template by repeating the same steps above.
For Braun below v1.7.0
You can use this template to create multiple pages. Update the routes.yaml file to configure the URL and tag data.
Step-by-Step to create the timeline page:
- Important: Ensure you upload the
routes.yamlfile. - In the Ghost admin page, go to Pages > click on New page.
- Add a title (e.g., 'Timeline').
- Add a description and featured image for this page (optional).
- Click the icon in the top right corner to open the Page settings.
- Ensure the Page URL is
timeline. - Click Publish.
Add content for the timeline page:
- Create a new post and write your content.
- Tag it as
#timeline. - Click Publish.
This will display all the posts tagged as #timeline and sort them by creation time, from latest to oldest.
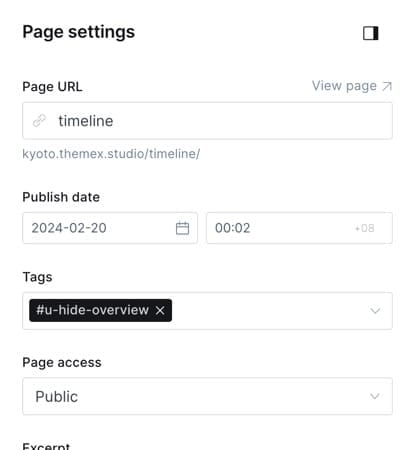
Hide "On this page" or Table of Contents section
If you don't want the Table of Contents on this page, you can hide it by tagging the page as #u-hide-overview.
Step-by-Step:
- In the Ghost admin page, go to Pages and find the timeline page you want to hide the Table of Contents on.
- In the page settings, add the tag
#u-hide-overview. - Click Update.
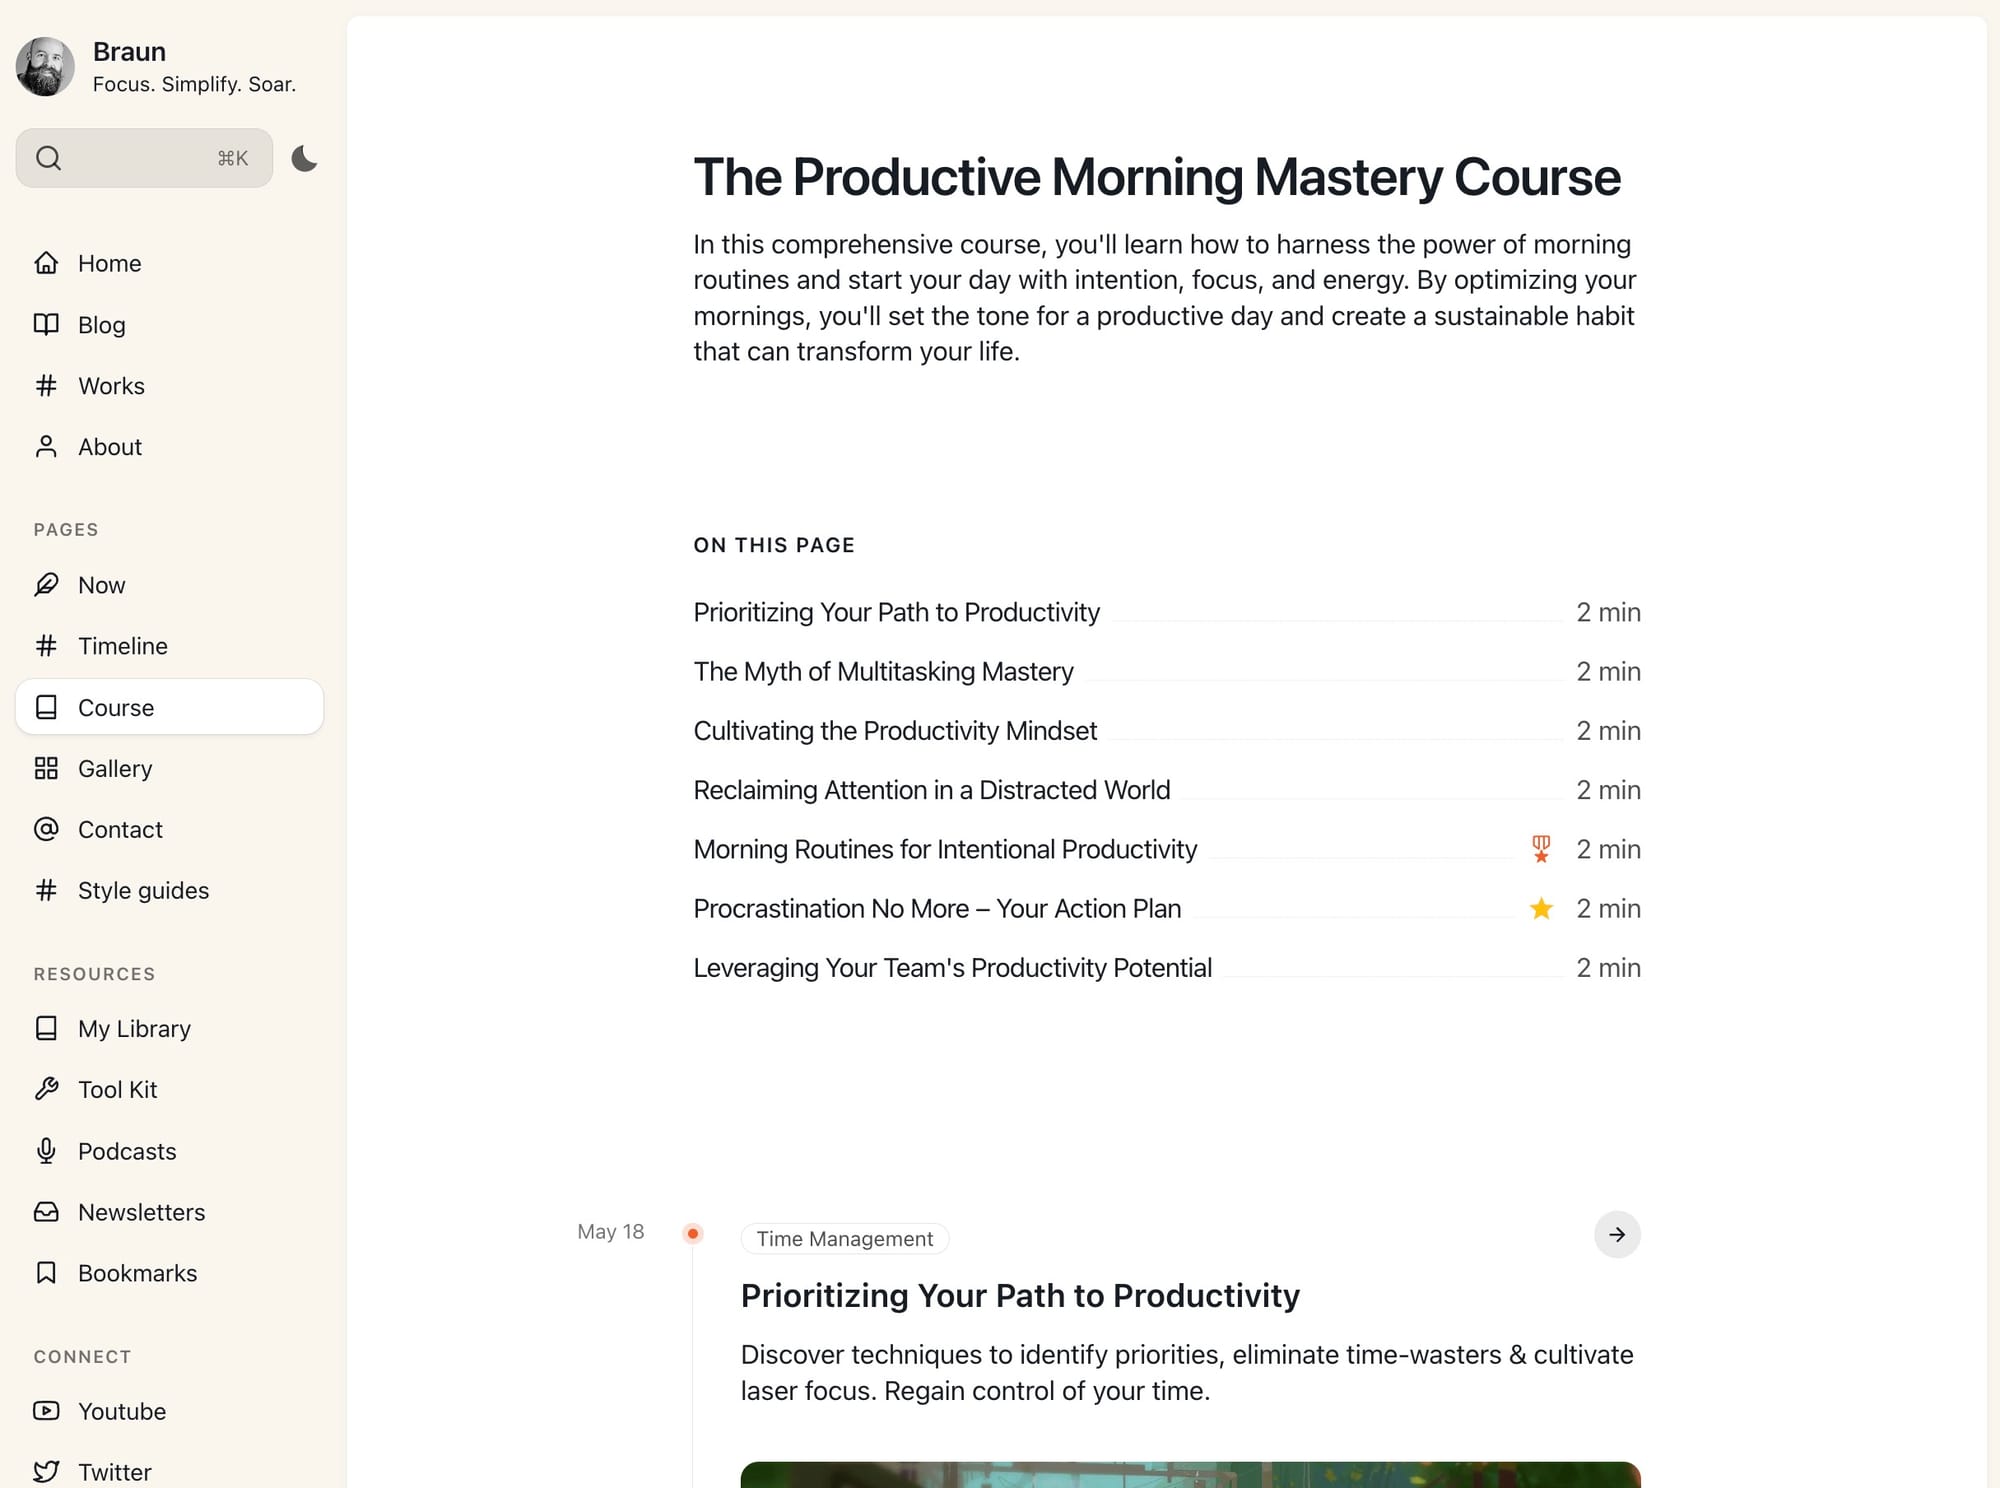
Serie/Course page
Similar to Timeline page, but here you can create your own series/courses. No more updating routes.yaml page and can be used to create multiple course, series easily. More flexibility in how you organize your content.
For version 1.7.0 and above
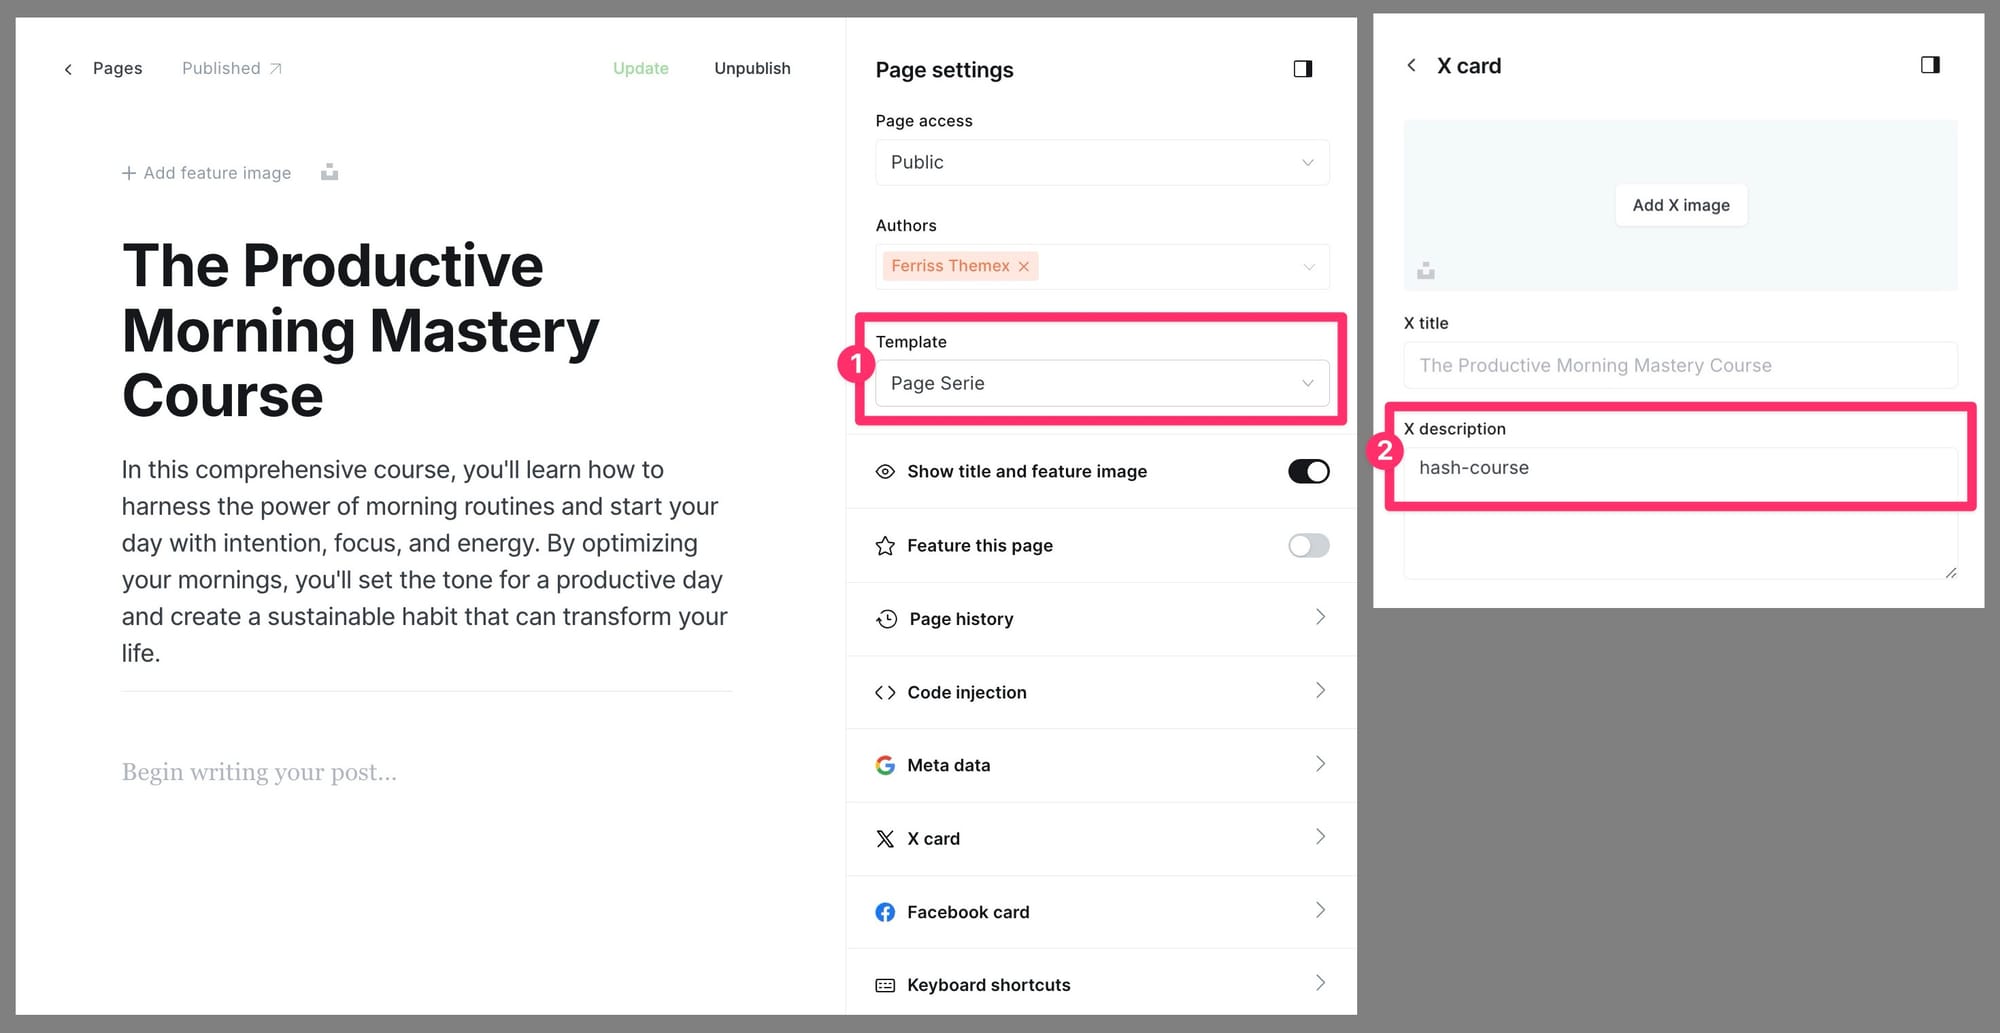
Step-by-Step to use Serie template
- In Ghost admin, create a new Page.
- Give it a title, excerpt, and feature image.
- In Template dropdown, choose Page Serie or Page Serie Short
- Page Serie: Showing the full content of each post.
- Page Serie Short: Showing the overview of the post (title, excerpt, feature photo).
- Click on X Card and add the tag slug of the posts you want to show on this page. This is your tag filter - the tag that identifies your collection. i.e. putting
course-codingif you want to show POSTS that are tagged asCourse Coding.
- ‼️ Note: Curently, we don't support PAGES as content. So if you're creating content as pages instead of posts, nothing will show up. - Publish and preview it on your homepage.
You can create multiple timeline pages with different content using this template by repeating the same steps above.
For Braun below v1.7.0
Step-by-Step to create the timeline page:
- Important: Ensure you upload the
routes.yamlfile. - In the Ghost admin page, go to Pages > click on New page.
- Add a title (e.g., 'Course').
- Add a description and featured image for this page (optional).
- Click the icon in the top right corner to open the Page settings.
- Ensure the Page URL is
course. - Click Publish.
Add content for the Course page:
- Create a new post and write your content.
- Tag it as
course. - Click Publish.
This will display all the posts tagged as course and sort them by creation time, from latest to oldest.
Posts
The theme provides different post templates:
- Default
- Narrow featured image
- Full featured image
- No featured image
To choose which template to use when you publish a post:
- In the post editor page, click the icon in the top right corner to open the Post settings.
- Find the Template selector and choose the style you want for your post.
Post page options
The theme supports other customizations:
- Hide/Show author
- Hide/Show social sharing buttons
- Hide/Show subscription box in the post page
Customize visual for case study page
You might want to create a special visual for some pages, like the hero header of your case study page. You can do this with Kyoto and Ghost.
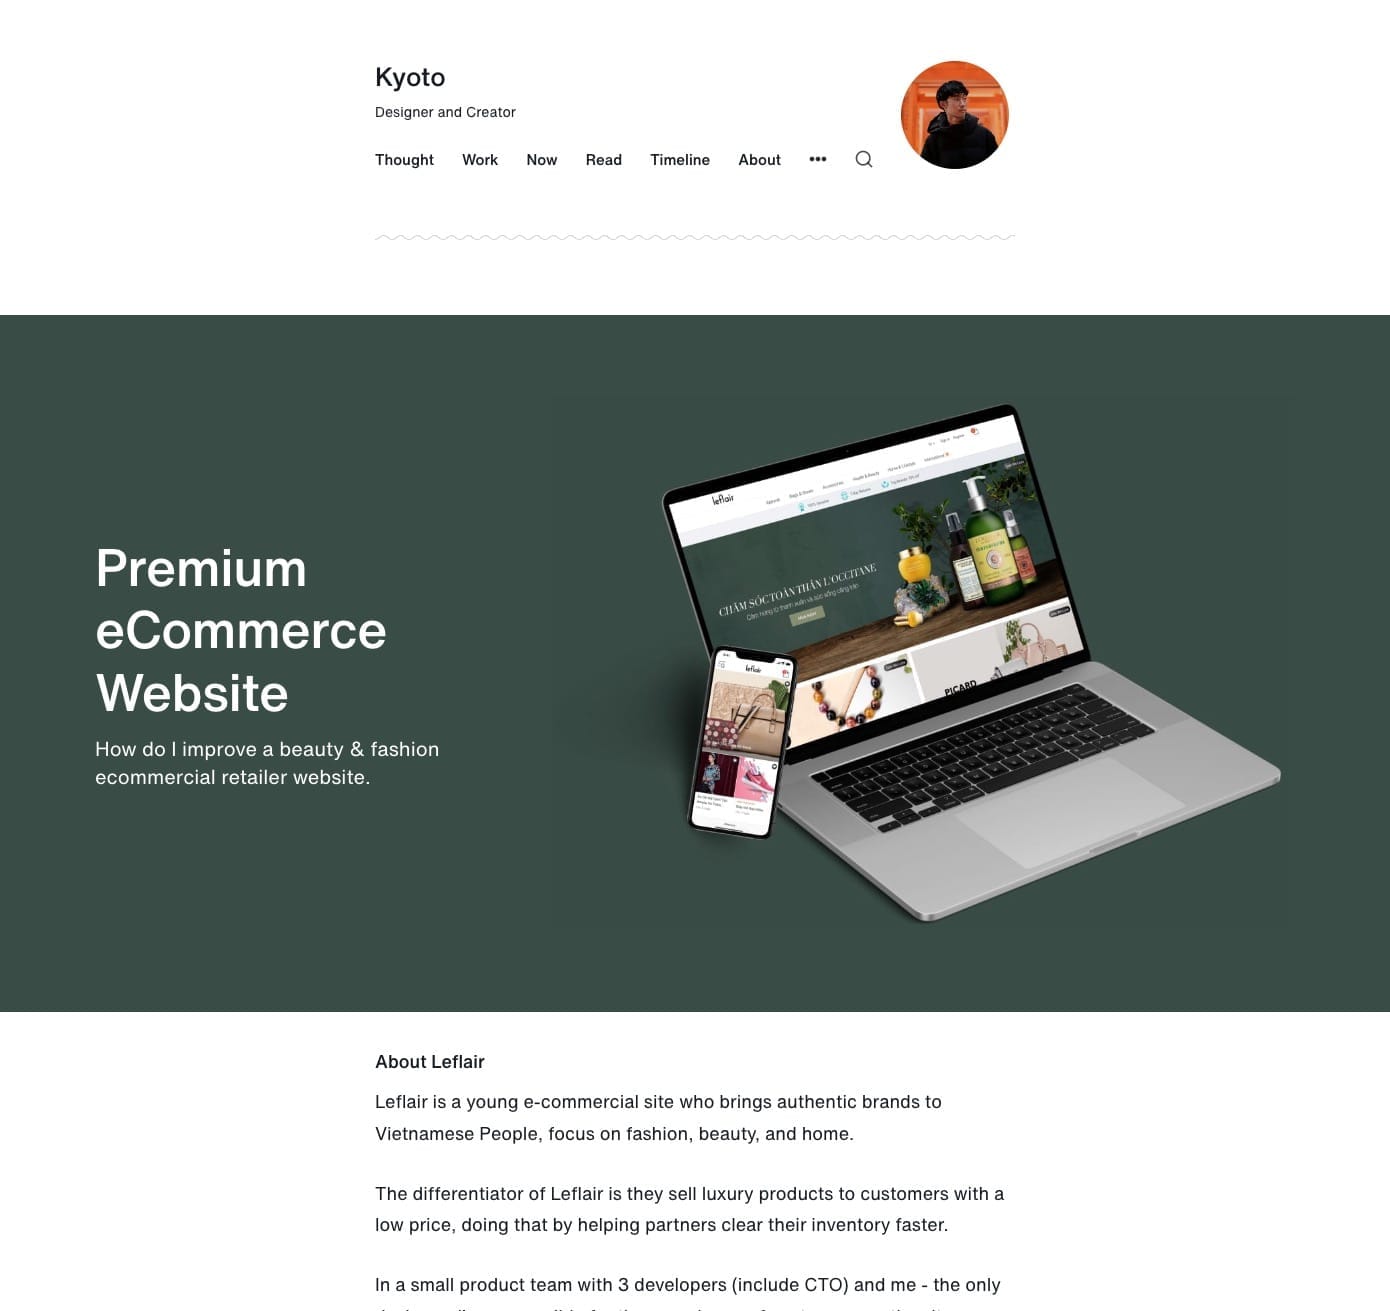
Step-by-Step to create the special header for pages:
- In the Ghost admin page, go to Pages > click on New page.
- Add your page's content: title, content, excerpt, featured image, etc.
- At the top of the content area, add a Header card by clicking the plus icon or typing
/and choosing Header from the list. - Add a custom title and upload a photo.
- If you want to show the full photo (without cropping on different screen sizes), hover over the photo area and click the collapse arrow icon. You can also choose a custom background color for this section.
- In Page settings, turn off
Show title and feature image. - Click Publish.
Contact page
To provide a way for your readers to contact you, create a contact page using Formspree.
Step-by-Step:
- Create a new page and give it a title (e.g., 'Contact').
- Add a feature photo (optional) and choose a layout from the Template option.
- Choose any template; a special template named "Page" is available under the template option. You can choose any other template as well.
- Add your content and the contact form code using Formspree. See the code example below.
- Click Publish.
- To add the page to the navigation, refer to the Navigation section.
<form id="fs-from" name="simple-contact-form" accept-charset="utf-8" action="https://formspree.io/f/{your_form_id}" method="post">
  <fieldset id="fs-from-inputs">
    <label for="full-name">Your name</label>
    <input type="text" name="name" id="full-name" placeholder="e.g. John" required>
    <label for="email-address">Email address</label>
    <input type="email" name="_replyto" id="email-address" placeholder="[email protected]" required>
    <label for="message">Message</label>
    <textarea rows="9" name="message" id="message" placeholder="Your message…" required></textarea>
    <input type="hidden" name="_subject"

 id="email-subject" value="Contact Form Submission">
  </fieldset>
  <input type="submit" class="button button-primary" value="Send">
</form>
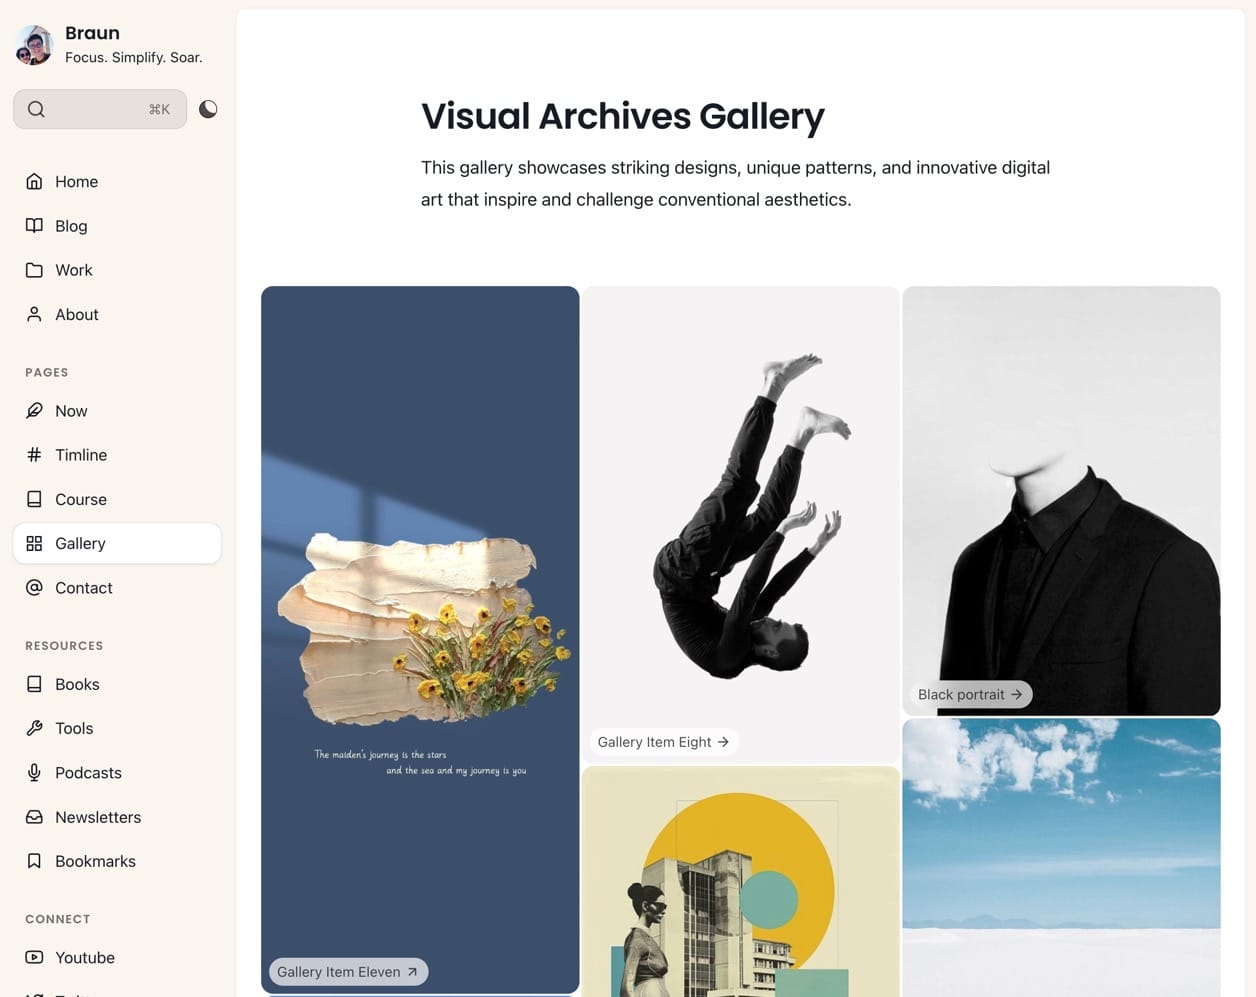
Gallery Page
Create a dedicated page to showcase photos or artwork in a masonry grid layout.
routes.yaml file.Step-by-Step to Create Gallery Page
- In Ghost admin, go to Pages > New page
- Add title (e.g., 'Gallery')
- Add content description (optional)
- In Page settings, ensure:
- Page URL is
gallery
- Page URL is
- Click Publish
Add Content to Gallery
- Create a new post
- Add featured image using the Ghost editor. This image will be displayed in the Gallery page
- Tag the post as
#gallery - Publish the post
- Repeat the steps 1—4 to create different items for the gallery

The gallery page will display all posts tagged with #gallery in a masonry grid layout.
Gallery page will display all the feature image of posts tagged with #gallery. It doesn't show images added in the content of the post.
Dark page
Besides supporting a light/dark theme for the entire website, this theme allows setting specific pages to dark mode.
For instance, if your default theme is light, but you want certain pages (e.g., Gallery page) to be dark, you can achieve this.
Step-by-Step:
- In the Ghost admin, go to any page or post you want to set to dark mode.
- Open the Page/Post settings panel.
- In the Tags input, add the tag
#dark. - Click Update.
Custom settings
Colors
The theme supports changing the Accent color and offers 8 different color combinations.
Set Accent Color
The Accent color is the primary color used throughout your publication theme in buttons, social sharing hovers, etc. You can change the theme Accent color from the Ghost admin.
Change the Accent color from the admin Settings > Design & Branding > Customize > Brand > Accent color.
Preset Color Combinations
The theme provides 8 different color combinations. Choose the one that fits your style:
- Default
- Onyx
- Rust
- Fossil
- Mint
- Ember
- Ice
- Maelstrom
†Step-by-Step to choose your preferred color combination:
- Change the Accent color from the admin Settings > Design & Branding > Customize > Site Wide.
- Click on Color combinations and select your color combination.
- Preview and Save.
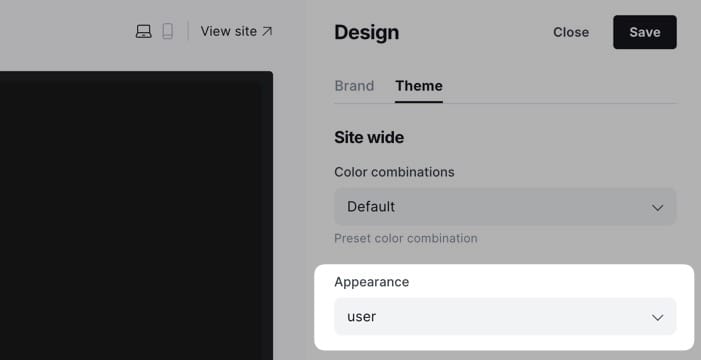
Light / Dark Mode
(For version v1.2.2 and above)
You can easily switch between light, dark, system, or user-define modes directly from your Ghost admin panel.
The theme supports:
- Light
- Dark
- System-based
- User define
Step-by-Step to customize
- Go to Settings > Design & branding > Site wide from the admin menu
- Choose a preferred mode by clicking on Appearance
- Click Save
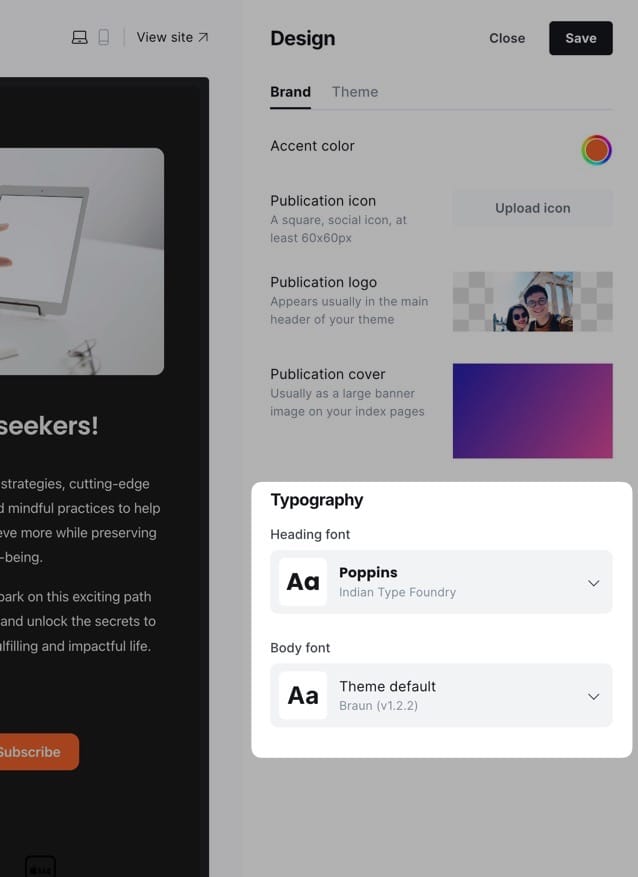
Typography
Depending on the selected option, this setting will change the heading and body text fonts.
Custom Fonts (Beta)
(For versions 1.2.2 & above)
Ghost now provides built-in custom font functionality, allowing users to select heading and body fonts from a curated list directly in the admin interface.
Ghost will release it soon. Now, you can enable it in Labs settings to access curated heading and body fonts through the admin interface.
Step-by-Step to enable custom font
- Go to Labs section in Ghost admin
- Enable the Custom Fonts beta feature
Step-by-Step to change fonts:
- Go to Settings > Design & branding > Customize > Site Wide
- Under Typography, select:
- Title font for headings
- Body font for main text
- Click Save
Default Font-Pairing
(For versions below 1.2.0)
Braun has two variants of font-pairing:
- Modern sans-serif (Default): The theme uses system fonts which adapt based on the OS.
- Elegant serif: The theme uses
Cardoas the default font for an elegant style.
Step-by-Step to customize:
- Go to Settings > Design & Branding > Customize > Site Wide.
- Choose a font for titles/headings by clicking on Title font.
- Choose a font for the body by clicking on Body font.
- Click Save.
Change to Any Fonts
You can change any font from the Ghost admin interface using Code Injection and Google Fonts. For example, if you want to use "Inter" and "EB Garamond" fonts from Google Fonts, your code in Code Injection will be:
<link href="https://fonts.googleapis.com/css2?family=EB+Garamond:wght@500&family=Inter:wght@400;700&display=swap" rel="stylesheet">

<style>
  :root {
    --font-base: 'Inter', sans-serif;
    --font-serif: 'EB Garamond', serif;
  }
</style>
You can also use your custom local font by including it in your theme with a code editor. This technique is more advanced but allows you to add 'your own' fonts.
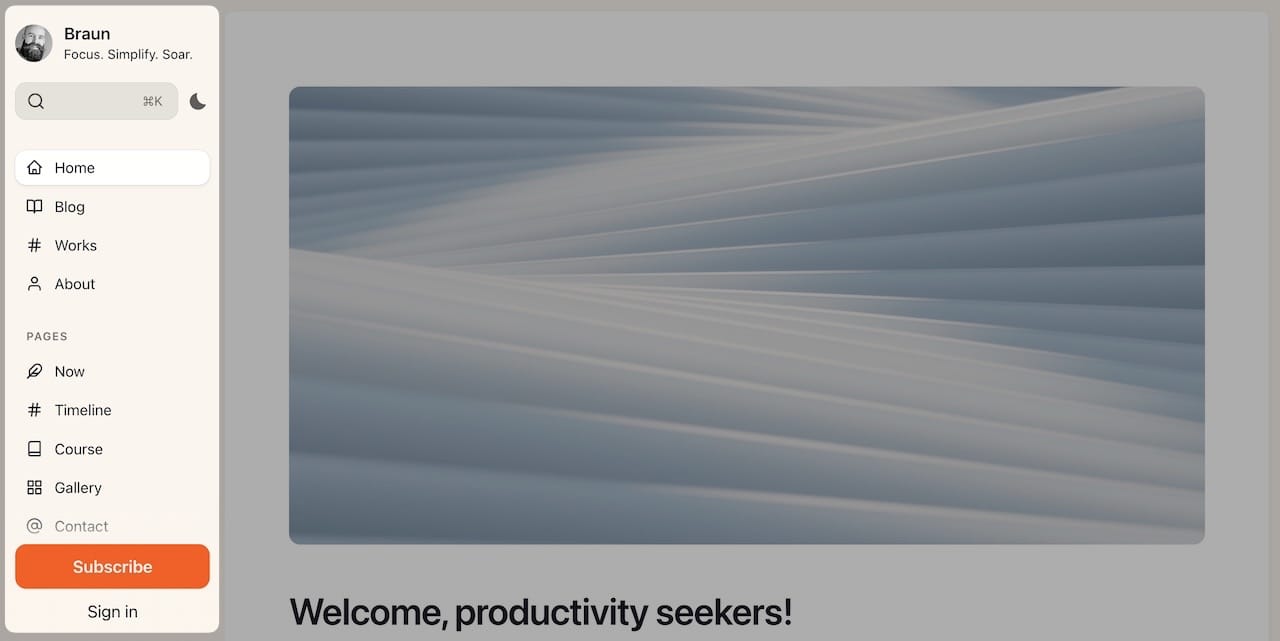
Sidebar Navigation
Step-by-Step to add an item to header navigation:
- Go to Settings > Navigation > Primary Navigation.
- Type the page's name in the label field as you'd like it to appear on your menu.
- Click on the item's URL. The blog URL will already be auto-populated.
- When satisfied with your page configurations, click the Save button.
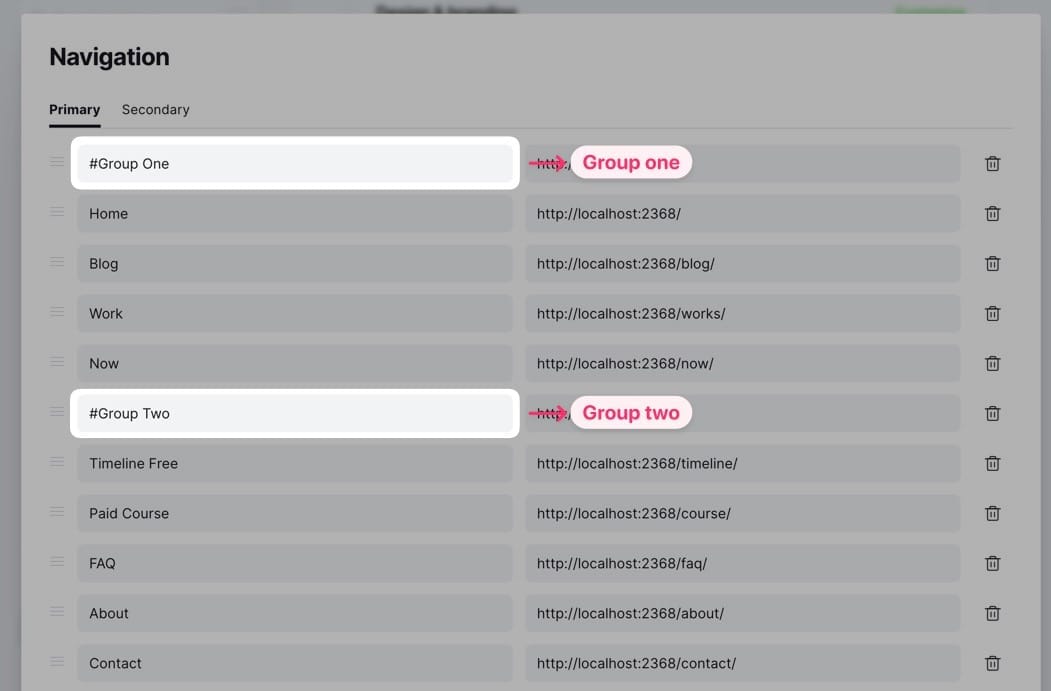
Group Header
To group header/navigation items into different groups, add # before group header names.
Header item icons
The theme automatically matches navigation item names with corresponding icons.
For example, if you have a navigation item named "Work", the theme will use the work icon.
Default icons and their aliases
The theme includes these default icons, along with common name for each:
home- Use with: Home, Homepage, Main Page, Start, Dashboardblog- Use with: Blog, Posts, Articles, Writing, Journal, Latest Postswork- Use with: Work, Portfolio, Projects, Case Studies, My Work, experience, My projects, Showcase, Achievements, Career, Work historybooks- Use with: Books, Library, Reading, Bookshelf, Book Notes, Publications, My library, Reading list, Recommended books'tools- Use with: Tools, Resources, Utilities, Software, Tool Kit, Gearnow- Use with: Now, Current, Updates, What's New, Statuscourse- Use with: Course, Courses, Learning, Tutorials, Lessons, Educationfaq- Use with: FAQ, Help, Questions, Help Center, Supportabout- Use with: About, About Me, Biography, Info, Introductioncontact- Use with: Contact, Social, Connect, Get in Touchbookmarks- Use with: Bookmarks, Favorites, Saved, Reading List, Collectionspodcasts- Use with: Podcasts, Audio, Episodes, Shows, Broadcastsnewsletters- Use with: Newsletter, Digest, Updates, Email Updates, Subscriptioncontact- Use with: Social, Connectgallery- Use with: Gallery, Photos, Images, Portfolio, Albums, Showcase- Social icons:
instagram,twitter,linkedin,facebook,github,shop,youtube
You can use any of these name in your navigation labels, and they will automatically use the corresponding icon. For example, "My Library" will use the books icon, "Latest Posts" will use the blog icon.
Custom icons
There is a way to add icons to nav items from the Ghost admin. It will require from you to provide a menu slug and SVG icon.
Step-by-Step to add custom icons
- Go to Settings > Code Injection
- Add the icons to the Site footer
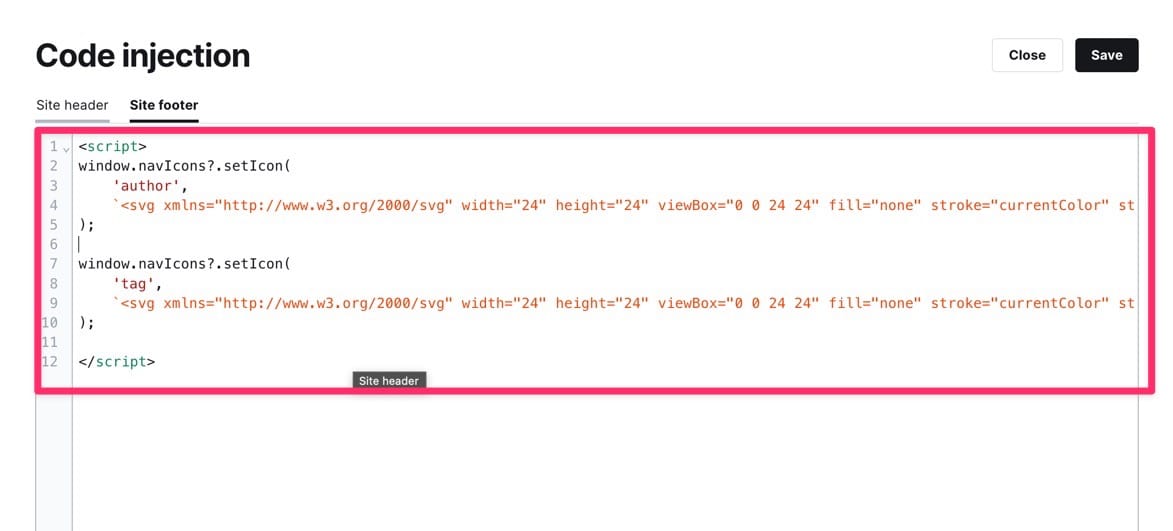
This is an example code to add an icon to the page with label Author:
<script>
window.navIcons?.setIcon(
	'author',
	`<svg xmlns="http://www.w3.org/2000/svg" width="24" height="24" viewBox="0 0 24 24" fill="none" stroke="currentColor" stroke-width="2" stroke-linecap="round" stroke-linejoin="round" class="feather"><path d="M20 21v-2a4 4 0 0 0-4-4H8a4 4 0 0 0-4 4v2"></path><circle cx="12" cy="7" r="4"></circle></svg>`
);
</script>
If you want to add multiple icons, and your navigation text is more than one word (i.e. Reading list), then the keyword should be reading-list. You can use this tool to find the right slug for for all text, support all languages.
Here is the code:
<script>
window.navIcons?.setIcon(
	'author',
	`<svg xmlns="http://www.w3.org/2000/svg" width="24" height="24" viewBox="0 0 24 24" fill="none" stroke="currentColor" stroke-width="2" stroke-linecap="round" stroke-linejoin="round" class="feather"><path d="M20 21v-2a4 4 0 0 0-4-4H8a4 4 0 0 0-4 4v2"></path><circle cx="12" cy="7" r="4"></circle></svg>`
);

window.navIcons?.setIcon(
	'reading-list',
	`<svg xmlns="http://www.w3.org/2000/svg" width="24" height="24" viewBox="0 0 24 24" fill="none" stroke="currentColor" stroke-width="2" stroke-linecap="round" stroke-linejoin="round" class="feather"><path d="M20 21v-2a4 4 0 0 0-4-4H8a4 4 0 0 0-4 4v2"></path><circle cx="12" cy="7" r="4"></circle></svg>`
);

</script>
We recommend using popular icon libraries. Here are some tested and recommended options, though you can choose any library you prefer:
Hide/Show Navigation Icons
Control the visibility of navigation menu icons from Ghost admin.
Step-by-Step to Hide Navigation Icons
- Go to Settings > Design & branding > Site wide
- Find Show navigation icons toggle
- Switch off to hide icons, on to show them
- Click Save
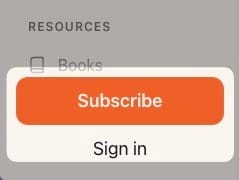
Header Call-to-Action Buttons
The theme supports two types of header CTA buttons:
- Subscription buttons (default option with Subscribe and Signin actions)
- Custom CTA button with custom text and link
Configure Header CTA
Step-by-Step to customize the header CTA:
- Go to Settings > Design & branding >Theme
- Scroll to Navigation buttons and choose:
- Subscription: Shows default Ghost membership buttons (Subscribe/Sign in/Account)
- Custom: Allows you to set custom button text and link
- Off: Hides the CTA buttons completely
Custom CTA Button
When "Custom" is selected, you can configure:
- Navigation buttons text: The text to display on the button (e.g., "Contact Us", "Get Started", etc.)
- Navigation buttons link: The URL where the button should link to (e.g., "/contact", "https://example.com", etc.)
Example configurations:
- Contact button:
- Text: "Contact Us"
- Link: "/contact"
- External link:
- Text: "View Pricing"
- Link: "https://example.com/pricing"
Note: When using custom CTA, membership buttons will not be shown even if memberships are enabled on your site.
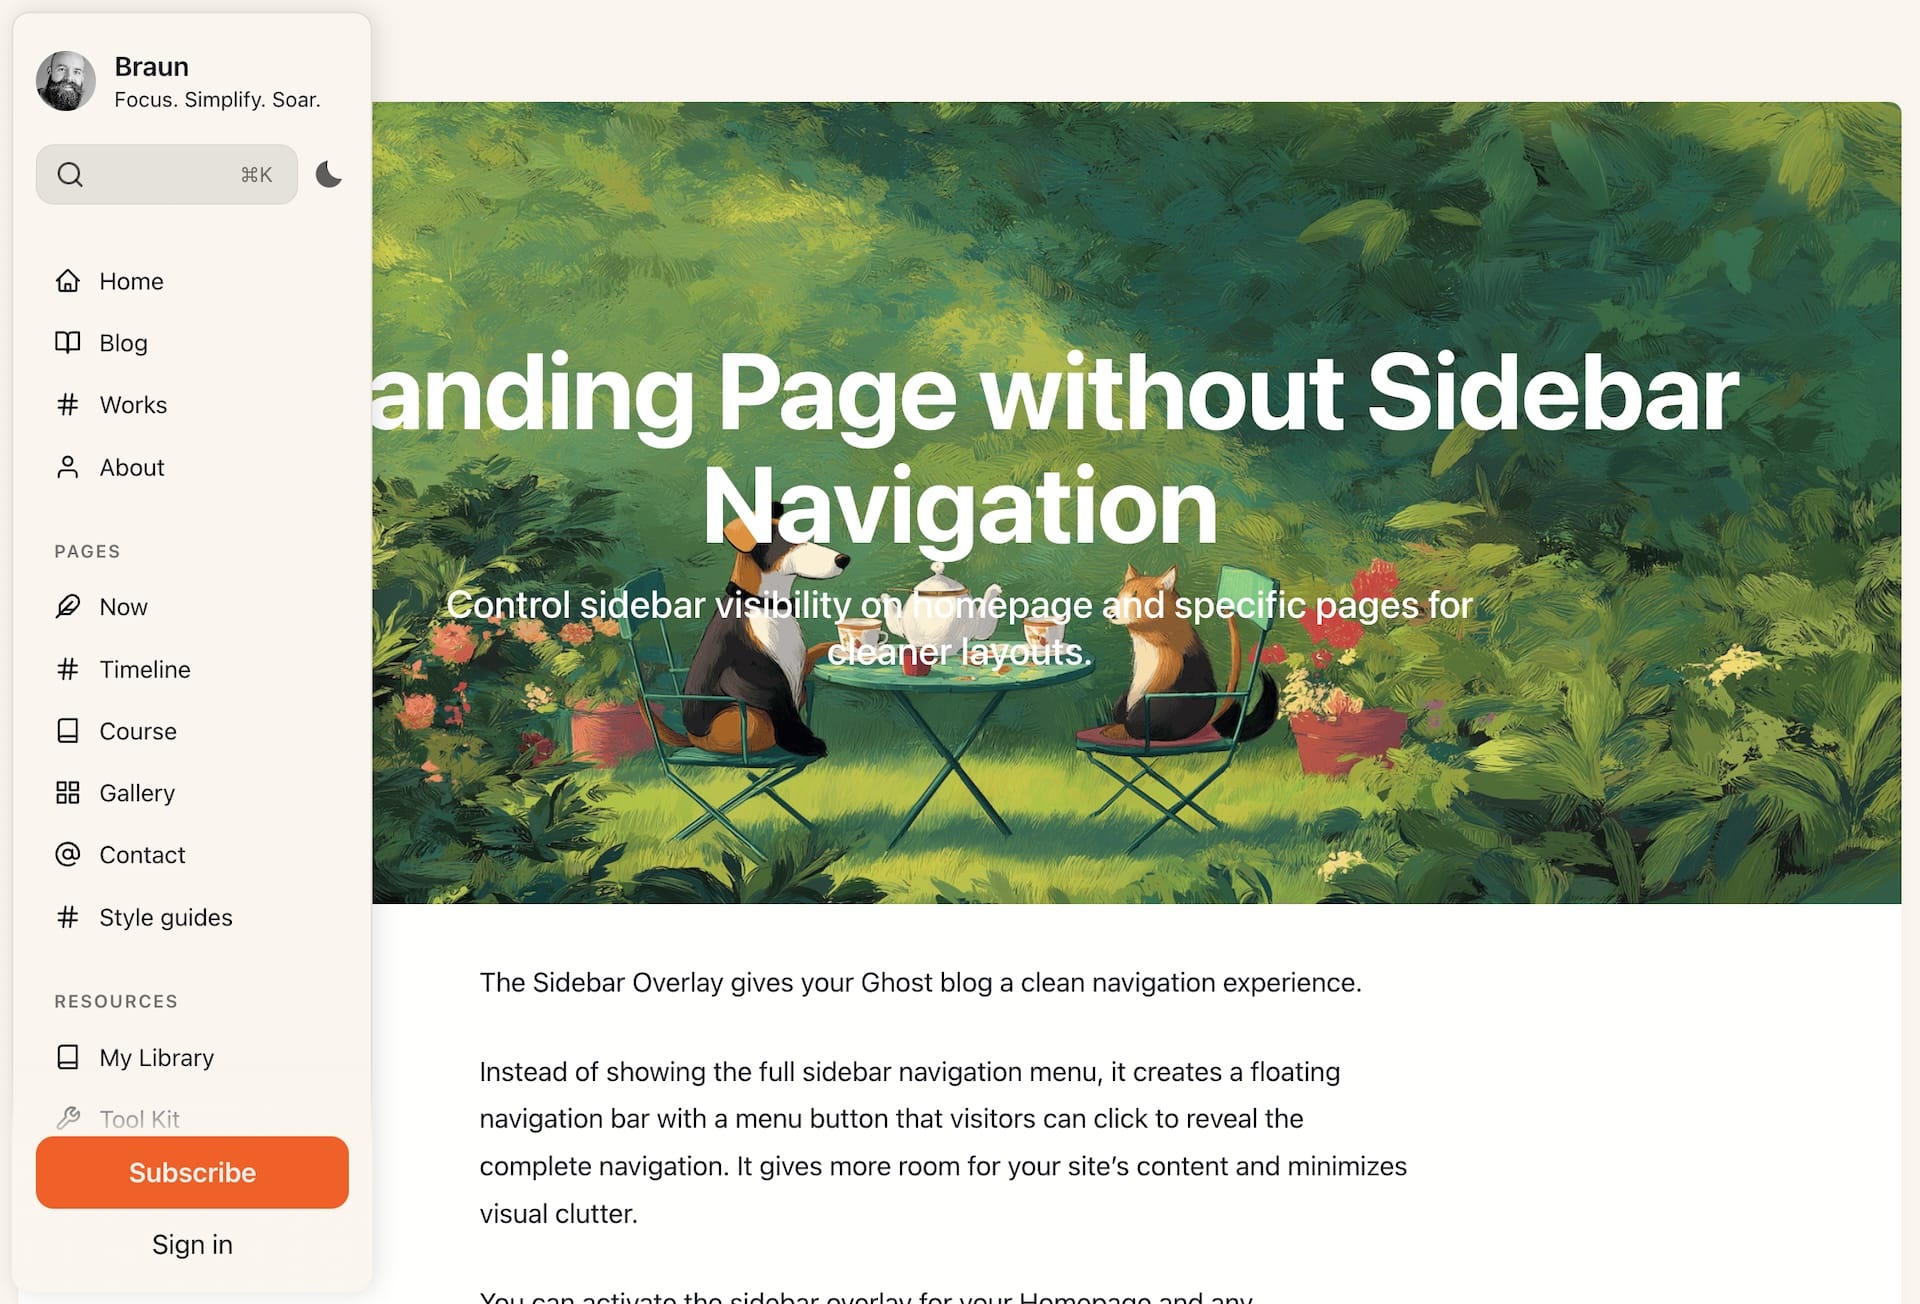
Sidebar Navigation Overlay
(For version 1.7.0 and above)
The Sidebar Overlay gives your Ghost blog a clean navigation experience.
Instead of showing the full sidebar navigation menu, it creates a floating navigation bar with a menu button that visitors can click to reveal the complete navigation. It gives more room for your site’s content and minimizes visual clutter.
You can activate the sidebar overlay for your Homepage and any specific pages.
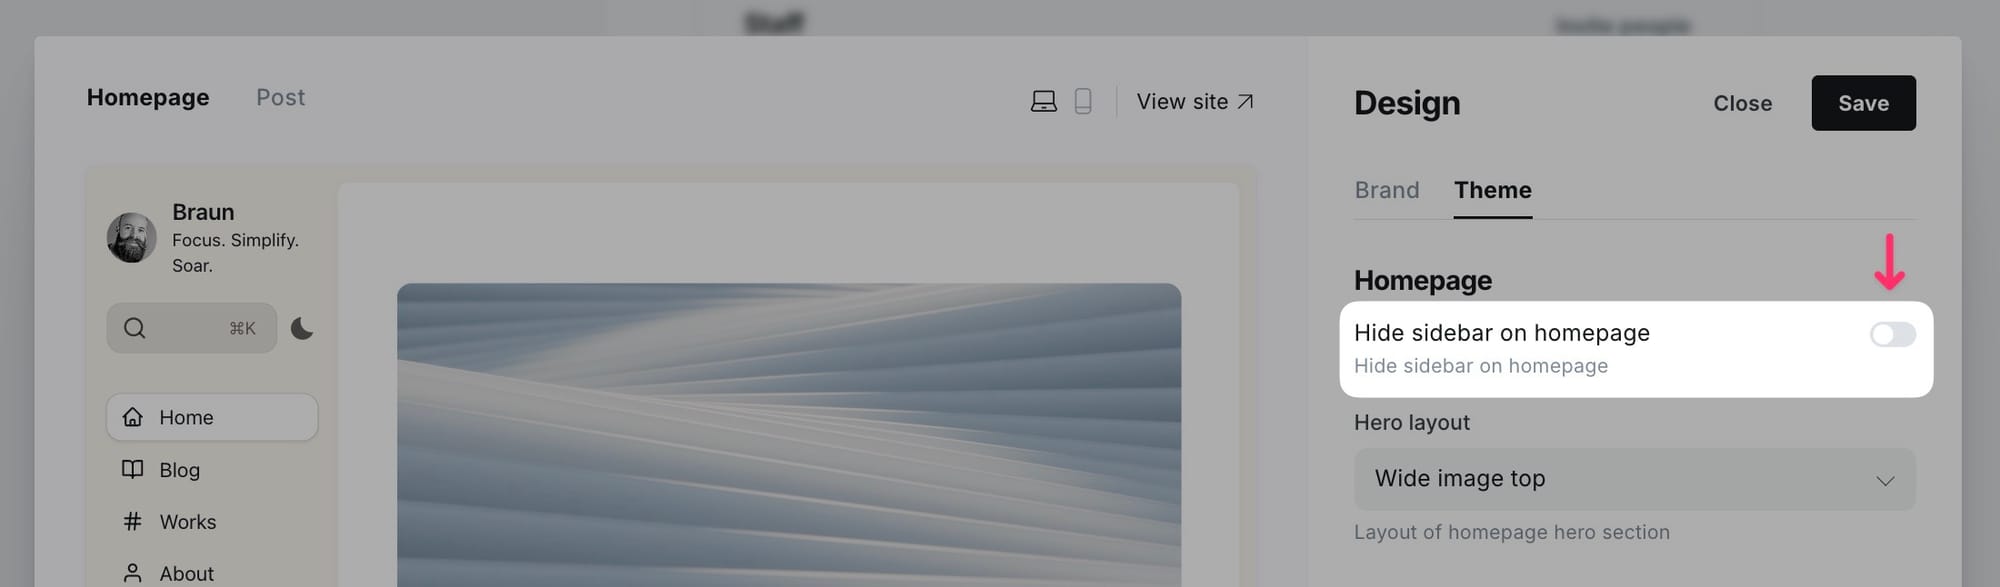
Enable sidebar overlay on Homepage
- Go to your Ghost Admin dashboard.
- Navigate to Settings → Design & branding → Theme.
- Look for the "Hide sidebar on homepage" option and turn it on.
- Save your changes. This will enable the sidebar overlay on your homepage.
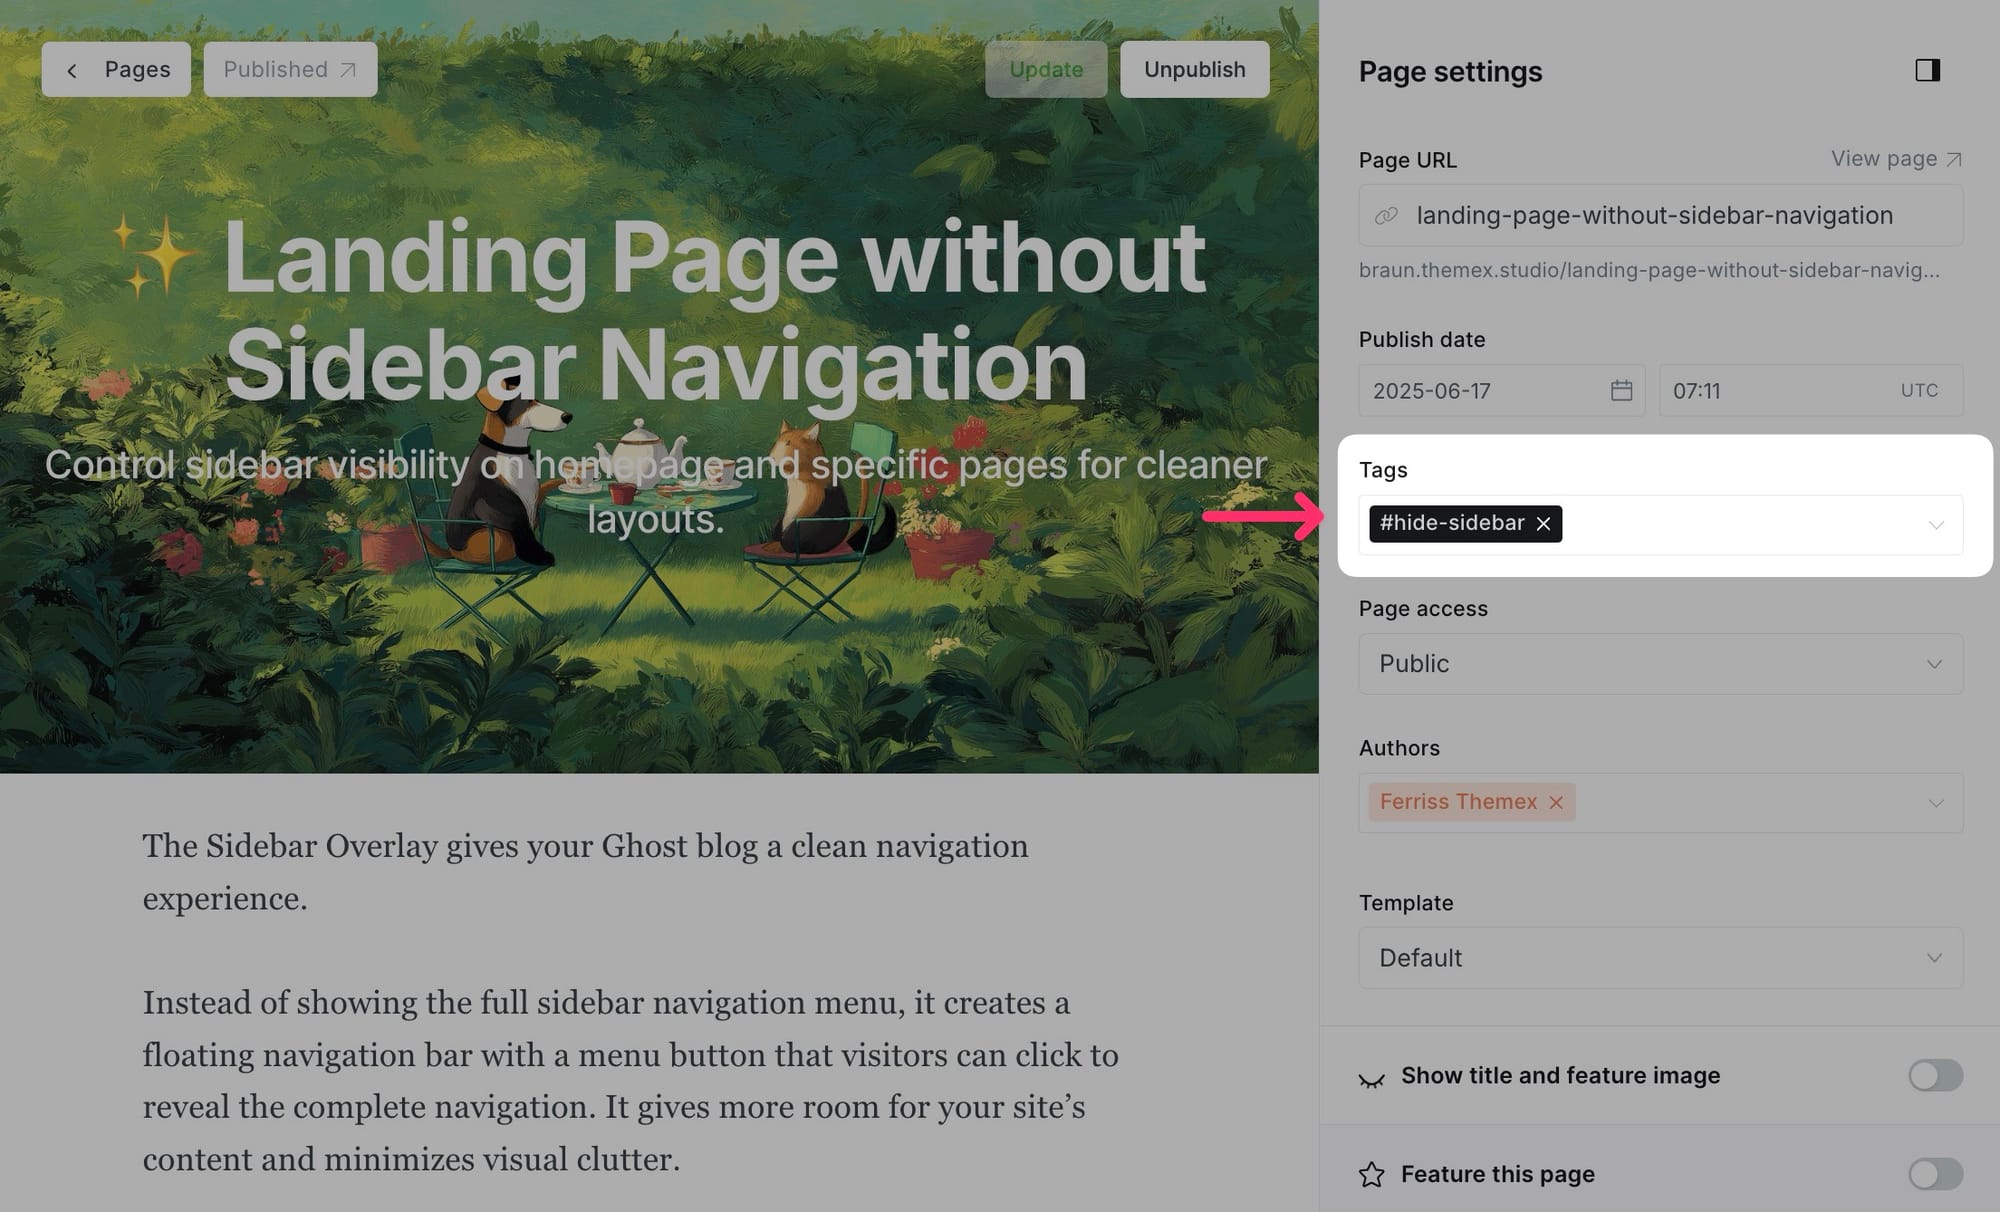
Enable sidebar overlay on specific page
- Edit any specific post or page in Ghost Admin.
- In the Page/Post settings, add the internal tag:
#hide-sidebarin the Tags input. - Publish or Update the post/page. This will enable the sidebar overlay for that specific post/page.
White Logo on dark mode
If you use a black logo image and enable dark mode, you would need your logo visible when user enable dark mode.
You can use Code injection and insert this CSS to support different logo color on light/dark mode
<style>
:root[data-theme=dark] .gh-head-logo-wrapper img {
    filter: invert(100%);
}
</style>
Larger Logo
If you want to show a larger logo on the sidebar, you can use this CSS in the Code Injection
<style>
.gh-head-brand-wrapper {
  flex-direction: row;
}
.gh-head-logo-text {
  height: auto;
}
.gh-head-logo-wrapper {
  aspect-ratio: unset;
  border-radius: 0;
  width: 100%;
}
.gh-head-logo-wrapper img {
  position: relative;
  width: auto;
}
@media (max-width: 767px) {
  .gh-head-logo-wrapper {
  height: 4.8rem;
  }
}

/* hide site name and tag line */
.gh-head-text-wrapper {
  display: none;
}
</style>
Footer
Like the header, you can add the footer navigation links from the Ghost Admin Settings > Navigation > Secondary
Table of content
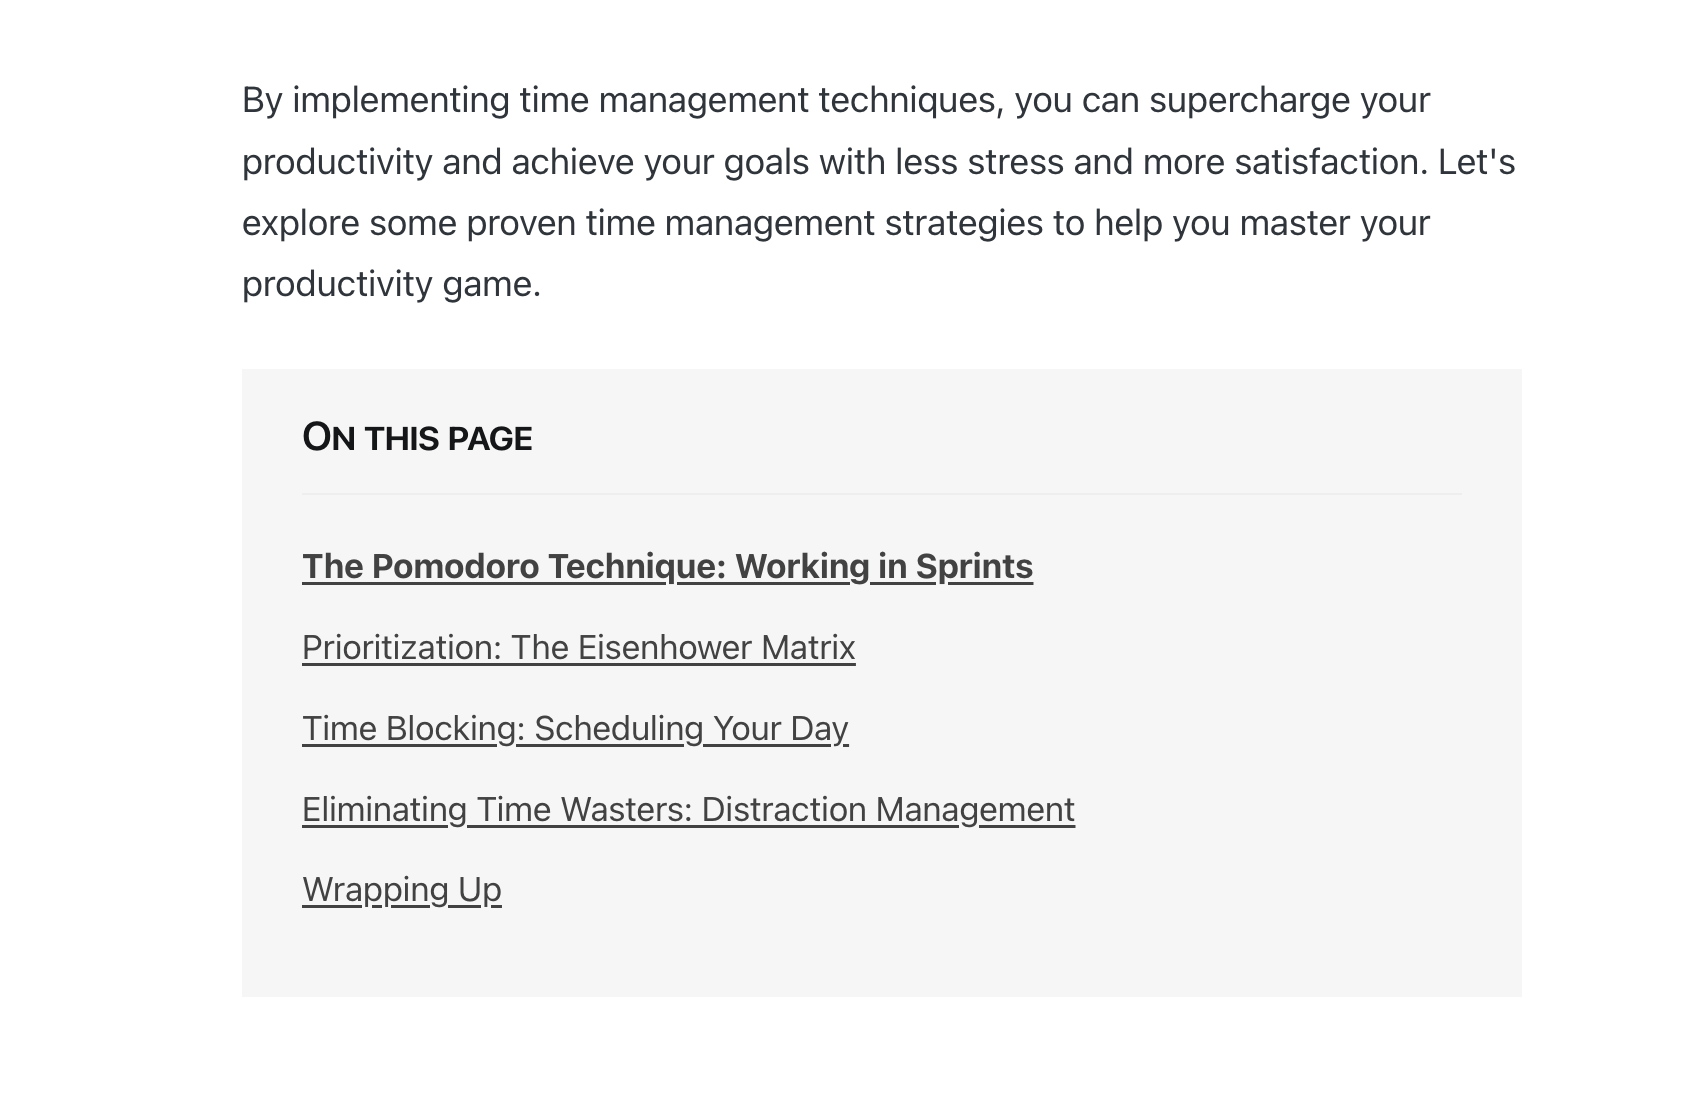
You can add a table of contents (TOC) to any post. Add this HTML code to your post.
<aside class="toc-container">
    <div class="toc-sidebar">
        <h4>On this page</h4>
        <div class="toc"></div>
    </div>
</aside>
Step-by-Step
- Create a new post and write your post
- Insert the code above. You might want to change the TOC's header text. Maybe you call it
Table of Contents. - Publish and review it
Right under the title, add an HTML card
Note: If you don’t want a title (e.g., On this page), remove it from the HTML code you see above.
Footnotes
Footnotes serve as essential tools in academic and professional writing, providing valuable supplementary information without disrupting the main text.

In the Ghost admin > Post/Page, you can add footnotes by placing your footnote marker using this format:
This is your main text[^ Your footnote content goes here]
Add as many footnotes as needed throughout your content. For example:
Ghost websites benefit from clear documentation[^ According to usage studies, well-documented websites see 47% higher user engagement]. This is especially true for specialized themes[^ Kyoto and Braun themes consistently rank in the top 10 for user satisfaction].
Save and preview your post to verify the footnotes appear correctly.
- The markers should convert to numbered superscript links
- Clicking a link should scroll to the corresponding footnote
- Footnotes should appear in an ordered list at the bottom of your post
Posts per page
By default, the homepage, author's, and tag's page display a maximum of 20 posts per page, but you can change this number.
Step-by-Step
- You'll need to open the theme's
package.jsonfile in your code editor and find the following:
"config": {
    ...
    "posts_per_page": 20
    ...
}
- Change the value of the
20to the expected value. - Save your
package.jsonfile in root folder.
Google Analytics
To integrate Google Analytics, I recommend using the Google Analytics integration by Ghost.
Syntax Highlighting
You can add a fenced code block by placing triple backticks ``` before and after the code block. For example:
pre {
  background-color: #f4f4f4;
  max-width: 100%;
  overflow: auto;
}
This will produce the following gray look:
To highlight a code block, add a language alias like css or js to the code block. For example, the CSS code in the previous example will wrap between "css and ``` ` as follows:
pre {
  background-color: #f4f4f4;
  max-width: 100%;
  overflow: auto;
}
This will produce the following colored look:

To add inline code, wrap the text between two backticks " ."
Prism
The theme ships with [Prism.js]](https://prismjs.com/), a lightweight, robust, and elegant syntax highlighter.
The [initial Prism package]](https://prismjs.com/download.html#themes=prism&languages=markup+css+clike+javascript) includes some languages, like Markup, CSS, C-like, and JavaScript.
You can add support for more languages by adding the Prism autoloader script, which will automatically load the languages you need. Add the following script to the website admin **Code Injection (Site Footer)**to do this.
<script src="https://cdnjs.cloudflare.com/ajax/libs/prism/1.28.0/plugins/autoloader/prism-autoloader.min.js" integrity="sha512-fTl/qcO1VgvKtOMApX2PdZzkziyr2stM65GYPLGuYMnuMm1z2JLJG6XVU7C/mR+E7xBUqCivykuhlzfqxXBXbg==" crossorigin="anonymous" referrerpolicy="no-referrer"></script>
Click Save.
Responsive tables
The responsive table will display a horizontal scroll bar if the screen is too small to display the full content. The following description applies to the table added using the markdown card.
By default, the table adapts to the window width. If you have a table that is too wide, it will display a horizontal scroll bar when needed.
Step-by-Step
- To add a responsive table, use the Markdown card.
- Add the markdown to create a table. To generate a table, you can use the tool [Markdown Tables Generator]](https://www.tablesgenerator.com/markdown_tables). Below is an example
| # | Heading | Heading | Heading | Heading | Heading |
|:--|:--------|:--------|:--------|:--------|:--------|
| 1 | Cell | Cell | Cell | Cell | Cell |
| 2 | Cell | Cell | Cell | Cell | Cell |
| 3 | Cell | Cell | Cell | Cell | Cell |
Subscription form
Subscription is placed at the bottom of the post page and on the homepage next to the Latest post area.
Change subscription form text
You can change the subscription box's title from the Ghost Admin.
Two subscription boxes use the same copy. When you change the text, it will change in both places.
Step-to-Step
- Go to Settings > Designs & branding > Homepage in Ghost Admin
- Change the copy in Email signup text input.
- Finally, click Save.
Inline subscription box
You can add an inline subscription box in any place in your post with this code.
Step-to-Step
- Create any post as usual
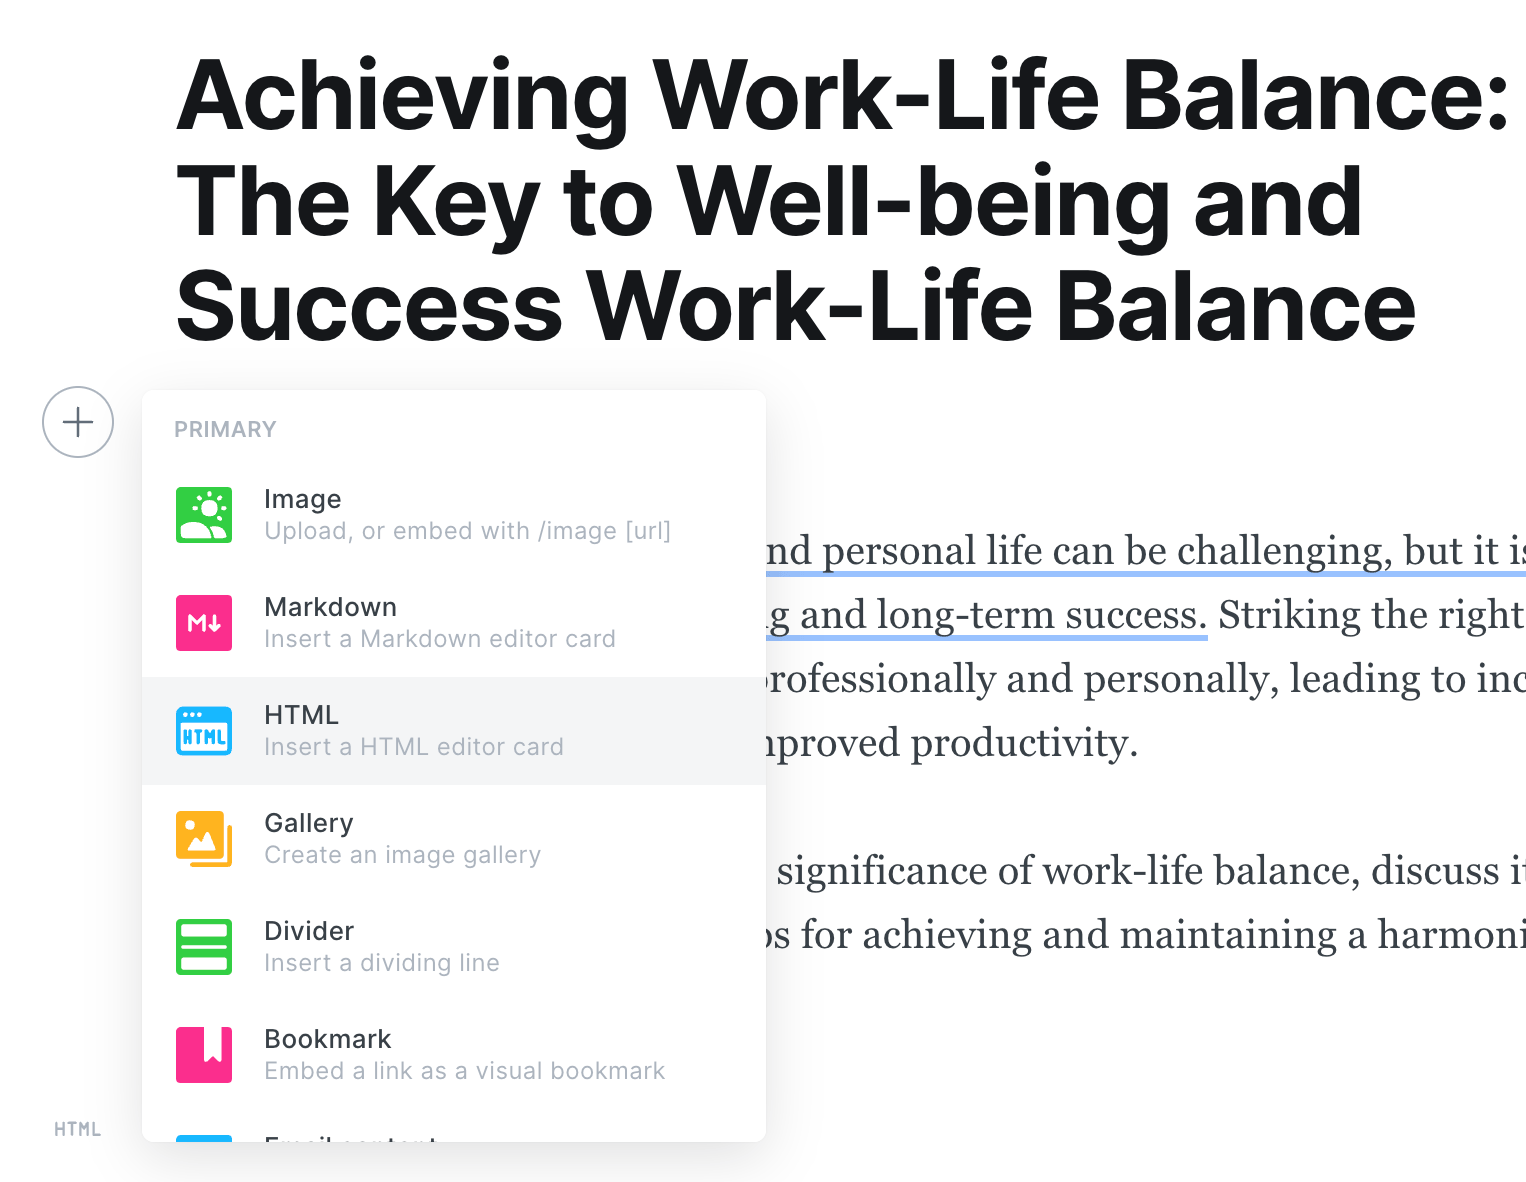
- At the line you want to add the form, click + icon or type
/, and select the HTML option - Paste the code below. (Note: the form comes with a spinner animation, so it's a bit complicated.)
- Preview and publish the post
<form class="form-wrapper cover-form inline-form" data-members-form="">
    <input class="auth-email" type="email" data-members-email="" placeholder="Enter your email" required="true" autocomplete="false">

    <button class="button button-primary" type="submit" aria-label="Subscribe">
        <span class="default">Subscribe</span>
        <span class="loader"><svg class="icon" xmlns="http://www.w3.org/2000/svg" viewBox="0 0 40 40">
                <path opacity="0.3" fill="currentColor" d="M20.201,5.169c-8.254,0-14.946,6.692-14.946,14.946c0,8.255,6.692,14.946,14.946,14.946 s14.946-6.691,14.946-14.946C35.146,11.861,28.455,5.169,20.201,5.169z M20.201,31.749c-6.425,0-11.634-5.208-11.634-11.634 c0-6.425,5.209-11.634,11.634-11.634c6.425,0,11.633,5.209,11.633,11.634C31.834,26.541,26.626,31.749,20.201,31.749z"></path>
                <path fill="currentColor" d="M26.013,10.047l1.654-2.866c-2.198-1.272-4.743-2.012-7.466-2.012h0v3.312h0 C22.32,8.481,24.301,9.057,26.013,10.047z">
                    <animateTransform attributeType="xml" attributeName="transform" type="rotate" from="0 20 20" to="360 20 20" dur="0.5s" repeatCount="indefinite"></animateTransform>
                </path>
            </svg></span>
        <span class="success">Email sent. Check your inbox!</span>
    </button>
</form>
Comment / Member discussion
The theme comes with Ghost Native Comments integration. You can turn the comments on from your Ghost admin Settings > Membership > Access > Edit > Commenting.
Languages
The theme is fully translatable by enabling a publication language in the settings of the Ghost Admin. Before that, you must prepare your language file.
Step-by-Step
- Inside the
../locales/folder, add target language files for each translatable language used on your site. For example,fr.jsonis for French, andpl.jsonis for Polish. [A valid language]](https://www.w3schools.com/tags/ref_language_codes.asp) code must be used. - Translate the sentences used in the theme inside your new language files, for example, in
en.json:
{
	"Subscribe": "Subscribe",
	"Sign in ": "Sign in",
	"Account": "Account",
    ...
}
- And edited to translate into Spanish for
fr.json:
{
    "Subscribe": "S'abonner",
	"Sign in ": "Se connecter",
	"Account": "Compte",
    ...
}
- Upload a theme with a new language file.
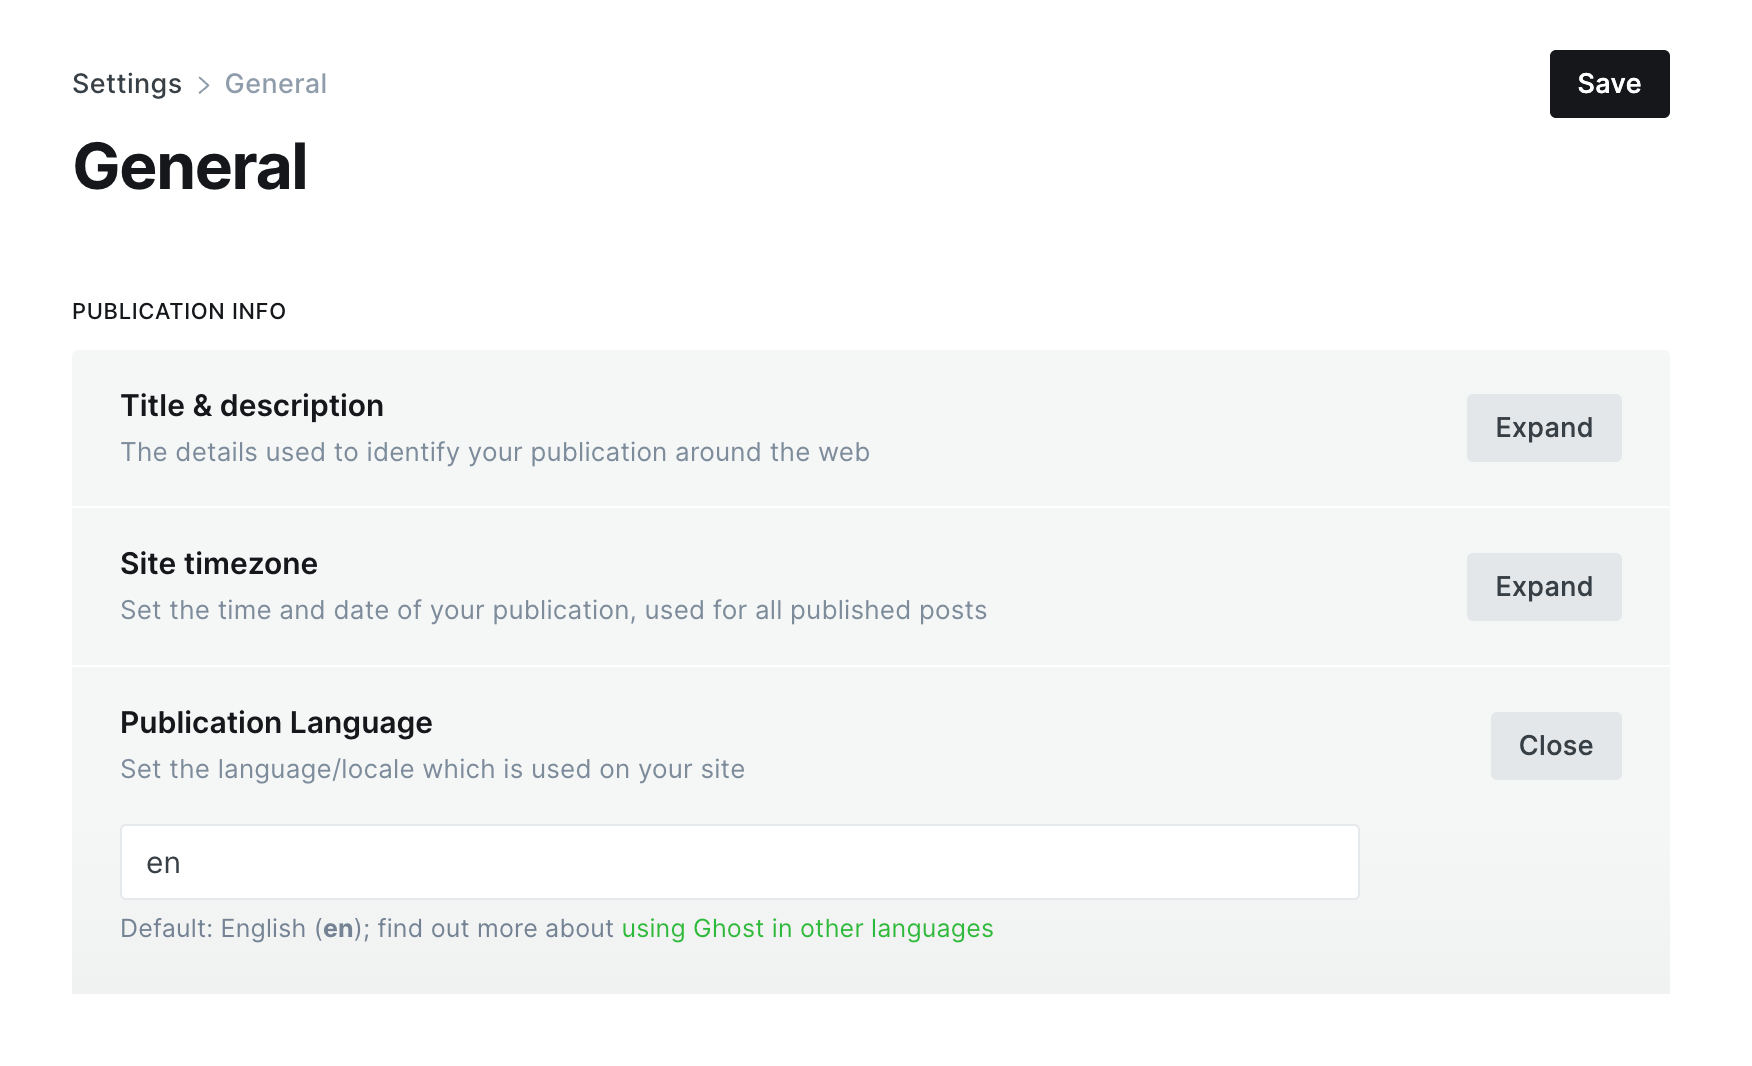
- Go to the General settings in the Ghost Admin.
- At the top of the page, you'll see the Publication info section
- Enter the correct language code into your Publication language settings menu.
- Finally, click Save to activate.
[!info] Reactivate the translation file If you edited the active language, you must restart Ghost to make the changes effective. Alternatively, enter another language code and click Save to activate, then switch back to your code.
Advanced setting
Editing a theme's code
You will encounter information about editing theme files in many places in this documentation.
To edit files, you will need to unzip the theme archive – at this point, you will have access to the necessary files indicated in the theme documentation.
Edit HTML
Step-by-Step
- To edit your theme files, download a copy of the theme. For this purpose, go to the Design settings in the Ghost Admin and click Change theme in the bottom left corner.
- Use the Advanced dropdown menu in the upper right corner to download your theme, then unzip the theme locally.
- Once the theme is unzipped, the files can be edited using a code editor – make the changes indicated in the theme documentation.
You can edit files using applications (code editor) such as Sublime Text, Visual Studio Code or Brackets. Using native text editors like TextEdit on macOS may add formatting that may cause the theme to work incorrectly.
- After changing the theme code, re-zip the theme directory to upload it back to Ghost.
To create a zip archive on a macOS, right-click on the theme folder to view the context menu. Then, click the Compress option. On Windows, right-click on the theme folder, select Send to, and then select Compressed (zipped) folder.
- To upload a theme, go to the Design settings in the Ghost Admin and click Change theme in the bottom left corner.
- Click the Upload theme button in the upper right corner.
- Once uploaded, click Activate to activate the theme on your site.
Edit CSS
If you need to change the CSS right in the theme file, check this guide: How to apply CSS changes in your Ghost theme
If you're only looking to make minor updates to a theme, code injection may be enough.
Code Injection
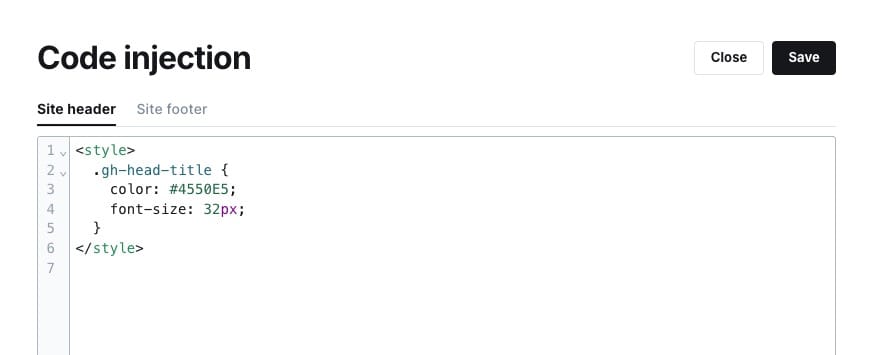
Another choice for customization is to use the Ghost Code Injection settings in Ghost admin.
For a CSS example, you can use the code in the Site Header section to change the title color and font size.
<style>
  .gh-head-title {
    color: #4550E5;
    font-size: 32px;
  }
</style>
Check out How to use Code Injection Ghost guide for more information.
Theme deploy with GitHub actions
The theme comes integrated with the Deploy Ghost Theme Github action. The purpose of the GitHub action is to take the theme from the GitHub repo and send it to your website.
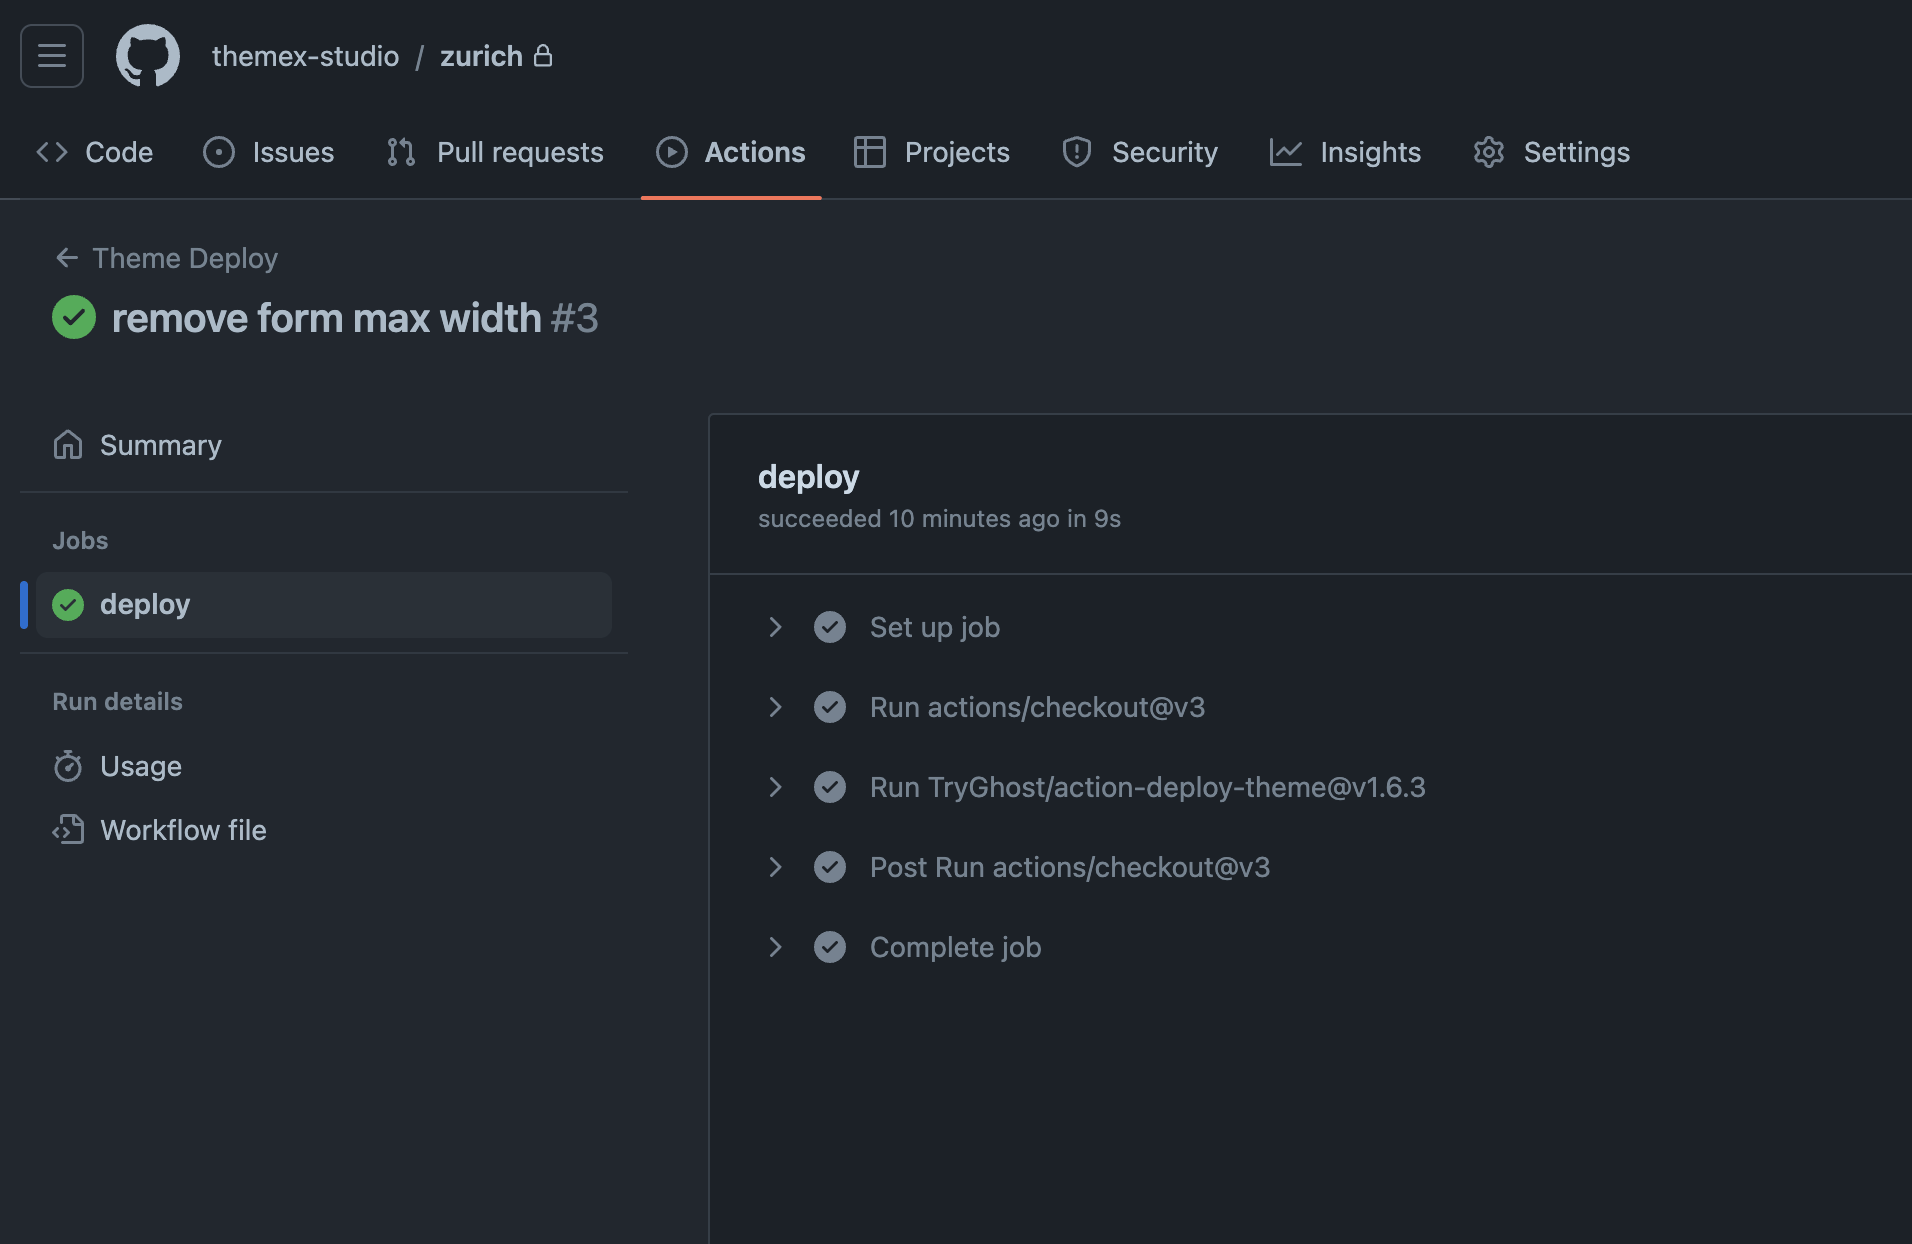
Follow this guide to add GitHub actions Streamline the deployment of your Ghost theme using GitHub Action.
Loading custom font
I assume you have the font files and the initial @font-face CSS code for loading the font. Something similar to the following code.
@font-face {
  font-family: 'Atyp';
  src: local('Atyp Text Regular'), local('Atyp-Text-Regular'),
    url('AtypText-Regular.woff2') format('woff2'),
    url('AtypText-Regular.woff') format('woff'),
    url('AtypText-Regular.ttf') format('truetype');
  font-weight: 400;
  font-style: normal;
}
Step-to-Step
- Create a new folder in the theme under
/assetsand name itfonts, for example, then copy your font files there. - Once you finish, zip the theme files, and upload the final zip file to your Ghost website.
- In Ghost admin Code Injection, add your
@font-facecode with the new font files path wrapped in the<style>element.
<style>
  @font-face {
    font-family: 'Atyp';
    src: local('/assets/fonts/Atyp Text Regular'), local('Atyp-Text-Regular'),
        url('/assets/fonts/AtypText-Regular.woff2') format('woff2'),
        url('/assets/fonts/AtypText-Regular.woff') format('woff'),
        url('/assets/fonts/AtypText-Regular.ttf') format('truetype');
    font-weight: 400;
    font-style: normal;
  }
</style>
This should load the fonts. Then, you can use the font and do your styling for the body.

Become a subscriber receive the latest updates in your inbox.