How to use custom local fonts in Ghost

Besides that, using our local font will make the site perform better than loading resources from external sites like Google Fonts.
So how do you do that?
If you are a developer, it seems straightforward. It's tough for non-developers like me. But I spent a good amount of time searching for how to do that. And I did it.
Here is step-by-step.
1/ Convert your font to web fonts
To make a font work on the web, we need the font type in .woff and .woff2
There are many online tools to convert normal font type to web font. You can can Webfont Generator from Font Squirrel or Online @font-face generator — Transfonter
Note: Those tools will convert to web fonts and provide us with a CSS file with initial codes we will reuse later.
2/ Add font files to the Ghost folder
In your Ghost theme folder, create a folder under /assets/ called fonts and move the fonts to that folder.
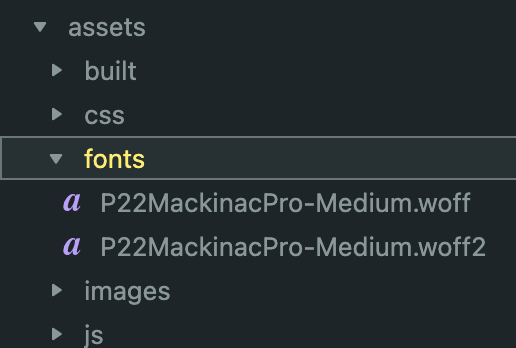
To make it safe and support all browsers, we need to use four types of font: woff, woff2, tff and truetype.
In my case, I only use two web font types, woff and woff2, because my site doesn't have to serve OG browsers (i.e., Internet Explorer). And the site will be lighter.
3/ Load the font with @font-face CSS code
To load the font into your Ghost site, add a @font-face to your CSS files. Something similar to this:
@font-face {
	font-family: P22 Mackinac Pro;
	src: url('../fonts/P22MackinacPro-Medium.woff2') format('woff2'), url('../fonts/P22MackinacPro-Medium.woff') format('woff');
	font-weight: 500;
	font-style: normal;
	font-display: swap;
}
This should load the font. Then, you can use it to style your site.
h1 {
	font-family: 'P22 Mackinac Pro';
	...
}
That is all you need to do.
Become a subscriber receive the latest updates in your inbox.